Table of Contents
Advertisement
Quick Links
Advertisement
Table of Contents

Related Manuals for ARBOS MEK-X250

Summary of Contents for ARBOS MEK-X250
- Page 1 MAINTENANCE MANUAL MEK-X Code 58310241 Rev.00 58310241 Translation of the original instructions LOVOL ARBOS GROUP S.p.A. a.s.u. Via Canale 3 - 41012 Migliarina di Carpi - Modena - Italy T +39 0522 640111 - F +39 0522 699002 info@lovoleurope.com - lovolarbos.com...
-
Page 3: Table Of Contents
Use and Maintenance Manual Indice INTRODUCTION 1.1. GENERAL INFORMATION 1.2. COPYRIGHT 1.3. INFORMATION ABOUT THE MANUAL 1.4. MANUAL UPDATING WARRANTY 2.1. CONDITIONS OF WARRANTY 2.2. WARRANTY INVALIDATION MACHINE PARTS 3.1. IDENTIFICATION DATA PLATE AND CE MARKING 3.2. INFORMATION ABOUT THE MACHINE 3.3. - Page 4 Use and Maintenance Manual...
-
Page 5: Introduction
Use and Maintenance Manual INTRODUCTION 1.3. INFORMATION ABOUT THE MANUAL This manual is to be considered an integral part of the ma- 1.1. GENERAL INFORMATION chine and must accompany it if it is resold and until it is de- This manual describes how the machine works and provides stroyed. -
Page 6: Warranty
Use and Maintenance Manual WARRANTY 2.2. WARRANTY INVALIDATION Besides the indications provided in the supply contract, the 2.1. CONDITIONS OF WARRANTY warranty is invalidated in the following cases: • On delivery, check that the equipment has not been damaged during transportation and that all accessories •... -
Page 7: Machine Parts
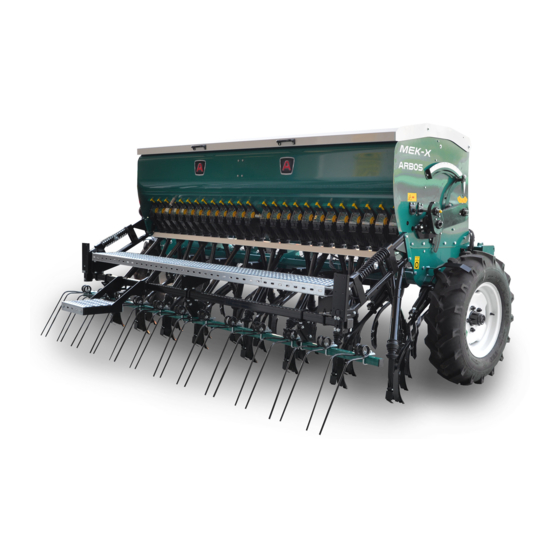
Use and Maintenance Manual MACHINE PARTS 1. Three-point hitch 7. Transport table light kit 2. Transmission wheel 8. Tank loading system with footboard 3. Seed tank 9. Seed collecting trays 4. Seed level sensor in hopper 10. Fertiliser gearbox 5. Towbar 11. -
Page 8: Identification Data Plate And Ce Marking
Use and Maintenance Manual 3.1. IDENTIFICATION DATA PLATE 3.2. INFORMATION ABOUT THE MACHINE AND CE MARKING The machine has been designed and constructed exclusively for sowing on soil. Each machine is equipped with an identification plate (Fig. 2) providing the following data: It can be coupled with any tractor equipped with a tow hook, compliant with standards, and with a minimum power as specified in the technical specifications table. - Page 9 Use and Maintenance Manual Make sure that the terrain is free of the following: • stones or masses of a diameter exceeding 8-10 cm. • tree stumps protruding more than 10 cm. • metal elements of any kind (mesh, cables, ropes, chains, pipes, etc.).
-
Page 10: Technical Specifications
Use and Maintenance Manual 3.3. TECHNICAL SPECIFICATIONS The data related to the various MEK-Xseeder models is reported below. TRANS- Weight (kg) Power Seed PORT Wheel pres- MODEL SPACING required capacity WHEELS Double WIDTH sure (PSI) Coulters Disc ROWS (mm) (CV) (litres) disc (cm) -
Page 11: Storage
Use and Maintenance Manual 3.4. STORAGE 3.6. SCRAPPING If the machine is not used for long periods, it must be stored In case of scrapping, the machine must be disposed of in spe- in a place not exposed to atmospheric agents and protected cific waste disposal sites, in compliance with the legislation in in order to avoid damage. -
Page 12: Safety And Accident-Prevention Rules
Use and Maintenance Manual SAFETY AND maintenance operation, activate the stationing parking brake, turn the engine off, remove the ignition key from ACCIDENT-PREVENTION RULES the dashboard and take care of it. • Personnel must use the safety provisions and individual Correct use of the appliance, careful attention to the rules protection devices when using or carrying out mainte- listed below, and strict application of all precautions to pre-... - Page 13 Use and Maintenance Manual • Attach the machine, as provided for, to a tractor that has a suitable power and configuration by means of the ap- propriate device (lifter) and is in compliance with regu- lations. • Pay the maximum attention during the equipment cou- pling and uncoupling phases.
-
Page 14: Safety Signs
Use and Maintenance Manual 4.1. SAFETY SIGNS Check that the emergency pictograms are in good condition. If the pictograms become damaged, they must be replaced with new originals requested from the manufacturer and placed in the position indicated in the use and maintenance manual. Make sure that the emergency pictograms are readable. - Page 15 Use and Maintenance Manual CAUTION - RISK OF TOXIC SUBSTANCES. LIFTING POINT 58280011 TYRE PRESSURE CORRECT MACHINE ANGLE Page 15...
-
Page 16: Movement And Transport
Use and Maintenance Manual 4.3. DRIVING ON A PUBLIC ROAD 4.2. MOVEMENT AND TRANSPORT If the machine needs to be transported over a long distance, If it is necessary to drive on a pub- lic road, it is mandatory to strictly it can be loaded onto a truck or other form of transport. -
Page 17: Before Use
Use and Maintenance Manual BEFORE USE • If fully-loaded or semi-loaded equipment blocks the vis- ibility of the signalling devices and illumination of the tractor, these devices must be adjusted on the equip- Verify that during the work, all the ment, in compliance with the relevant highway code. -
Page 18: Preparing The Machine
Use and Maintenance Manual PREPARING THE MACHINE 6.1. CONNECTING THE MACHINE TO THE TRACTOR Before using the machine, familia- Make sure that only a tractor with a suitable configuration for rise yourself with the controls and towing the machine is used. operating abilities. -
Page 19: Hydraulic Connections
Use and Maintenance Manual • YELLOW: fan delivery, to be connected to a priority dis- tributor with flow control, suitable for hydraulic motor actuation (continuous flow approx. 22 litres) and heat exchanger. • FLAT-FACE FEMALE CONNECTION: fan return and oth- er circuits, with max. -
Page 20: Refilling The Tank
Use and Maintenance Manual 6.7. SEED TANK DRAIN Checks while sowing Once all the previously mentioned operations have been To empty the seeds from the hopper; follow the instructions carried out, the seeder is ready to work. However we recom- below: mend you run a few meters in both directions to make sure that you are sowing as required. -
Page 21: Low Level Sensor
Use and Maintenance Manual ADJUSTMENTS 6.8. LOW LEVEL SENSOR The seeder is equipped with a device which controls the seed To obtain correct seed density per hectare (Kg/Ha), the distri- level inside the hopper. bution organs must be properly adjusted (gearbox, feelers, graduated slide gates). -
Page 22: Seed Dispenser Roller Adjustment
Use and Maintenance Manual 7.2. SEED DISPENSER ROLLER ADJUSTMENT 7.3. SEED SPEED GEARBOX Depending on the type of seed, set the graduated slide gates The variator adjusts the speed of rotation of the distribution (W and N) according to the indications provided in the table rollers and thereby the amount of seed distributed, acting on (see page 23). -
Page 23: Adjusting The Amount Of Seeds To Be Distributed
Use and Maintenance Manual 7.4. ADJUSTING THE AMOUNT OF SEEDS TO Sowing table key: BE DISTRIBUTED 1) Seeder adjustment table. 7.4.1. READING ADJUSTMENT TABLE 2) Distribution table by type of seed. Depending on the features of the seeder, a specific seed dis- tribution adjustment table is provided. - Page 24 Use and Maintenance Manual Numero le Frumento - Wheat - Ble - Weizen - Trigo - Number rows Inter la - Spacing - Ecartement - Abstand - Nombre rangs GEAR BOX Reihenzahl Distancias Hileras - (mm) Numero hileras POSITION MEK-X 250 MEK-X 300 MEK-X 350 MEK-X 400...
-
Page 25: Transmission Parts Adjustment Table
Use and Maintenance Manual 7.4.2. TRANSMISSION PARTS ADJUSTMENT TABLE Example of how to read the graph • Type of seed “OAT”. To obtain correct seed coverage, the following distribution • Spacing between rows 120 mm. parts must be adjusted: To distribute 120 Kg/Ha. •... -
Page 26: Adjustment Graphs
Use and Maintenance Manual 7.4.3. ADJUSTMENT GRAPHS Orzo - Barley - Orge - Gerste - Cebada - Frumento - Wheat - Ble - Weizen - Trigo - Inter la - Spacing - Ecartement - Abstand - Inter la - Spacing - Ecartement - Abstand - GEAR BOX GEAR BOX Distancias Hileras -... - Page 27 Use and Maintenance Manual Soia - Soya - Soya - Soiabhone - Soya - Piselli - Peas - Pois - Erbeen - Arveja - Inter la - Spacing - Ecartement - Abstand - Inter la - Spacing - Ecartement - Abstand - GEAR BOX GEAR BOX Distancias Hileras -...
- Page 28 Use and Maintenance Manual Colza - Colza - Colza - Raps - Colza - Trifoglio - Red Clover - Tre e - Rotklee - Trebol - Inter la - Spacing - Ecartement - Abstand - Inter la - Spacing - Ecartement - Abstand - GEAR BOX GEAR BOX Distancias Hileras -...
-
Page 29: Gear Speed Table For Sowing Test
Use and Maintenance Manual 7.4.4. GEAR SPEED TABLE FOR Release the seed collecting trays 17 from the cover and • position them below the seed outlets. SOWING TEST The table below shows the number of revolutions that the seeder gear must make to carry out a sowing test with the machine stationary. -
Page 30: Sowing Exclusion From Half The Machine
Use and Maintenance Manual 7.6. SOWING EXCLUSION FROM HALF THE MACHINE In order to perform finishing jobs, the machine is equipped with a system for excluding distributors on the right part of the ma- chine from sowing. To exclude he right part of the machine, disconnect the pin and position it as shown in fig. 20. Fig. -
Page 31: Sowing Depth Adjustment
Use and Maintenance Manual 7.7. SOWING DEPTH ADJUSTMENT In the case of a carrying machine, raise the seeder from the ground, remove the "r" pin 23 and the rotation block bracket Sowing depth can be adjusted depending on the conditions of the soil and one own habits. -
Page 32: Seed Covering Harrow Adjustment
Use and Maintenance Manual 7.8. SEED COVERING HARROW ADJUSTMENT 7.9. ADJUSTING THE ROW MARKER It is possible to adjust the pressure and inclination with which The row marker allows you to mark a line on the ground par- the teeth of the harrow cut the sown soil. allel to the trajectory of the tractor. -
Page 33: Configuring The Row Marker
Use and Maintenance Manual 7.9.2. ROW MARKER PREPARATION • Park the tractor on level ground, engage the handbrake, ensure the seeder is raised above the ground and then turn off the engine. • Connect the hydraulic pipes to the tractor’s hydraulic system, making sure the tractor’s hydraulic system is not pressurized. -
Page 34: Setting The Row Marker Disc
Use and Maintenance Manual 7.9.4. SETTING THE ROW MARKER DISC In the presence of more or less rugged lands, adjust the row marker disc as follows: • Remove the screw 31. • Position the disc as required. Insert the screw 31to block the disc. •... -
Page 35: Maintenance
Use and Maintenance Manual MAINTENANCE • Avoid long and repeated skin contact with fuels/lubri- cants/fluids, since these could generate inflammation or other skin pathologies; In case of damage, the operator must stop the machine, take out • Do not ingest fuels/lubricants/fluids. In case of acciden- the ignition key, come down from tal contact with the eyes, carefully wash the area with the tractor and determine the en-... -
Page 36: Maintenance Interventions Which May Be Carried Out By The Operator
Use and Maintenance Manual 8.1. MAINTENANCE INTERVENTIONS WHICH NEW MACHINE • Check the tightening of all the screws and nuts, and that MAY BE CARRIED OUT BY all the transmissions are free to operate. THE OPERATOR The interventions described in the following paragraphs AT THE BEGINNING OF THE SEEDING SEASON do not require a technical specialisation. -
Page 37: Spare Parts
Use and Maintenance Manual 8.3. SPARE PARTS Repair work and part replacement should be carried out us- ing original spare parts requested from an authorised dealer. It is important to remember that any request for spare parts should be accompanied by the following information: •... - Page 38 Use and Maintenance Manual Page 38...
- Page 39 EC Declaration of Conformity The company ARBOS S.p.A. with its legal office at Via Canale 3 Town Migiarina di Carpi Province Modena Tel. and fax +39 0522 640111 - +39 0522 699002 declares under its sole responsibility that the machine:...
- Page 40 This statement must be shown on request of the competent authorities. To avoid that it becomes damaged or illegible it is recommended to cut down the hatch and place it in a protected place.
- Page 41 Use and Maintenance Manual Page 39...
- Page 42 LOVOL ARBOS GROUP S.p.A. a.s.u. Via Canale 3 - 41012 Migliarina di Carpi - Modena - Italy T +39 0522 640111 - F +39 0522 699002 info@lovoleurope.com - lovolarbos.com Page 40...
Need help?
Do you have a question about the MEK-X250 and is the answer not in the manual?
Questions and answers