Table of Contents
Advertisement
Quick Links
Advertisement
Table of Contents

Summary of Contents for luxvision LRK 5200
-
Page 2: Table Of Contents
L i s t 1. Cautions 1-1. Usage condition 1-2. Storage and warranty (without package) 1-3. Packing conditions for delivery 1-4. Avoid storage and place 1-5. Safety 1-6. Safety cautions 2. Parts names 2-1. Body Parts 2-2. Accessories 3. Conveyance and Handling Procedure 4. -
Page 3: Cautions
1. Cautions This manual contains information on correct handling and operational procedures as well as safety consideration pertinent to LRK-5200. Before carrying out measurement and/or adjustment, read the instructions throughly so that effective operation is ensured. As this constitutes an important reference and user guide, keep it on hand at all times. 1-1. -
Page 4: Safety
Warning Temperature : 10 ~ 40℃ ● Humidity : 30 ~ 75% ● 1-5. Safety To ensure the safe and proper use of the device, and to prevent any injuries, warning signs are marked on the device and the manual. Before reading the details on the ‘Safety cautions’ be aware of the following symbols and their meanings. -
Page 5: Parts Names
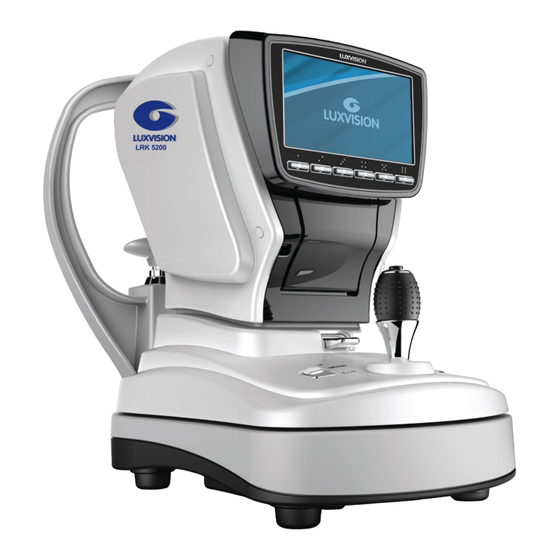
2. Parts names 2-1. Body Parts ① LCD Screen ⑦ Print Button ② Function Button ⑧ Chin-rest ③ Printer ⑨ Chin-rest Pin ④ Measurement Button ⑩ Soft Lock Lever ⑤ Joystick ⑪ Base ⑥ Chin-Rest Up/Down Button... - Page 6 ① Surround IR-LED ④ Base ② Chin-rest ⑤ ForeHead-rest ③ Body ⑥ View Window ① Fuse Holder ③ VGA External Interface (Video) ② Power Innet ④ RS-232 External Interface...
-
Page 7: Accessories
2-2. Accessories Model Eye Power Code (2.5m) Printer Paper (Width 57mm) 3EA Fuse (2A 250V) Chin-Rest Paper Chin-Rest Pin 500EA Operation Manual Dust Cover 1EA Use accessories specified by manufacturer to avoid any malfunction or failure. Warning Extra care should be taken for the storage of a model eye avoid where the lens of the model eye ●... -
Page 8: Conveyance And Handling Procedure
3. Conveyance and Handling Procedure When transporting the instrument, make sure that the body has been securely locked. The lock knob shold be turned clockwise until body and base are firmly fixed to each other. 4. Installation Environment (1) Do not expose the instrument's view window directly to the sunlight or bright lighting from other sources. -
Page 9: Safeguard Summary
5. Safeguard Summary (1) LRK-5200 is a precision optical instrument. Always handle with care and avoid dropping it accidentally. (2) Ensure that the instrument is properly grounded when connected to the power source. (3) Do not touch the optical parts with fingers and be sure to avoid dust, as their measuring accuracy could be adverely affected and incorrect values may result. -
Page 10: Preparation
6. Preparation 6-1. Printing paper and Chin-rest paper (1) Set a roll of printer paper in the printer. Refer to ‘10-1. Reloading Printer Paper’ for the procedure. (2) Set and fix the chin-rest papers with the chin-rest pins on the chin-rest. Warning For sanitary consideration, disposing the sheet of the used chin-rest paper after every ●... -
Page 11: Applying Power
6-2. Applying Power (1) Check that the button is 'OFF' (O) (2) Put the power cord into the instrument's power innet placed on bottom of base then insert the plug into a general porpose outlet. Caution Always make sure that the cable is grounded. ●... -
Page 12: Standby
6-3. Standby When the power is turned on, the screen as shown below appears on the LCD screen, which is ready for taking measurements. Item Description P.D (Pupil Distance) Indication of Corneal Vertex Distance Options are 0, 10, 12, 13.5, 15mm Unit of Refractive measurement Mark of Astigmatic value Indicates the eye to be measured. - Page 13 Operation of Joystick Forward : moves the measuring unit toward the patient. ● Backward : moves the measuring unit toward the user. ● Right/Left : moves the measuring unit to the right or left respectively. ● Moves the measuring unit up when turned clockwise and down when turned un-clockwise. ●...
-
Page 14: Measurement
7. Measurement 7-1. Aligment (1) Have the patient place his or her chin on the chin-rest and his or her forehead against the headrest. Then have him or her see the internal target. Warning Uncomfortable posture may cause fatigue to the patient during measurement. ●... - Page 15 (3) Operating joystick, move measuring unit to show patient's eye on the screen. If 12 mire dots are appeared, adjust to make central white point into red small circle. (4) Control the joystick to make central white point cearly.
- Page 16 (5) When alignment is completed, press the measurement button. Warning It is essential to achieve correct alignment for more precise measurement. ● It is strongly recommended to practice and be accustomed to alignment and focusing before measurement. LRK-5200 is equipped with 'Auto Measurement Function'.
-
Page 17: Refractive Measurement
7-2. Refractive measurement (1) Press the button then select measurement mode. (2) When the measurement is finished, the result will be appeared on the screen. Right/Left Eye Refractive measurement Number Measurement number Spherical Value Astigmatic Value Axis angle of Astigmatism Pupil distance Vertex distance STEP... - Page 18 (3) Print out sample of Refractive Measurement. Date / Time / Patient's name Vertex distance Sign of Astigmatic Spherical Value Astigmatic value Axis of Astigmatic value Average of Value Pupil distance User message print function button is for display the data on the monitor screen.
-
Page 19: Keratometry Measurement
7-3. Keratometry measurement (1) When the keratometry measurement is finished, the result will be appearde on the screen. R1 Value R2 Value Axis of Corneal astigmatism INDEX Corneal Refractive index ※ PD result is indicated after both right and left eyes are measured... - Page 20 (2) Print out sample of Keratometry Measurement. Date / Time / Patient's name Index Refrative Index R1 Value R2 Value Corneal Refractive Power Axis of Corneal Astigmatism Average of Value Corneal Astigmatic Value Pupil Distance User message print function button is for display the data on the monitor screen. (4) If "D"(dioptor) is selected in "m/D"...
-
Page 21: Contact Lens Basecurve Measurement
7-4. Contact lens Basecurve measurement (1) Put a small amount of water on the concave face of the contact lens holder as below. (2) Place the contact lens so that its convex side faces the holder. (3) Check the contact lens is firmly adhered to the holder then set mode to measure. - Page 22 (4) Sample of Contact lens Base curve measurement. R1 Basecurve R2 Basecurve Astigmatism of Contact Lens Refactive Power of Contact Lens Axis of R1&R2 curve...
-
Page 23: Kerato-Peripheral Measurement
(5) Print out sample of Contact lens Basecurve measurement. Date / Time / Patient's name R1 Value R2 Value Refractive Power of Basecurve Axis of each Basecurve Average of each result Astigmatic Value of Basecurve User message print function button is for display the data on the monitor screen. (7) If "D"(dioptor) is selected in "m/D"... - Page 24 7-5. Kerato-Peripheral Measurement (1) Press a measurement mode to PK mode. (2) Following the refractive measurement procedure. (3) Measure the center, watch measurement guide mark on the screen. In case of the corneal peryphery, let patient see the green light. Measurement position (right eye) ●...
- Page 25 (4) Complete the peripheral measurement for all position. Right/ Left eye Inferior Value PK mode Nasal Value Number Measurement number Temporal Value R1 Value of center Pupil distance R2 Value of center INDEX Refractive index Result icon of Axis of center STEP refractive measurement Superior Value...
- Page 26 (5) Measure the opposite side as same as previous measurement. Warning Advise patient to turn only his or her eyes, not forehead. (6) Printout sample of P.K measurement. Date / Time / Patient's name Index Refrative Index R1/R2 Measurement result of center Average of each result Astigmatic Superior Value...
-
Page 27: Additional Function
8. Additional function 8-1. IOL Function (1) LRK-5200 has a function to measure the implanted eye such as IOL. (2) Press button. when the measurement is prepared, mark comes out. (3) Following the refractive measurement procedure. Warning If IOL mode is not set when IOL implanted eye is measured,measurement may fail or error. -
Page 28: Retro-Illumination Function
8-2. RETRO-ILLUMINATION Function (1) LRK-5200 has function to observe cataract or other trouble. (2) 3 types of function. CAPTURE Capture the screen without Refractive measurement. CAPTURE-REF Capture the screen after Refractive measurement. Capture the screen after refractive measurement with IOL function. (3) Control each illumination (REF/ILLUM/TAG) to make clear pupil image. - Page 29 (4) In CAPTURE-REF MODE, Eye image would be captured if measurement button is pressed, then captured image will be stored if measurement button is presed. (5) The measurement result & captured images would be displayed on the screen if button is pressed, then other result & images can be show using button.
- Page 30 (6) Real Size image. (7) Zoom Function would be activated if button is pressed.
-
Page 31: Size Measurement Function
8-3. SIZE Measurement Function (1) Measure to size of pupil. (2) Press button. (3) Place eye-image between two violet bars, then press measurement button to capture. 12.9... - Page 32 (4) The distance between two bars would be displayed if they are moved by buttons after they are choosen button. (5) After press the measurement button, save the first measurement value.
- Page 33 (6) Press the button then measure the second measurement by same way. (7) When save the second measurement value, average value will be displayed on the screen.
-
Page 34: Setting
9. Setting 9-1. Menu Setting Press the button on main screen. Button functions 6 buttons are shown under the screen as below Back to main screen Shift the setting Move to next Return the setting Change the menu Save Item Description ON: Prints out counter value COUNT OFF: No printout... - Page 35 Item Description Select printing sequance PRINTING ORDER LEFT/RIGHT AUTO / MANUAL Auto/Manual measurement function AUTO COUNT Sets the number of times in AUTO Function POWER SAVE Sets the time of Power saving Selects Vertex Distance Selects the sign for astigmatism STEP (D) Selects the step of result for refractive value STEP (mm)
- Page 36 Item Description MODE Button to change sequance of measurement modes PRINT LABEL Button : Move the cursor to the right/ left Button : Delete the character Chin-rest Up : Change the character in cursor Down Button DSTS Spherical diopter DSTC astigmatic diopter DSTA Axis of astigmatism...
-
Page 37: Auto Measurement Function
9-2. Auto measurement function This function starts measuring automatically when alignment meets the measurement requirement. (1) When you wish to measure with auto measurement function on, set 'Auto/Manual' in the menu screen to 'AUTO'. (2) Press the button for save then press button to go back to the Main screen. -
Page 38: Maintenance
10. Maintenance 10-1. Reloading printer paper (1) When the printer paper is out, icon comes out on the screen. (2) Push the printer cover then open as below drawing. (3) Set a roll of printer paper, insert the loose end of the paper to the printer. - Page 39 (4) Insert the loose end of the paper to the printer as arrow. (5) Draw the paper to the slot of the printer cover then close. Caution ※ Printer paper has front & back. When the paper jams or fades out, please turn it over.
-
Page 40: Replacement Of Fuses
10-2. Replacement of fuses When the fuse has blown, remove the fuse holder at the side of power innet for replacement. Retate the fuse holder to the direction of the arrow mark shown below pusing it down, and you can remove it. Caution Always use the specified fuses only. -
Page 41: Confirmation Of Measurement Accuracy
(2) Avoid storage under the following conditions. Where dust accumulates. ● Where water may get on the unit. ● Where temperature and humidity are high or low. ● Where sunlight exposes on the unit. ● Unstable and / or high place. ●... -
Page 42: Specifications
11. Specifications 11-1. Measurement Conventional mode Refractometer ● Keratometer REF/KER Refractometer with Keratometer CLBC Contact-lens basecurve measurement Special Function ● Peripheral Keratometer ILLUM Retro-illumination function SIZE Cornea / Pupil size measurement Refractometer Sphere -25.00 ~ +25.00D (VD 12mm) (0.12 / 0.25D Steps) ●...
Need help?
Do you have a question about the LRK 5200 and is the answer not in the manual?
Questions and answers