Table of Contents
Advertisement
Quick Links
Advertisement
Table of Contents

Related Manuals for Green Gear Cycling Bike Friday OSATA

Summary of Contents for Green Gear Cycling Bike Friday OSATA
- Page 1 Using Your Bike Friday® OSATA Green Gear Cycling, Inc. 3364 W 11th Ave. Eugene, OR 97402 800-777-0258 USA & Canada +1-541-687-0487 Int’l • +1-541-687-0403 Fax www.bikefriday.com • info@bikefriday.com version 3/4/14 800-777-0258 • +1-541-687-0487 www.bikefriday.com...
-
Page 2: Table Of Contents
The growth of OSATA Handlebars Anatomy of a Bike Friday OSATA Placing OSATA into TravelCase 34-36 Anatomy of a Bike Friday OSATA: Closeup A Word on Safety / Your Tools Accessories: Travel Trailer Parts and Assembly 37-39 Congratulations / If You Need Help... -
Page 3: The Story Behind Osata
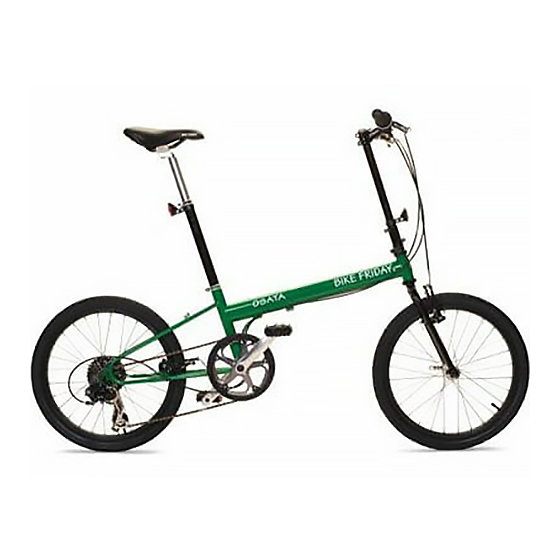
Bike Friday’s most affordable prices, starting less than A note from Bike Friday Co-Founder Alan Scholz: $500. Thank you for purchasing our Bike Friday OSATA. Your bike is an example of the wonderful empowering relationships we have with our customers. - Page 4 Anatomy of an OSATA Anatomy of a OSATA: Closeups www.bikefriday.com 800-777-0258 • +1-541-687-0487 800-777-0258 • +1-541-687-0487 www.bikefriday.com...
-
Page 5: A Word On Safety / Your Tools
It will improve your confidence and self-sufficiency as Blue skies and happy trails from Green Gear Cycling you venture across the globe. www.bikefriday.com 800-777-0258 • +1-541-687-0487 800-777-0258 •... -
Page 6: Unpacking Your Osata
Unpacking your OSATA Assembling your OSATA Open the box or TravelCase and remove the bike from the Unpacking Your OSATA From a Box or TravelCase container. Remove the bubble wrap or felt covers and lay Opening your box or TravelCase may present an intimidat- the disassembled bike out on front of you. -
Page 7: Easy Pack Mast
Your Bike Friday OSATA has several of them. If you are not toward the center of the hub. familiar with their operation, PLEASE study these directions Loosely thread on the knurled carefully. -
Page 8: Assembly: Reconnect Linear Pull / V-Brake
Using a Quick Release Assembling your OSATA Adjust Knurled Nut With the wheel installed and the axle properly Reconnect Linear Pull seated in the frame (or Brakes / V-Brakes the frame joint closed), To close the V-brake to the position the quick release riding position, while fac- NOODLE lever so that it is in line... -
Page 9: Adding Brake Cable Slack
Assembling your OSATA Assembling your OSATA Mount the Stem Riser Adding Cable Slack Upper Stem Slide the bottom of the stem to V-Brakes Riser Bolt riser onto the fork steerer Barrel To increase slack in the tube, keeping the stem riser’s brake cable, you can turn Adjuster Locking... -
Page 10: Double Check Your Bike Friday
Assembly: Pedals Double Check Your Friday Double Check Your Bike Friday! Pedal Thread Directions At this point your bike should be ready to ride. However, Bike pedals have two dif- before you ride away, be sure to double-check your assembly. ferent thread directions. -
Page 11: Saddle Height
Adjusting your OSATA Adjusting OSATA: Handlebar How to Adjust Your OSATA to Fit Each Individual Rider Handlebar Height: This is a subjective preference. Handle- bar height can be classified into three general categories: 1) The OSATA is adjustable to a wide range of riders. Adjust- bars below saddle;... - Page 12 Adjusting OSATA: Handlebars Adjusting OSATA: Main Frame Adjusting Handlebar Height. Adjusting the Main Frame Sizing Loosen the upper stem riser Adjusting the main frame size can be done by one person but bolt, adjust the height as is easier with two. If you are encountering any resistance Upper Stem needed and re-tighten.
- Page 13 Adjusting OSATA: Main Frame Adjusting OSATA: Main Frame Make Frame Larger (cont.) Make Frame Larger (cont.) • Kneeling in front of the • Lift the front wheel so it bicycle while facing it, is close to being directly place one hand on the above the rear wheel.
-
Page 14: Adjusting Headset
Adjusting OSATA Adjusting OSATA: Headset Two Person Technique, Make Frame Larger (cont.) Tap Adjust Method (Using Improvised Tools) • Front person: Stand facing the front of the bike. Remove the seatpost from the • Place one hand on the fork blade, the other hand on the seatmast and the seatmast stem riser. - Page 15 Adjusting OSATA: Headset Adjusting OSATA: Headset Tap Adjust Method (cont.) OSATA Headset Press Tool (cont.) Place the seatmast over the Remove the washer and nut steerer tube. from the bottom of the tool. While lifting upward on the [Figure 39] fork with one hand, tap Slide the rest of the tool, from downward on the seatmast to...
-
Page 16: Packing In Travelcase
Remove your Accessories, Set your Derailleur the seatpost collar bolt, collapse the seatpost into the mast and Before disassembling and packing your Bike Friday OSATA, then lightly tighten the seatpost remove all extra accessories including racks and water bottle collar clamp). -
Page 17: Remove Front Wheel
Packing: Front Wheel Packing: Handlebars Remove the Front Wheel Remove Stem Riser Upper Stem Riser Bolt After removing the front Loosen the stem riser lower wheel, close the brake bolt and pull upward on the again. Remove the quick handlebars Locking release from the axle by Headset... -
Page 18: Placing Osata Into Travelcase
Packing: OSATA in TravelCase Placing the OSATA into a TravelCase Place the main frame protec- tor (half of a crush protector) in the open end of the rear end half. [Figure 50] Place the front end of the Fig. 50 bike, with the head tube in the Northeast corner. - Page 19 Packing: OSATA in TravelCase Packing: OSATA in TravelCase Place saddle / seatmast on Place the front wheel in, West wall with the mast overlapping the rear. You pointing East, through the may need to offset it to the rear end. West a bit.
- Page 20 Accessories: TravelTrailer Accessories: TravelTrailer Your Trailer Parts Connect the Axles If you purchased a Travel Slip the open ends of the Trailer with your bike, you axles over the “T” of the should have two trailer T-piece. Each axle will wheels and two yellow felt have a threaded bolt with bags with the tongue and...
-
Page 21: Dual Drive Hub Information
Accessories: TravelTrailer Dual Drive Hub Install the Trailer Wheels Dual Drive Hub Specifics Insert the axle bolt through Installing the Rear Wheel: the recessed bearing side Install the rear wheel into the rear frame dropouts and bolt into of the wheel. Once the place. -
Page 22: Bike Friday Service
Bike Friday Service Bike Friday Maintenance New Bike Maintenance New Bicycle Tips and Maintenance Recommendations Like all bikes, your Bike Friday travel bike will go through a break- in period. After the first few weeks of riding you might find that Unlike other new bicycles purchased from a shop, your Bike your drive train doesn’t shift as crisply as it did when new, or Friday OSATA has been disassembled partly and placed in a... - Page 23 Bike Friday Maintenance Bike Friday Maintenance Overhauling the Bearings [CONTINUED] Maintenance To increase their lifespan before replacement, cartridges cn be serviced. Using a thin knife, you can peel back the rubber/ Maintenance frequency depends on how much you ride and plastic (metal in the case of Chris King) seal, clean out the old under what conditions.
-
Page 24: Warranty Information
Traveling with your OSATA Bike Friday® Guarantee We at Green Gear Cycling, Inc. (Bike Friday) want you, the Traveling with your Bike Friday on the airlines today will, for the customer, to be happy with your new bicycle. For direct orders... - Page 25 This warranty is expressly limited to the repair or replacement of the This warranty is expressly limited to the repair or replacement defective part at the discretion of Green Gear Cycling. This is the sole of the defective frame, fork, or defective part at the discretion of remedy of the warranty.
- Page 26 LAR PURPOSE, whether EXPRESSED or IMPLIED. Pre-Owned Bike Guarantee We at Green Gear Cycling, Inc. (Bike Friday) want you, the customer, to be happy with your preowned bicycle. If the bike does not meet your expectations, you may return the bicycle to us for a full refund, less shipping charges.
Need help?
Do you have a question about the Bike Friday OSATA and is the answer not in the manual?
Questions and answers