Table of Contents
Advertisement
Available languages
Available languages
Quick Links
Advertisement
Table of Contents

Summary of Contents for Highland MC-K03A
- Page 1 ITEM #3738508 Single Serve Coffee Maker HIGHLAND and logo design are trademarks or registered trademarks of LF, LLC. All rights reserved. MODEL #MC-K03A 866-994-1024 You could also contact us at partsplus@lowes.com or visit www.lowespartsplus.com. SM21235...
- Page 2 Package Contents ........................... Safety Information ........................... Assembly Instructions ........................Cleaning and Maintenance ......................Warranty ............................1000W...
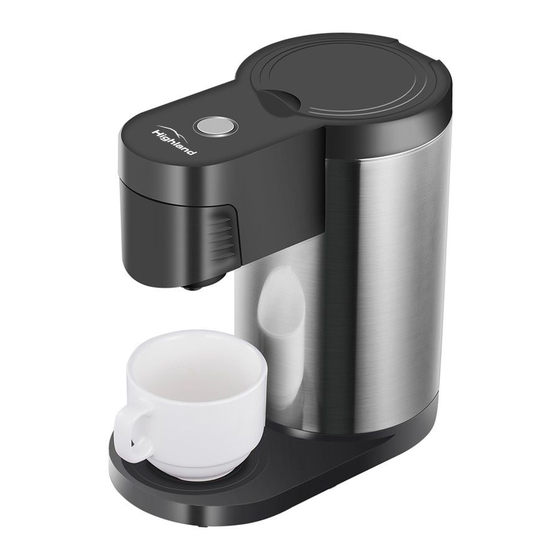
- Page 3 PART DESCRIPTION QUANTITY Water Tank Lid Water Tank Brew Button Cartridge lid Cartridge Spout Cup Tray...
- Page 4 Warning: When using the appliance (following also as “the Brewer”) especially when children are present, basic safety precautions should always be followed to reduce the risk of fire, electric shock, and / or injury to persons, including the following: 1. Read all instructions before using. 2.
- Page 5 14. This appliance has a polarized plug (one blade is wider than the other). To reduce the risk of electric shock, this plug is intended to fit into a polarized outlet only one way. If the plug does not fit fully into the outlet, reverse the plug.
- Page 6 1. Plug the appliance into its own grounded outlet. If the electric circuit is overloaded with other appliance, the Brewer may not function properly. 2. Water quality varies from place to place. For the best tasting gourmet coffee, we recommend using bottled or filtered water. 3.
- Page 7 2. Put a mug (10oz. minimum) on the cup tray. 3. Unwrap cord and plug the Brewer into a grounded outlet. 4. Place the cartridge to the right position without portion pack. 5. Press and release the Brew button to turn on the Brewer (light‐on, and flashing slowly).
- Page 8 6. Remove and dispose of the used portion pack in time. Enjoy the coffee! Caution: Portion pack will be hot, wait at least 5 minutes before removing.Caution: To avoid risk of injury or scald by the hot water, do not take out the cartridge from the Brewer Head during the brew process.
-
Page 9: Cleaning And Maintenance
CLEANING AND MAINTENANCE Regular cleaning of the Brewer’s external components is recommended. 1. Never immerse the Brewer in water or other liquids. The housing and other external components may be cleaned with a soapy, damp, non-abrasive cloth. 2. The cup tray should be periodically inspected and clean by cloth. Cleaning the cartridge The Cartridge can be placed onto the top shelf of a dishwasher. - Page 10 De-scale the Brewer: Mineral content in water varies from place to place. Depending on the mineral content of the water in your area, calcium deposits or scale may build up in your Brewer. Scale is non-toxic, but left unattended, it can hinder Brewer performance. De-scaling your Brewer helps maintain the heating element and other internal parts that come in contact with water.
-
Page 11: Warranty
WARRANTY ONE YEAR LIMITED WARRANTY. The manufacturer warrants this product to be free from manufacturing defects in material and workmanship. This one-year warranty does not cover transit damages. This warranty does not apply to the finish on any portion of the product. Serving performed by unauthorized persons shall render the warranty invalid. - Page 12 Cafetera monodosis HIGHLAND y el diseño del logotipo son marcas comerciales o marcas registradas de LF, LLC. MODELO #MC-K03A Todos los derechos reservados. Número de serie Fecha de compra ¿Preguntas, problemas, piezas faltantes? Antes de volver a la tienda, llame a nuestro Departamento de Servicio al Cliente al 866 994-1024, de lunes a domingo de 8 a.m.
-
Page 13: Especificaciones Del Producto
ÍNDICE Contenido del paquete ........................14 Información de seguridad ........................15 Instrucciones de ensamblaje ......................17 Limpieza y mantenimiento ........................20 Garantía .............................22 ESPECIFICACIONES DEL PRODUCTO ESPECIFICACIONES Rango de voltaje 120 V Frecuencia nominal 60 Hz Potencia nominal 1000 W Garantía 1 año... -
Page 14: Contenido Del Paquete
CONTENIDO DEL PAQUETE PIEZA DESCRIPCIÓN CANTIDAD Tapa del tanque de agua Tanque de agua Botón de preparación Tapa del cartucho Cartucho Tubo surtidor Bandeja para tazas... -
Page 15: Instrucciones Importantes De Seguridad
INSTRUCCIONES IMPORTANTES DE SEGURIDAD Advertencia: Al utilizar el electrodoméstico (también llamado "la cafetera"), especialmente cuando hay niños presentes, siempre se deben seguir las precauciones básicas de seguridad para reducir el riesgo de incendio, descarga eléctrica o lesiones a las personas, incluidas las siguientes: 1. - Page 16 14. Este electrodoméstico tiene un enchufe polarizado (una clavija es más ancha que la otra). Para reducir el riesgo de una descarga eléctrica, este enchufe está diseñado para encajar en un tomacorriente polarizado de una sola manera. Si el enchufe no encaja por completo en el tomacorriente, inviértalo. Si aún no entra, póngase en contacto con un electricista calificado.
-
Page 17: Instrucciones De Ensamblaje
INSTRUCCIONES DE ENSAMBLAJE 1. Enchufe el electrodoméstico en su propio tomacorriente con conexión a tierra. Si el circuito eléctrico está sobrecargado con otro electrodoméstico, es posible que la cafetera no funcione correctamente. 2. La calidad del agua varía de un lugar a otro. Para obtener el mejor sabor del café... - Page 18 2. Coloque una taza (295,72 ml mínimo) en la bandeja para tazas. 3. Desenrolle el cable y enchufe la cafetera en un tomacorriente con conexión a tierra. 4. Coloque el cartucho en la posición correcta sin paquete de porciones. 5. Presione y suelte el botón de preparación para encender la cafetera (luz encendida y parpadeando lentamente).
- Page 19 6. Retire y deseche el paquete de porciones usado a tiempo. ¡Disfrute el café! Precaución: El paquete de porciones estará caliente, espere al menos 5 minutos antes de retirarlo. Precaución: Para evitar el riesgo de No saque el cartucho durante el lesiones o quemaduras por agua caliente, no proceso de preparación.
- Page 20 LIMPIEZA Y MANTENIMIENTO Se recomienda limpiar frecuentemente los componentes externos de la cafetera. 1. Nunca sumerja la cafetera en agua u otros líquidos. La carcasa y otros componentes externos se pueden limpiar con un paño no abrasivo, húmedo y con jabón. 2.
- Page 21 Descalcifique la cafetera: El contenido de minerales en el agua varía de un lugar a otro. Según el contenido mineral del agua en su área, pueden acumularse depósitos de calcio o sarro en la cafetera. El sarro no es tóxico, pero si no se elimina, puede perjudicar el rendimiento de la cafetera.
- Page 22 GARANTÍA UN AÑO DE GARANTÍA LIMITADA. El fabricante garantiza que este producto no presentará defectos de fabricación en el material ni en la mano de obra. Esta garantía de un año no cubre los daños durante el transporte. Esta garantía no se aplica al acabado de ninguna pieza del producto. El mantenimiento realizado por personas no autorizadas anulará...
Need help?
Do you have a question about the MC-K03A and is the answer not in the manual?
Questions and answers
I can't figure out how to use this single serve coffee maker, I put the water in the reservoir and put the k cup in, pressed the button and all the machine did was have a fast flashing blue button
When the button on the Highland MC-K03A single serve coffee maker flashes blue rapidly, it indicates the water level is below the "MIN" line. To use the coffee maker:
1. Fill the water tank with bottled or filtered water below 95˚F, ideally 77˚F.
2. Make sure the water level is above the “MIN” line and below the “MAX” line.
3. Place a mug (minimum 10 oz) on the cup tray.
4. Plug in the brewer.
5. Place the cartridge in position without a portion pack.
6. Press and release the Brew button to start the preheating process.
7. Wait for brewing to complete and auto-stop.
This answer is automatically generated