
Summary of Contents for 360 Vision Centurion
- Page 1 Centurion Installation Manual Ver 2.7 Page 1 Centurion Installation/Configuration Manual © 360 Vision Technology Ltd.
-
Page 2: Table Of Contents
Centurion Installation Manual Ver 2.7 Page 2 Table of Contents 1 Safety and Precautions ..........................3 2 Housing Dimensional Drawing ........................3 3 Bracket Dimensional Drawing ........................5 4 Connections ............................... 7 4.1 Standalone Alarmcard Setup ......................9 4.2 RS422/RS485 Converter ......................... 12 5 Connections to Centurions with HMA ....................... -
Page 3: Safety And Precautions
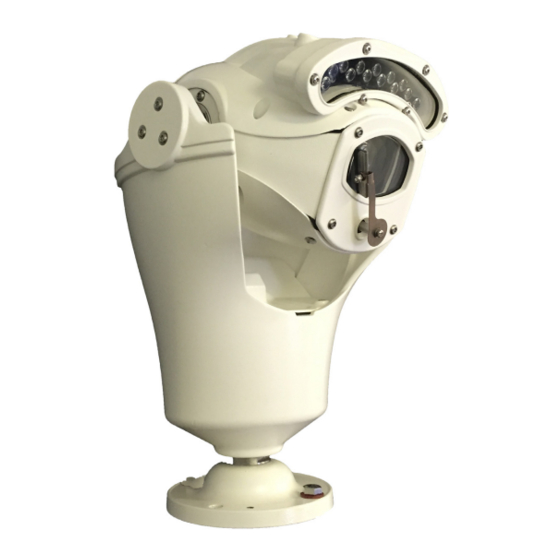
6. 360 Vision Technology Limited accept no liability for any damage caused by incorrect or improper installation. 7. To prevent risk of injury caused by the Centurion or mounting options becoming detached, fit a suitable safety chain or lanyard. - Page 4 ANY THIRD PARTY WITHOUT THE DIRECT WRITTEN ALL DIMENSIONS IN MM APPROVED: Manor Park, Runcorn, Cheshire, PART NUMBER: Centurion Single LED Array - Covers IR80, or IR110WL versions. X.X = PERMISSION OF THE AUTHOR. M3100-B WA7 1SY. United Kingdom. REMOVE ALL SHARP EDGES...
-
Page 5: Bracket Dimensional Drawing
Centurion Installation Manual Ver 2.7 Page 5 3 Bracket Dimensional Drawing Weight 1.2kg Centurion Wall Bracket 8.0 (x4) ON 101.6 (4 INCH) PCD. FIX PREDATOR USING: M8 (x4) ON 101.6 M8x30 HEX-HEAD BOLTS (x4) (4 INCH) PCD. - STAINLESS STEEL. - Page 6 Centurion Installation Manual Ver 2.7 Page 6 Weight 2.5kg Centurion PMB Bracket Please use the appropriate fixings to suit the weight of the camera housing used. © 360 Vision Technology Ltd.
-
Page 7: Connections
It is important that the water should not be allowed to pool around the connector, as this will increase the risk of contamination and corrosion which may cause poor connections. The connector on the base of the Centurion is rated IP68, when it is correctly connected and the locking ring is tight. - Page 8 Centurion Installation Manual Ver 2.7 Page 8 BLACK 30Vdc(-) BROWN 30Vdc(+) WHITE 30Vdc(-) GREY 30Vdc(+) GREEN 30Vdc(-) PINK 30Vdc(+) VIOLET BLUE RS485 D- ORANGE RS485 D+ Coax Screen Coax Core © 360 Vision Technology Ltd.
-
Page 9: Standalone Alarmcard Setup
When an alarm is activated, the ALARM PCB will activate the alarm relay output and will send commands to set the Centurion to activate ‘alarm mode’. The Centurion will save the current status (pan, tilt, lens, tour and mimic) then it will seek the preset which corresponds with the active alarm number. - Page 10 Centurion Installation Manual Ver 2.7 Page 10 Dil Switch Settings Address 1 to 128 range See below Dil Switch Settings Normally Open Contacts Normally Closed Contacts (unused inputs must be connected to common) RS485 Address Settings Switch is shown as white.
- Page 11 Centurion Installation Manual Ver 2.7 Page 11 BLACK 30Vdc(-) BROWN 30Vdc(+) WHITE 30Vdc(-) GREY 30Vdc(+) GREEN 30Vdc(-) PINK 30Vdc(+) VIOLET BLUE ORANGE RS485 D- RS485 D+ Coax Screen Coax Core © 360 Vision Technology Ltd.
-
Page 12: Rs422/Rs485 Converter
Centurion Installation Manual Ver 2.7 Page 12 CON4 Settings CON4 Protocol Settings 360 Vision Pelco D 9600 baud Pelco D 4800 baud Pelco D 2400 baud Pelco P 9600 baud Pelco P 4800 baud Pelco P 2400 baud Alarm Settings... -
Page 13: Connections To Centurions With Hma
Page 13 5 Connections to Centurions with HMA When the HMA (Hinged Mount Adaptor) is fitted to the Centurion, the ‘Centurion Composite Cable’ is not used. Connections between the power supply and Centurion use conventional cables as detailed below. 30Vdc Power connections between Centurion PSU and Centurion that is fitted with... -
Page 14: Basic Twisted Pair/Rs485 Data Wiring
Install the software (Predator-issued-120521-1-installer.exe) on the laptop being used. Connect the RS485 end of the cable fitted with a 3 way connector to the Centurion PSU 3 way RS485 port. Run the utility on the laptop and then connect the USB end of the cable into the laptop. The utility will then look for new comms ports and then will look for the camera across all baud rates used. -
Page 15: Centurion Osd
Centurion Installation Manual Ver 2.7 Page 15... -
Page 16: Osd Operation/Navigation
Define Tour A tour of presets is stored in the Centurion as a list of tour points. Each tour point consists of a preset number, the dwell time for which the Centurion will pause and the speed parameter that will be used to seek the preset. - Page 17 Centurion Installation Manual Ver 2.7 Page 17 General Settings Menu Offers more camera options. General 1 Digital Zoom - Use this option to enable or disable digital zoom. • White Balance - Change the camera white balance settings to suit the area.
- Page 18 Some Centurions include the ‘intelligent lighting’ feature which allows the intensity of the illumination to be reduced when the Centurion tilts down below a particular angle (i.e. the ‘Low Light Angle’). Below this angle the power to the lamps is reduced to the percentage value that has been set (i.e.
- Page 19 Factory Reset - This will reboot the camera and all the settings will be lost. • Centurion Software Version - This shows the software version of the camera. Privacy Zone Menu Can be used to obscure a scene within an image e.g. private residence. Move the camera to the position required for the privacy zone before going into the camera OSD.
-
Page 20: Special Presets
Centurion Installation Manual Ver 2.7 Page 20 10 Special Presets Seek 64 Seek 66 (On) (Mono/colour not changed) (Off) Illumination (When it is dark) Seek 65 White Lights Seek 66 (On) (Mono/colour not changed, no timer) (Off) Night Sensor Seek 67... -
Page 21: Important - Care Of Painted Surfaces
If damage occurs to the coating (e.g. the Centurion is dropped, scrapped etc), repairs MUST be carried out immediately. When the Centurion is installed in areas where there is a high risk of damage from birds or their droppings, additional precautions and measures should be used to keep the birds away from the Centurion e.g. fit anti-bird spikes. - Page 22 Centurion Installation Manual Ver 2.7 Page 22 © 360 Vision Technology Ltd.
Need help?
Do you have a question about the Centurion and is the answer not in the manual?
Questions and answers