Advertisement
Available languages
Available languages
Quick Links
Advertisement

Subscribe to Our Youtube Channel
Summary of Contents for Brigmton BTDT2-919
- Page 1 MANUAL DE INSTRUCCIONES TDT2 – PVR – TIME SHIFT – HDMI BTDT2-919...
- Page 2 SEGURIDAD 1. Lea estas instrucciones. 2. Conserve estas instrucciones. 3. Preste atención a todas las advertencias. 4. Siga todas las instrucciones. 5. No utilice este equipo cerca del agua. 6. Limpie únicamente con un paño seco. 7. No coloque cerca de fuentes de calor como radiadores, registradores de calor, estufas, o cualquier otro aparato (incluyendo amplificadores) que produzcan calor.
- Page 3 ADVERTENCIA : El aparato no debe exponerse a goteos o salpicaduras y no se deben colocar objetos sobre el aparato con líquidos, como jarrones. Las baterías no deben exponerse a un calor excesivo, como la luz del sol, el fuego o similares. Este símbolo indica que hay voltajes peligrosos que constituyen un riesgo de descarga eléctrica dentro de esta unidad.
-
Page 4: Panel Frontal Y Trasero
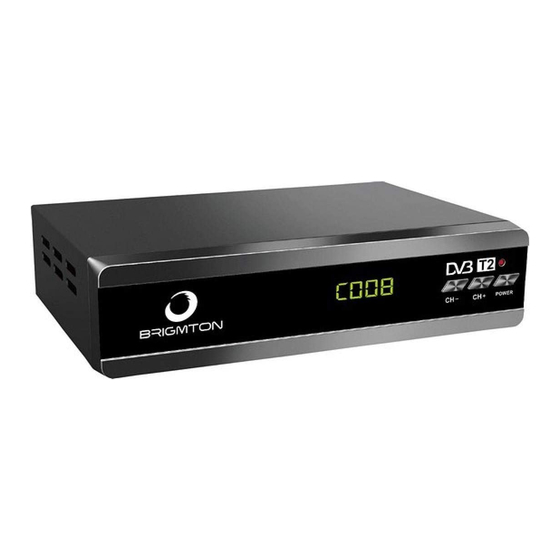
PANEL FRONTAL Y TRASERO (1) FUNCIÓN DE ENERGÍA: Presione para encender/apagar la fuente de alimentación principal. (2) CANAL ABAJO: Se usa para cambiar canales sin usar el control remoto (3) CANAL ARRIBA: Se usa para cambiar canales sin usar el control remoto. -
Page 5: Mando A Distancia
MANDO A DISTANCIA... - Page 6 Colocación de las pilas Retire la tapa de la batería de la parte posterior del mando a distancia y coloque 2 pilas AAA, dentro del compartimento. Asegúrese de que las polaridades de las pilas coinciden con las marcas de polaridad dentro del compartimento.
- Page 7 FIGURA 2.1 2.2 GUÍA DE PROGRAMAS ELECTRÓNICOS (EPG) Puede presionar el botón (EPG) en el control remoto para entrar a la página EPG y saber más sobre los programas que se reproducirán. Como se muestra en la figura siguiente, el botón Now/Next (Modo), Presione (EXIT) o (EPG) para silenciar el menú...
- Page 8 La etiqueta 5 muestra información actual del programa de reproducción (NOW). Presione ARRIBA/ABAJO). El botón puede cambiar es estado AHORA y SIGUIENTE. La etiqueta 6 muestra la información del programa del siguiente intervalo de tiempo (NEXT). La etiqueta 7 muestra la información de la pista actual 2.3 TELETEXTO Presione el botón (TEXTO) para ingresar al menú...
- Page 9 FIGURA 2.4 MENÚ SUBTÍTULOS Presione el botón ARRIBA/ABAJO para seleccionar el idioma. 2.4 SUBTÍTULO TTX El conjunto predeterminado de subtítulos TTX está cerrado. Presione el botón SUBTÍTULOS e ingrese en el menú de subtítulos como se muestra en la figura 2.5. FIGURA 2.5 MENÚ...
- Page 10 FIGURA 3.1 MENÚ INSTALACIÓN Búsqueda de audio Búsqueda manual Filtro de canal: sólo busca el programa gratuito o busca todo el programa. País: seleccione el país LCN: número de canal lógico Antena activa: alimentación de antena 3.1.1 Búsqueda automática El elemento de búsqueda automática se utiliza para buscar el programa de TV/Radio de acuerdo con la lista de frecuencias como figura en el apartado 3.2.
- Page 11 El sistema buscará el programa y lo guardará automáticamente como en la figura 3.3: FIGURA 3.3 BÚSQUEDA AUTOMÁTICA 3.1.2 Búsqueda manual Se puede utilizar para buscar programas según la frecuencia específica. Seleccione el elemento e ingrese en el menú como en la figura 3.4. FIGURA 3.4 BÚSQUEDA MANUAL Hay tres configuraciones: (1) Número de canal...
- Page 12 Búsqueda finalizada. El sistema guardará el programa y el menú de atrás (instalación). 3.1.3 Filtro de canal FIGURA 3.5 MENÚ FILTRO DE CANAL Presione el botón ARRIBA/ABAJO para cambiar el elemento diferente, luego presione el botón ENTER para seleccionarlo. Sólo busque el programa gratis o busque gratis + encripte.
- Page 13 FIGURA 3.6 MENÚ PREFERENCIA 3.2.1 Lenguaje OSD Se usa para configurar el idioma del menú como se muestra en la figura 3.7. FIGURA 3.7 MENÚ LENGUAJE OSD 3.2.2 Tiempo de espera de OSD Se usa para configurar el tiempo de visualización del menú como se muestra en la figura 3.8.
- Page 14 FIGURA 3.8 MENÚ TIEMPO DE ESPERA OSD 3.2.3 Transparencia OSD Se usa para ajustar la transparencia del menú principal como se muestra en la figura 3.9. FIGURA 3.9 MENÚ TRANSPARENCIA OSD 3.2.4 Subtítulo preferido Se usa para configurar el idioma predeterminado de los subtítulos como se ve en la figura 3.9.
- Page 15 FIGURA 3.9 MENÚ SUBTÍTULO PREFERIDO 3.2.5 Problemas auditivos Este ítem se usa para configurar usuarios con problemas auditivos con subtítulos especiales. Depende de si el operador de transmisión tiene soporte para tal función, como se muestra en la figura 3.10. FIGURA 3.10 PROBLEMAS AUDITIVOS 3.3 Configuración Se usa para realizar la configuración del sistema como se ve en la figura...
- Page 16 FIGURA 3.10 CONFIGURACIÓN 3.3.1 Elija la configuración. Luego elija Ethemet/Config como se ve en la figura 3.12. FIGURA 3.12 3.4 Centro de medios Como se ve en la figura 3.13.
- Page 17 FIGURA 3.13 PVR CONFIG 3.4.3 Búsqueda 3.6.7 Control de radiodifusión Puede usar la tecla Recall o Stop para salir, regresar la interfaz principal. Presione la tecla Repeat para iniciar o cancelar el vídeo, puede usar la tecla Pause para pausar. Use FF para x2 para reproducción acelerada y Reproducción para velocidad normal.
-
Page 18: Solución De Problemas
3.7 Cambio de hora La función de cambio de hora se usa para reproducir el programa de horario antiguo. Hay tres formas, como se ve en la figura 3.21. FIGURA 3.21 SOLUCIÓN DE PROBLEMAS... -
Page 19: Declaración De Conformidad
Ferson Electrónica, S.A. declara bajo su responsabilidad que el aparato indicado cumple los requisitos de las siguientes directivas: Low Voltage Directive 2014/35/EU EN 60065:2014 EMC Directive 2004/108/EC EN 55032:2015 EN 61000-3-2:2014 EN 61000-3-3:2013 EN 55 020:2007+A12:2016 EN 55032:2015 Descripción del aparato: Modelo BRIGMTON BTDT2-919 BRIGMTON Sintonizador Made in China... - Page 20 INSTRUCTION MANUAL TDT2 – PVR – TIME SHIFT – HDMI BTDT2-919...
- Page 21 SECURITY 1. Read these instructions. 2. Keep these instructions. 3. Pay attention to all warnings. 4. Follow all instructions. 5. Do not use this equipment near water. 6. Clean only with a dry cloth. 7. Do not place near heat sources such as radiators, heat registers, stoves, or any other apparatus (including amplifiers) that produce heat.
- Page 22 SECURITY WARNING : • The appliance should not be exposed to dripping or splashing and no objects should be placed on the appliance with liquids, such as vases. • Batteries should not be exposed to excessive heat, such as sunlight, fire or the like.
-
Page 23: Front And Rear Panel
FRONT AND REAR PANEL (1) POWER FUNCTION: PRESS TO TURN ON / OFF THE MAIN POWER SUPPLY. (2) DOWN CHANNEL: USED TO CHANGE CHANNELS WITHOUT USING THE REMOTE CONTROL. (3) UP CHANNEL: USED TO CHANGE CHANNELS WITHOUT USING THE REMOTE CONTROL. (4) LED DISPLAY: USED TO SHOW THE CHANNEL NUMBER OR TIME. -
Page 24: Remote Control
REMOTE CONTROL... - Page 25 Inserting the batteries Remove the battery cover on the back of the remote control and place 2 AAA batteries inside the compartment. Make sure that the polarities of the batteries match the polarity markings inside the compartment. Using the remote control To use the remote control, point towards the front of the digital decoder.
-
Page 26: Electronic Programs Guide (Epg)
2.2 ELECTRONIC PROGRAMS GUIDE (EPG) You can press the (EPG) button on the remote control to enter the EPG page and learn more about the programs that will be played. As shown in the following figure, the Now / Next button, Press (EXIT) or (EPG) to mute the EPG menu. - Page 27 AND DOWN). The button can change is status NOW and NEXT. • Label 6 shows the program information of the next time interval (NEXT). • Tag 7 shows the information of the current track 2.3 TELETEXT Press the (TEXT) button to enter the teletext menu, as shown in Figure 2.3. 2.3 MENÚ...
- Page 28 2.4 SUBTITLE TTX The default TTX subtitle set is closed. Press the SUBTITLES button and enter the subtitle menu as shown in figure 2.5. 3. Introduction of the Main Menu 3.1 Installation To help use the installation antenna and the search program as shown in 3.1.
- Page 29 - Country: select the country - LCN: logical channel number - Active antenna: antenna feed 3.1.1 Automatic search The automatic search element is used to search the TV / Radio program according to the list of frequencies as shown in section 3.2. The system will search for the program and save it automatically as in figure 3.3: 3.1.2 Manual search...
- Page 30 There are three configurations: (1) Channel number (2) Frequency (KHz): the predetermined frequency is 177143 KHz. You can enter the number directly. (3) Bandwidth: select Bandwidth between 6 MHz, 7MHz and 8MHZ by default. Press start search button. Finished search The system will save the program and the back menu (installation).
- Page 31 element is used to establish the logical order of the channel. The Active Antenna item is used to activate / deactivate the active antenna. The system will turn off the power when it is activated and the antenna is disconnected. 3.2 Preference The Preference menu is used to configure the language and audio settings as shown in Figure 3.6.
- Page 32 It is used to configure the menu display time as shown in figure 3.8. 3.2.3 OSD Transparency It is used to adjust the transparency of the main menu as shown in figure 3.9. 3.2.4 Favorite subtitle It is used to configure the default subtitle language as shown in Figure 3.9.
- Page 33 3.2.5 Hearing problems This item is used to configure users with hearing problems with special subtitles. It depends on whether the transmission operator has support for such a function, as shown in Figure 3.10. 3.10 3.3 Configuration It is used to perform the configuration of the system as shown in Figure 3.11.
- Page 34 3.10 3.3.1 Choose the configuration. Then choose Ethernet / Config as shown in Figure 3.12. 3.12 3.4 Media center As seen in figure 3.13.
- Page 35 3.13 PVR CONFIG 3.4.3 Search 3.6.7 Broadcasting control You can use the Recall or Stop key to exit, return the main interface. Press the Repeat key to start or cancel the video, you can use the Pause key to pause. Use FF for x2 for accelerated playback and Playback for normal speed.
- Page 36 3.7 Change of time The time change function is used to play the old schedule program. There are three ways, as shown in Figure 3.21. 3.21...
- Page 37 DIRECTIVAS EMC Low Voltage Directive 2014/35/EU EN 60065:2014 EMC Directive 2004/108/EC EN 55032:2015 EN 61000-3-2:2014 EN 61000-3-3:2013 EN 55 020:2007+A12:2016 EN 55032:2015 Description of apparatus: Model BRIGMTON BTDT2-919 BRIGMTON Tunner Made in China...
Need help?
Do you have a question about the BTDT2-919 and is the answer not in the manual?
Questions and answers