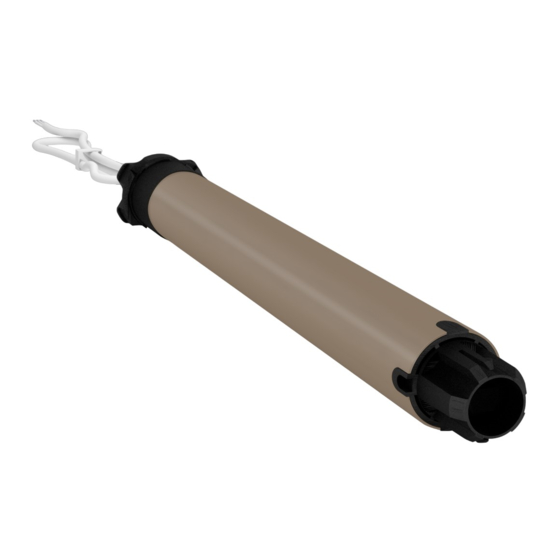
Summary of Contents for DELRA DORE TYMOOV PERFORMANCE XRP
- Page 1 TYMOOV PERFORMANCE XRP/DXRP EFFICACITE XRE Gamme de moteurs tubulaires radio birectionnels Bidirectional Wireless Tubular Motor range Produktreihe Rohrmotor bidirektionale Funktechnologie...
- Page 2 Recommendations WARNING: Important security instructions Preliminary elements Incorrect installation may cause severe injury Follow all the instructions and keep this installation guide in a safe - TYMOOV xRP/DxRP or xRE motors are motors fitted with 868 place. MHz - X3D wireless receivers. They are compatible with the range of DELTA DORE X3D control systems and alarms.
- Page 3 Recommendations - Cables going through a metal wall must be protected and isolated by a sleeve. The TYMOOV xRP/DxRP or xRE cable can be disassembled. - If the power cable is damaged, it must be replaced by the manufacturer, after-sales service or similarly qualified personnel in order to prevent hazards.
-
Page 4: Table Of Contents
Contents 1/ Motor fitting ....................8 1.1 Crown and wheel assembly ................. 8 1.2 Assembly in the tube ....................8 1.3 Motor head position ....................9 1.4 Attaching the motor to the mount ..............9 2/ Connection ....................10 2.1 Wiring without push button, only by transmitter ........10 2.2 Wiring with a push button ................. -
Page 5: 1/ Motor Fitting
1/ Motor fi tting • Never hit the motor head or output shaft to fi t the motor into the tube. 1.3 Motor head position Never pierce the tube when the motor is installed. The motor head must be positioned on the mount such that the cable outlet is in the •... -
Page 6: 2/ Connection
2/ Connection 3/ Starting up for the fi rst time The electrical wiring must comply with EN, IEC and national institute standards for The fi rst time it is switched on, the motor will make a short movement in both installation (e.g.: NF C15-100 for France). -
Page 7: Setting Stops
3/ Starting up for the first time 3.2 Setting stops 3.2.1 Setting 2 automatic stops You can use Auto mode if there are both upper and lower physical stops. The motor It is possible that the shutter will move in the opposite direction to the button will automatically detect its end of travel distances. - Page 8 3/ Starting up for the fi rst time 3.2.3 Setting 2 manual stops 3.2.2 Setting 1 manual stop + 1 automatic stop ❶ Position the shutter ❶ Position the shutter Scroll step by step Scroll step by step To scroll step by step, briefl y press then Press the button until the shutter is Press the...
-
Page 9: 4/ Modifying Stops
4/ Modifying stops 6/ Associating a smoke detector You want to control the opening of roller shutters if smoke is detected The stops must fi rst be removed then set again for them to be modifi ed. Remove them by proceeding as follows: On the transmitter that is already associated, press the button for more than 3 seconds... -
Page 10: 8/ Remove One Or Several Associations
8/ Remove one or several associations 9/ Obstacle detection The motors of the TYMOOV range include the obstacle detection feature. 8.1 Remove an association After locking on an obstacle, the motor reverses direction by about 15 cm. - Remove the front panel of the remote control. Obstacles can only be detected when the stops have been set. -
Page 11: 11/ Favourite Positions
11/ Favourite positions 12/ Association with an alarm control unit You can save up to 2 favourite positions: This function is only available with the Radio Performance DxRP and xRP motors Not compatible with Radio Effi cacité motors. ❶ ❷ Set the shutter to the required position. In order for the intruder detector to function, the lower stop must automatically lock the shutter with fasteners. -
Page 12: Defining.the.motor's.operating.mode
12/ Association with an alarm control unit 13/ Your remote control is lost or not functioning 12.2 Defi ning the motor’s operating mode Initial condition: The lost remote control was only associated with a single motor (receiver). Alarm activation The shutter remains in Switch off the motor power supply, wait 10 seconds, then switch the motor back on. -
Page 13: 14/ Help
14/ Help 15/ Technical Characteristics If the motor is not working: • Power supply: 230V - 50 Hz +/- 10% • Class II insulation - Check that the wiring corresponds to the diagrams in the “Connection” chapter. • Operating time: 4 minutes - Check the power supply in the network. - Page 14 www.deltadore.com...


Need help?
Do you have a question about the TYMOOV PERFORMANCE XRP and is the answer not in the manual?
Questions and answers