Table of Contents
Advertisement
Quick Links
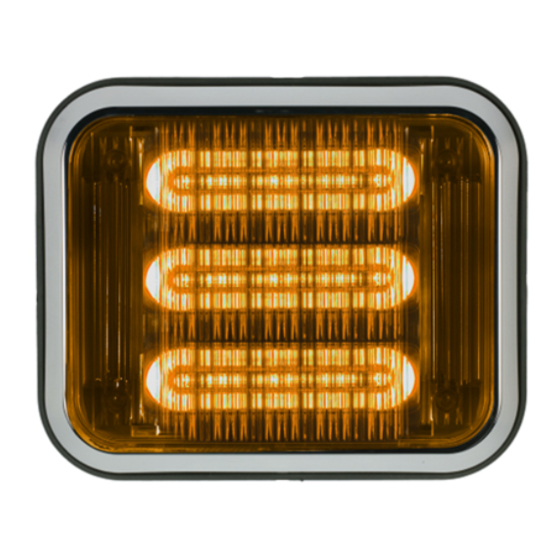
LED PriZm II
Perimeter Lights
Contents:
IMPORTANT!
Read all instructions before installing and using. INSTALLER: This manual must be deliv-
ered to the end user.
T55065 Rev. A
General Description...........................................................................2
Specifications.....................................................................................2
Unpacking & Pre-Installation.............................................................2
Installation & Mounting......................................................................3
Device Operation...............................................................................4
Parts & Exploded View......................................................................6
Installation Template Dimensions......................................................7
Maintenance......................................................................................7
Warranty.............................................................................................8
INSTALLATION
& OPERATION MANUAL
7x9 Shown
Page 1 of 8
Advertisement
Table of Contents

Summary of Contents for Code 3 PriZm II
- Page 1 INSTALLATION & OPERATION MANUAL LED PriZm II Perimeter Lights 7x9 Shown Contents: General Description................2 Specifications..................2 Unpacking & Pre-Installation.............2 Installation & Mounting..............3 Device Operation................4 Parts & Exploded View..............6 Installation Template Dimensions............7 Maintenance..................7 Warranty.....................8 IMPORTANT! Read all instructions before installing and using. INSTALLER: This manual must be deliv- ered to the end user.
- Page 2 General Description The PriZm II Perimeter lights are offered in sizes 3x7, 4x6 and 7x9. Both solid and multi-color are available. Multi-color lights are “split” horizontally (left/right). The outer lens is field replaceable, and provides a water- proof barrier via an interface with a field replaceable outer gasket. The units are surface-mounted, requiring no recesses to be cut in the vehicle for normal mounting. Only a hole for wiring and 4 small holes for mount- ing screws will be required. The unit is available with or without bezel, and operates on (+12VDC). Solid color...
- Page 3 2. Install customer supplied grommet in the 1” diameter wire hole. Install the four plastic grommets in the mount- ing holes (Code 3 supplied). 3. Route the vehicle power wires and allow a minimum of 3” of slack to protrude from the center opening at each light head location.
- Page 4 Device Operation Flash Pattern Selection - To select a different flash pattern, apply +12 VDC to the red wire and connect the black wire to the power supply ground. Touching the white wire to power supply ground for less than 1 second will change to the next pattern, for 1-2 seconds will change to the previous pattern, and over 2 seconds will reset to the default pattern (Pattern #1).
- Page 5 Light Head Next Pattern Previous Pattern Default Pattern Indication Indication Indication Solid Color (All sizes) No lights on All lights on All lights flash once Split Color (All sizes) Right side on Left side on All lights flash twice Table 2 - Pattern Change Indication Flash Pattern Syncing - The flash patterns of multiple light heads may be synced together by simply connect- ing the yellow wires of all light heads to be synced. Up to 20 light heads may be synced in this fashion. All flash patterns that share the same flash rate may be synced together. For example, any 75 FPM flash pattern may be synced with any other 75 FPM flash pattern, etc. If this feature is not desired, the end of the yellow wire must...
- Page 6 Parts & Exploded View Standard Unit Bezeled Unit Light Outer Lens Light Parts Kit Bezel (Figure 2) (Figure 3) Housing Lens Gasket Gasket Bezel Gasket 3x7 Red T52011 T52112 3x7 Amber T52011 T52113 T52007 T07919 T07916 T07922 3x7 Blue T52011 T52114 3x7 Red, Amber, Blue or Multi-Color T52011...
- Page 7 Installation Template Dimensions Figure 4 - 3x7 5.750" 2.875 1.000 1.625 3.250" 0.250 Figure 5 - 4x6 7.250" 3.625" 1.000 2.625" 5.250" Figure 6 - 7x9 Maintenance 0.250 The lens is field removable for cleaning and replacement. Remove the lens by unscrewing the four mounting screws. Use mild detergent, warm water and a soft cloth to clean both surfaces of the lens. Use of any other chemicals may void product warranty.
- Page 8 Manufacturer Limited Warranty Policy: Manufacturer warrants that on the date of purchase this product will conform to Manufacturer’s specifications for this product (which are available from the Manufacturer upon request). This Limited Warranty extends for Sixty (60) months from the date of purchase. DAMAGE TO PARTS OR PRODUCTS RESULTING FROM TAMPERING, ACCIDENT, ABUSE, MISUSE, NEGLIGENCE, UNAPPROVED MODIFICA- TIONS, FIRE OR OTHER HAZARD;...
Need help?
Do you have a question about the PriZm II and is the answer not in the manual?
Questions and answers