Table of Contents
Advertisement
Quick Links
Table of Contents
Operator's Manual
RCF3696, RCFM3696, RCF3610, & RCFM3610
Read the operation manual entirely. When you see this symbol, the
!
subsequent instructions and warnings are serious - follow without
exception. Your life and the lives of others depend on it!
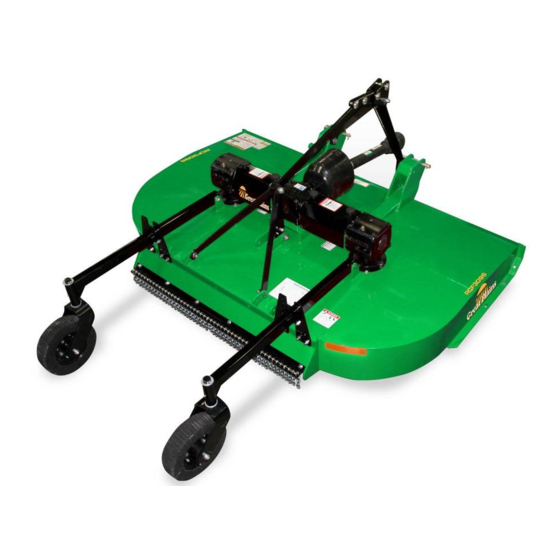
Semi-Mount with Single Tailwheels on Rear Axle Shown.
Also available in 3-Point Mount and Pull-Type Hook-up.
Illustrations may show optional equipment not supplied with standard unit.
ORIGINAL INSTRUCTIONS
© Copyright 2021
Rotary Cutters
Manufacturing, Inc.
www.greatplainsmfg.com
Printed 8/20/21
39667
EN
327-154M
Advertisement
Table of Contents

Related Manuals for GREAT PLAINS RCF3696


Summary of Contents for GREAT PLAINS RCF3696
- Page 1 Table of Contents Operator’s Manual RCF3696, RCFM3696, RCF3610, & RCFM3610 Rotary Cutters Manufacturing, Inc. www.greatplainsmfg.com Read the operation manual entirely. When you see this symbol, the subsequent instructions and warnings are serious - follow without exception. Your life and the lives of others depend on it! Semi-Mount with Single Tailwheels on Rear Axle Shown.
-
Page 2: Machine Identification
Machine Height Machine Length Machine Width Machine Weight Delivery Date First Operation Accessories Dealer Contact Information Name: Street: City/State: Telephone: Email: California Proposition 65 WARNING: Cancer and reproductive harm - www.P65Warnings.ca.gov RCF3696, RCFM3696, RCF3610, & RCFM3610 Rotary Cutters 327-154M 8/20/21... - Page 3 Great Plains Manufacturing, Inc. provides this publication “as is” without warranty of any kind, either expressed or implied. While every precaution has been taken in the preparation of this manual, Great Plains Manufacturing, Inc. assumes no responsibility for errors or omissions. Neither is any liability assumed for damages resulting from the use of the information contained herein.
- Page 4 Table of Contents Table of Contents Continued Skid Shoe Maintenance ....60 Long-Term Storage ......61 Ordering Replacement Parts .
-
Page 5: Important Safety Information
Important Safety Information Important Safety Information Listed below are common practices that may or may not be applicable to the products described in this manual. Safety at All Times Look for the Safety Alert Symbol The SAFETY ALERT SYMBOL indicates there is a potential hazard Careful operation is your best to personal safety and extra precaution must be taken. -
Page 6: Transport Safely
Lower implement to the ground and Replace parts on this implement correct tools and equipment. follow all shutdown procedures with genuine Great Plains parts Always properly match the wheel before leaving the operator’s seat to only. Do not alter this implement in size to the properly sized tire. -
Page 7: Wear Personal Protective Equipment (Ppe)
Use Seat Belt and ROPS Keep Riders Off Lights and Devices Machinery Great Plains recommends the use of a CAB or roll-over-protective- A slow moving power machine Never carry riders on the tractor or structures (ROPS) and seat belt can create a hazard when driven implement. - Page 8 Important Safety Information Listed below are common practices that may or may not be applicable to the products described in this manual. Avoid crystalline Silica Be aware of and follow OSHA If possible, change into disposable (or other local, State, or Federal) or washable work clothes at the (quartz) Dust guidelines for exposure to airborne...
- Page 9 Important Safety Information This page left blank intentionally. 8/20/21...
-
Page 10: Safety Labels
Spray soapy water onto the cleaned area. all damaged or missing labels. Order new labels from your Peel backing from label and press label firmly onto the nearest Great Plains dealer. To find your nearest dealer, surface. visit our dealer locator at www.greatplainsag.com. - Page 11 2 - Places (Left & right side) 33937 838-614C 2" x 9" Red Reflector 2 - Places (Left & right side) 33939 Rear Gauge Wheels Not Shown for Clarity 33937 818-552C Danger: Rotating driveline 2 - Places RCF3696, RCFM3696, RCF3610, & RCFM3610 Rotary Cutters 327-154M 8/20/21...
- Page 12 2- Places (Right front corner of deck and right back side of deck) 33939 Rear Gauge Wheels Not Shown for Clarity 818-556C Danger: Thrown Object 33939 Rear Gauge Wheels Not Shown for Clarity RCF3696, RCFM3696, RCF3610, & RCFM3610 Rotary Cutters 327-154M 8/20/21...
- Page 13 Danger: Rotating Driveline Semi-Mount Rotary Cutter Only 35042 838-094C Warning: High Pressure Pull-Type Rotary Cutter Only 35042 818-681C Notice: 20 MPH Max Travel Speed Located on pull-type hitch and all gauge wheels 33016 RCF3696, RCFM3696, RCF3610, & RCFM3610 Rotary Cutters 327-154M 8/20/21...
- Page 14 818-130C (Shown) Warning: 540 rpm 818-240C Warning: 1000 rpm 33937 818-540C Danger: Guard Missing Do Not Operate 22296 818-552C 22296 Danger: Rotating Driveline Hazard Keep Away 35042 858-558C Caution: Driveline Damage RCF3696, RCFM3696, RCF3610, & RCFM3610 Rotary Cutters 327-154M 8/20/21...
-
Page 15: Using This Manual
Table of Contents Introduction Introduction Owner Assistance Great Plains welcomes you to the growing family of new product owners. This Rotary Cutter has been designed The dealer should complete the Online Warranty with care and built by skilled workers using quality Registration at the time of purchase. -
Page 16: Section 1: Assembly & Set-Up
3-Point hitch category assembly task and make the job safer by having all the RCF3696 & RCFM3696 ....Cat. l or ll needed parts and equipment readily at hand. -
Page 17: Torque Requirements
Operator’s Manual. Remove temporary solid plug on top Plug Vented Dip- of T-box and replace with included 3/8" vent plug. See your nearest Great Plains dealer if vent plug is missing. Vented Dipstick Installation Oil Level Plug Refer to Figure 1-3:... - Page 18 A-Frame hitch plates (#2 & #3) with 1"-8 x 4 1/2" cap screw (#6) and nylon locknut (#9). 5. Install remaining clevis pin (#14), flat washer (#11) and hairpin cotter (#13) to the A-Frame hitch assembly (#2 & #3) as shown. RCF3696, RCFM3696, RCF3610, & RCFM3610 Rotary Cutters 327-154M 8/20/21...
- Page 19 6. Push/pull on driveline yoke to ensure it is securely fastened to the gearbox shaft. Rotate access doors (#5) closed and snap in place. 8. Rotate driveline storage hook down and place driveline (#6) in storage hook. RCF3696, RCFM3696, RCF3610, & RCFM3610 Rotary Cutters 327-154M 8/20/21...
- Page 20 See your nearest Great Plains dealer if it is not correct. 2. Install washers (#3) as follows: RCF(M)3696 With 15" Tailwheels Install two 2 1/4"...
- Page 21 See your nearest Great Plains dealer if it is not correct. 2. Attach left and right-hand tailwheel arms (#2) to axle tube (#1) with 5/8"-11 U-bolts (#5) and hex flange...
- Page 22 The following hook-up instructions are for RCF(M)3696 cutters. See page 19 for “RCF(M)3610 Hitch Hook-Up (3-Point)”. Make sure you have read and follow all Safety Alerts and Important Notes above before continuing. RCF3696, RCFM3696, RCF3610, & RCFM3610 Rotary Cutters 327-154M 8/20/21...
- Page 23 The following hook-up instructions are for RCF(M)3010 page 20. cutters. See page 18 for “RCF(M)3696 Hitch Hook-Up (3-Point)”. Make sure you have read and follow all Safety Alerts and Important Notes above before continuing. RCF3696, RCFM3696, RCF3610, & RCFM3610 Rotary Cutters 327-154M 8/20/21...
- Page 24 8. Continue with “Hydraulic Hook-up Option (3- damage to the tractor and cutter can occur if this Point)” on page 21. check is not made. Refer to “Check Driveline Collapsible Length” on page 28. RCF3696, RCFM3696, RCF3610, & RCFM3610 Rotary Cutters 327-154M 8/20/21...
- Page 25 The Cat. II quick hitch attaches to adapter bushing (#5) outside the cutter hitch plates. Secure bushing (#5) to hitch pin (#1) with roll pin (#4) RCF3696, RCFM3696, RCF3610, & RCFM3610 Rotary Cutters 327-154M 8/20/21...
- Page 26 Table of Contents Section 1: Assembly & Set-Up This page left blank intentionally. RCF3696, RCFM3696, RCF3610, & RCFM3610 Rotary Cutters 327-154M 8/20/21...
- Page 27 (#1) to 45-50 ft-lb torque. 6. Push/pull on driveline yoke to ensure it is securely fastened to the gearbox shaft. Rotate access doors (#5) closed and snap in place. RCF3696, RCFM3696, RCF3610, & RCFM3610 Rotary Cutters 327-154M 8/20/21...
- Page 28 See b. Tighten locknuts (#4) to the correct torque. your nearest Great Plains dealer if it is not correct. 6. Continue with “Hitch Hook-Up (Semi-Mount)” on 2. Install washers (#5) as follows: page 26.
- Page 29 See your nearest Great Plains dealer if it is not correct. 2. Attach left and right-hand tailwheel arms (#2) to axle tube (#1) with 5/8"-11 U-bolts (#4) and hex flange...
- Page 30 Make sure you have read and follow all Safety Alerts to stop lateral float. Please consult your tractor’s and Important Notes listed on page 26 before manual for adjusting instructions. continuing. RCF3696, RCFM3696, RCF3610, & RCFM3610 Rotary Cutters 327-154M 8/20/21...
- Page 31 IMPORTANT: Check driveline minimum collapsible length before completing “Driveline Hook-up (Semi-Mount)”. Structural damage to the tractor and cutter can occur if this check is not made. Refer to “Check Driveline Collapsible Length” on page 28. RCF3696, RCFM3696, RCF3610, & RCFM3610 Rotary Cutters 327-154M 8/20/21...
-
Page 32: Check Driveline Collapsible Length
3. Continue with driveline hook-up. Refer to: off shaft. • “Driveline Hook-up (3-Point)” on page 20 9. Continue with “Assemble Inner & Outer Driveline • “Driveline Hook-up (Semi-Mount)” on page 27. Halves” on this page. RCF3696, RCFM3696, RCF3610, & RCFM3610 Rotary Cutters 327-154M 8/20/21... - Page 33 Start tractor and drive forward enough to clear the support blocks. 8. Lower implement to ground and shut tractor down using “Tractor Shutdown Procedure”. RCF3696, RCFM3696, RCF3610, & RCFM3610 Rotary Cutters 327-154M 8/20/21...
-
Page 34: Axle Assembly (Pull-Type)
5. If leveling rods (#10) were removed while uncrating See your nearest Great Plains dealer if mounting lug is the unit, reattach them to axle (#3) as shown with not installed correctly or is the wrong mounting lug. - Page 35 (#12). Make sure detent RCF(M)3610 Tongue Assembly pin is fully inserted. Figure 1-24 2. Adjust park jack to be vertical. Refer to “Park Jack Angle Alignment” on page 41. RCF3696, RCFM3696, RCF3610, & RCFM3610 Rotary Cutters 327-154M 8/20/21...
- Page 36 1" OD bushings (#3), two flat washers (#9), 5/8"-11 x 7 1/2" bolt (#5), and hex nut (#8). Tighten hex nut to the correct torque. 33946 Equal Angle Hitch Assembly Figure 1-25 RCF3696, RCFM3696, RCF3610, & RCFM3610 Rotary Cutters 327-154M 8/20/21...
- Page 37 4. Pry open access doors (#13) in the gearbox shield by placing a tool in the notch at the back of both doors. 33947 Constant Velocity Hitch Assembly (RCF3610 Shown) Figure 1-26 RCF3696, RCFM3696, RCF3610, & RCFM3610 Rotary Cutters 327-154M 8/20/21...
- Page 38 Make sure you have read and follow all Safety Alerts drawbar. Secure hitch pin with hitch pin keeper (#5). and Important Notes on this page. One inch diameter hitch pin (#6) and hitch pin keeper (#5) are customer supplied. RCF3696, RCFM3696, RCF3610, & RCFM3610 Rotary Cutters 327-154M 8/20/21...
- Page 39 Make sure chain hook is securely locked in 4. After all air is purged from the hydraulic system and place. all hydraulic pressure is relieved, tighten hose fitting at the hydraulic cylinder. RCF3696, RCFM3696, RCF3610, & RCFM3610 Rotary Cutters 327-154M 8/20/21...
-
Page 40: Section 2: Assembly Of Optional Equipment
See “Constant Velocity Driveline (Pull-Type)” on page 33. 33954 Rear Chain Guard (RCF(M)3696 Double Chain Shown) Figure 2-1 Notched End Notched End 33953 Front Chain Guard (RCF(M)3696 Single Chain Shown) Figure 2-2 RCF3696, RCFM3696, RCF3610, & RCFM3610 Rotary Cutters 327-154M 8/20/21... -
Page 41: Rubber Safety Guards (Optional)
Attach front Rubber Deflectors (#1) and reflector bracket (#4) to the deck front with 1/2" -13 x 3 1/2" long carriage bolts (#2) and hex whiz nuts (#3). 33955 Front Rubber Guard (RCF(M)3696 Shown) Figure 2-4 RCF3696, RCFM3696, RCF3610, & RCFM3610 Rotary Cutters 327-154M 8/20/21... - Page 42 The RCF3096, RCF3010, & RCFM3010 cutters have two hitch options, swivel clevis hitch shown in Figure 2-6 or Performance hitch shown in Figure 2-7. See your nearest Great Plains dealer should you want to change your hitch set-up. Refer to Figure 2-5: Part No.
- Page 43 (#6). NOTE: For additional safety in transport, raise cutter as high as possible, and shorten check chains to prevent inadvertent falling in transport. 16264 Check Chain Assembly Figure 2-8 RCF3696, RCFM3696, RCF3610, & RCFM3610 Rotary Cutters 327-154M 8/20/21...
- Page 44 Table of Contents Section 2: Assembly of Optional Equipment This page left blank intentionally. RCF3696, RCFM3696, RCF3610, & RCFM3610 Rotary Cutters 327-154M 8/20/21...
-
Page 45: Section 3: Adjustments
Make sure base of park jack is level with or lower than the head, especially after the wings are folded up. See cover picture for correct positioning. RCF3696, RCFM3696, RCF3610, & RCFM3610 Rotary Cutters 327-154M 8/20/21... -
Page 46: Cutting Height Adjustment
Set Front Blade Tip Should Rear Blade Tip Should Be Set Be Set At Cutting Height Slightly Higher Than Cutting Height Cutting Height and Deck Leveling Front to Back Figure 3-3 RCF3696, RCFM3696, RCF3610, & RCFM3610 Rotary Cutters 327-154M 8/20/21... -
Page 47: Center Link Adjustment
5. Recheck cutting height. If required, repeat “Cutting Height Adjustment” instructions on page 42 and instructions for “Level Front To Back” on this page. 33959 3-Point Cutter Height Adjustment Figure 3-5 RCF3696, RCFM3696, RCF3610, & RCFM3610 Rotary Cutters 327-154M 8/20/21... - Page 48 Front Blade Tip Front Blade Tip Should Be Rear Blade Tip Should Be Set Set At Cutting Height Slightly Higher Than Cutting Height Cutting Height & Deck Leveling Front To Back Figure 3-7 RCF3696, RCFM3696, RCF3610, & RCFM3610 Rotary Cutters 327-154M 8/20/21...
- Page 49 (#3) that will fill the exposed cylinder rod. The following spacers are available. • Two 1" spacers • One 1 1/4" spacer • One 1 1/2" spacer • One 1 3/4" spacer RCF3696, RCFM3696, RCF3610, & RCFM3610 Rotary Cutters 327-154M 8/20/21...
- Page 50 Figure 3-11 on page 47. 2. Measure distance from end of blade (cutting tip) to ground. This distance is the cutting height. 33957 Deck Leveling Figure 3-9 RCF3696, RCFM3696, RCF3610, & RCFM3610 Rotary Cutters 327-154M 8/20/21...
- Page 51 Rear Blade Tip Front Blade Tip Front Blade Tip Should Be Rear Blade Tip Should Be Set Set At Cutting Height Slightly Higher Than Cutting Height Cutting Height & Deck Leveling Figure 3-11 RCF3696, RCFM3696, RCF3610, & RCFM3610 Rotary Cutters 327-154M 8/20/21...
-
Page 52: Operating Checklist
Make repairs before putting the off instantly. implement back into service. • All guards and shields must be installed and in good working condition while operating the implement. RCF3696, RCFM3696, RCF3610, & RCFM3610 Rotary Cutters 327-154M 8/20/21... -
Page 53: Section 4: Operating Instructions
3. Inspect tractor safety equipment to make sure it is 14. Investigate cause of vibration and make repairs installed and in good working condition. before putting cutter back into service. RCF3696, RCFM3696, RCF3610, & RCFM3610 Rotary Cutters 327-154M 8/20/21... -
Page 54: Blade Engagement & Disengagement
Unlock first 50 feet of cutting. Check cutter levelness and blades, remove support blocks, and repeat “Blade cutting height to make certain it is adjusted properly. Engagement” instructions. RCF3696, RCFM3696, RCF3610, & RCFM3610 Rotary Cutters 327-154M 8/20/21... -
Page 55: Turning Angles For Pull-Type Cutters
25 degrees up or down or at any angle that will force the driveline to bind and/or hit the tractor drawbar. 20795 Right CV Driveline Figure 4-3 Ditch / Bank Wrong Ditch / Bank Crossing Steep Ditches and Banks Figure 4-1 RCF3696, RCFM3696, RCF3610, & RCFM3610 Rotary Cutters 327-154M 8/20/21... - Page 56 6. If equipped with hydraulic hoses (#6 & #7), disconnect hose from tractor. Insert couplers through spring hose loop (#5) to keep couplers out of the dirt. RCF3696, RCFM3696, RCF3610, & RCFM3610 Rotary Cutters 327-154M 8/20/21...
- Page 57 (#11) through park jack and mounting bracket. 9. Disconnect hydraulic hose (#8) from the tractor. Insert couplers through spring hose loop (#7) to keep couplers out of the dirt. RCF3696, RCFM3696, RCF3610, & RCFM3610 Rotary Cutters 327-154M 8/20/21...
- Page 58 With a little practice you will be cutter can be consistently returned to the same cutting pleased with what you and your Great Plains cutter can and transport height. If you have a pull-type or semi-mount cutter make sure...
-
Page 59: Section 5: Maintenance & Lubrication
Keep rotating parts and 3. Replace wheel rims and tires as needed with gearboxes free from debris. genuine Great Plains parts. Do not loosen split rim hardware (#1) until all air pressure in the tire has •... -
Page 60: Cutter Blade Maintenance
Do not remove more material than necessary. b. Do not heat and/or pound out a cutting edge. c. Do not grind blades to a razor edge. Leave a blunt cutting edge approximately 1/16" (2 mm) thick. RCF3696, RCFM3696, RCF3610, & RCFM3610 Rotary Cutters 327-154M 8/20/21... - Page 61 Great Plains List of Cutter Blades Part No. Part Description 820-195C RCF3696 CUTTER BLADE 1/2 x 4 x 20 CCW 820-196C RCF3696 CUTTER BLADE 1/2 x 4 x 20 CW 820-137C RCF3610 CUTTER BLADE 1/2 x 4 x 25 CCW...
-
Page 62: Clutch Run-In
Figure 5-6 for exact spring length. 6. The clutch should be checked during the first hour of cutting and periodically each week. An additional set of scribe marks can be added to check for slippage. RCF3696, RCFM3696, RCF3610, & RCFM3610 Rotary Cutters 327-154M 8/20/21... -
Page 63: Clutch Disassembly
Place springs (#2) over the bolts and secure with nuts (#1). 1.27" 826-888C Main 1000 (32.2 mm) Refer to Figure 5-6: Progressively tighten each spring retainer bolt until correct spring height “A” is reached. RCF3696, RCFM3696, RCF3610, & RCFM3610 Rotary Cutters 327-154M 8/20/21... -
Page 64: Flex Couplers
Flex Couplers Skid Shoe Maintenance Refer to Figure 5-7: Refer to Figure 5-8: Replace two rubber discs (#1), (Great Plains Part No. 1785273), as follows: If additional repair parts are WARNING required, refer to Great Plains’ Parts Manuals 326-600P To avoid serious injury or death: for RCF(M)3696 and 326-423P for RCF(M)3610 cutters. -
Page 65: Long Term Storage
4. Repaint parts where paint is worn or scratched to prevent rust. Ask your Great Plains dealer for aerosol touch-up paint. Paint is also available in touch-up bottles with brush, quarts, and gallon sizes by adding TU, QT, or GL to the end of the aerosol part number. -
Page 66: Lubrication Points
Quantity = Until grease purges from the relief hole Pillow Bearing (Pull-Type Cutter) (RCF3610 & RCFM3610) Type of Lubrication: Multi-Purpose Grease Quantity = As required 33966 Required Ratchet Jack Type of Lubrication: Multi-Purpose Grease Quantity = As required 35068 RCF3696, RCFM3696, RCF3610, & RCFM3610 Rotary Cutters 327-154M 8/20/21... - Page 67 NOTE: Use a suction or siphon pump to drain gearboxes of oil when there is not an oil drain plug. Hours RCF(M)3610 Flex Coupler Type of Lubrication: Multi-Purpose Grease Quantity = As required 35008 RCF3696, RCFM3696, RCF3610, & RCFM3610 Rotary Cutters 327-154M 8/20/21...
- Page 68 CV Driveline U-Joints & Profile Shields Type of Lubrication: Multi-Purpose Grease Quantity = 6 pumps 14618 13755 Hours Telescoping Driveline Profiles With Zerks 27845 Type of Lubrication: Multi-Purpose Grease Quantity = 6 pumps 27847 RCF3696, RCFM3696, RCF3610, & RCFM3610 Rotary Cutters 327-154M 8/20/21...
-
Page 69: Pull-Type Hitch
Quantity = Clean & coat the inner tube of the driveline 14618 with a light film of Multi-Purpose Grease and then reassemble. Pull-Type Hitch (RCF3010 & RCFM3010) Type of Lubrication: Multi-Purpose Grease Quantity = As required 70156 RCF3696, RCFM3696, RCF3610, & RCFM3610 Rotary Cutters 327-154M 8/20/21... -
Page 70: Section 6: Specifications & Capacities
Spring shock absorber on axle of semi-mount & pull type Front guard Optional: Rubber deflector, single chain guard, or double chain guard Rear guard Optional: Rubber deflector, single chain guard, or double chain guard RCF3696, RCFM3696, RCF3610, & RCFM3610 Rotary Cutters 327-154M 8/20/21... - Page 71 RCF(M)3696 = 12' - 5" (3.78 m) RCF(M)3610 = 10' - 6 1/2" (3.21 m) RCF(M)3610 = 13' - 1" (3.99 m) 2' - 9 3/4" (0.86 m) 33969 Pull-Type Rotary Cutter (RC3696 Shown) RCF3696, RCFM3696, RCF3610, & RCFM3610 Rotary Cutters 327-154M 8/20/21...
-
Page 72: Section 7: Features & Benefits
Section 7: Features & Benefits RCF(M)3696 & RCF(M)3610 Models Features Benefits Surpassed rugged All Great Plains Cutters have been designed and tested and meet rigorous voluntary industry standards testing procedures. 540 or 1000 rpm Fits wider variety of tractors. High gearbox hp rating Gearboxes are built rugged. -
Page 73: Section 8: Troubleshooting
Blades loose Tighten blade bolts Blade carrier bent Replace blade carrier Excessive vibration Blade broken Replace blade Blade will not swing Remove and inspect blade Blades have unequal weight Replace both blades RCF3696, RCFM3696, RCF3610, & RCFM3610 Rotary Cutters 327-154M 8/20/21... -
Page 74: Section 9: Torque & Tire Inflation Charts
35 to 40 ft-lbs. (Beaded washer should be embedded halfway into rubber Blade Bolt Lock Nut 450 ft-lbs Blade Carrier Hub Nut 450 ft-lbs minimum Wheel Lug Nuts 85 ft-lbs Tire Inflation Chart Tire Size Inflation PSI 29" AC Tire RCF3696, RCFM3696, RCF3610, & RCFM3610 Rotary Cutters 327-154M 8/20/21... -
Page 75: Warranty
20 miles per hour (32 kilometers per hour), or failures occurring from soils with rocks, stumps, or other obstructions. Great Plains reserves the right to make changes in materials or design of the product at any time without notice. he warranty shall not be interpreted to render Great Plains liable for damages of any kind, direct or consequential or contingent to property. - Page 76 Great Plains, Mfg. 1525 E. North St. P.O. Box 5060 Salina, KS 67402...
Need help?
Do you have a question about the RCF3696 and is the answer not in the manual?
Questions and answers