Table of Contents
Advertisement
Quick Links
Advertisement
Table of Contents

Related Manuals for HQST Voyager

Summary of Contents for HQST Voyager
- Page 1 VOYAGER Waterproof Solar Charge Controller 20A PWM Version 1.0...
- Page 2 Important Safety Instructions Please save these instructions. This manual contains important safety, installation, and operating instructions for the charge controller. The following symbols are used throughout the manual: Indicates a potentially dangerous condition. Use extreme WARNING caution when performing this task Indicates a critical procedure for safe and proper operation of CAUTION the controller...
- Page 3 Battery Safety Lead-acid and LiFePO4 batteries can be dangerous. Ensure no sparks or flames are present when working near batteries. Refer to battery manufacturer’s specific charging rate setting. Do NOT charge improper battery type. Never attempt to charge a damaged battery, frozen battery, or non-rechargeable battery.
-
Page 4: Table Of Contents
Table of Contents General Information Dimensions Optional Component Installation Mounting Recommendations Wiring Wire AWG Operation Change the Parameters 1. Clear overall power generation to 0 KWh 2. Selecting Battery Type 3. Change from C° to F° 4. Select Lithium Battery Voltage and Charge Voltage System Status Icons Four Charging Stages Troubleshooting... -
Page 5: General Information
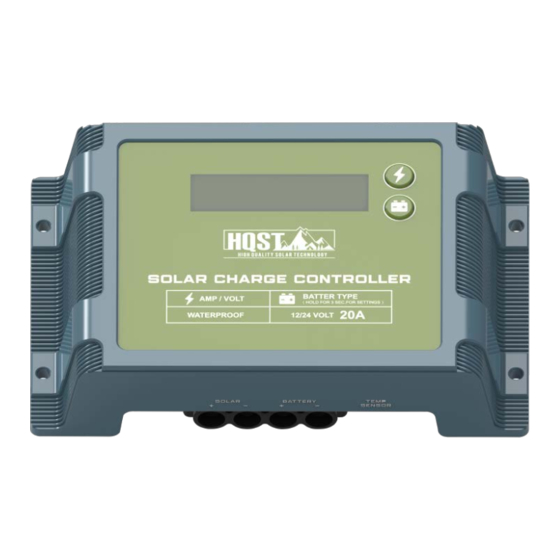
General Information The Voyager is an advanced PWM charge controller suitable for 12/24VV solar system applications. It features an intuitive LCD displaying information such as charging current and battery voltage, as well as an error code system to quickly diagnose potential faults. The Voyager is completely waterproof and suitable for charging up to 4 different battery types, including Lithium. -
Page 6: Dimensions
( HOLD FOR 3 SEC.FOR SETTINGS ) WATERPROOF 12/24 VOLT Optional Component The Voyager is shipped by itself with no additional components. Optional components that require a separate purchase: Voyager Temperature Sensor: Measures the temperature at the battery and uses this data for very accurate temperature compensation. -
Page 7: Installation
WARNING batteries. Gas can accumulate and there is a risk of explosion. The Voyager is designed for vertical mounting on a wall. Choose Mounting Location—place the controller on a vertical surface protected from direct sunlight, high temperatures, and water. Make sure there is good ventilation. -
Page 8: Wire Awg
Cable Sizing Distance Wiring < 10ft 10ft-20ft Cable Total Length One-Way Distance Cable Size (AWG) 14-12AWG 12-10AWG NEC Maximum Current for different Copper Wire Sizes Current 95A 130A 170A Max. The solar controller should be installed as near the battery as NOTE possible to avoid efficiency loss. -
Page 9: Change The Parameters
The Voyager is an easy to use controller requiring minimal maintenance. The user can adjust some parameters based on the display screen. The user can manually cycle through the display screens by using the"AMP/VOLT" and "BATTERY TYPE" buttons Cycles forwards through the different display screens. -
Page 10: Select Lithium Battery Voltage And Charge Voltage
4. Select Lithium Battery Voltage and Charge Voltage In the screen showing the battery voltage, hold down "BATTERY TYPE" for approximately 3-5 seconds BATT. before the screen flashes the current battery type. Once TYPE flashing, use the"AMP/VOLT" button to highlight LI. Once LI is flashing, tap the "BATTERY TYPE"... -
Page 11: Four Charging Stages
Four Charging Stages The Voyager has a 4-stage battery charging algorithm for a rapid, efficient, and safe battery charging. They include: Bulk Charge, Boost Charge, Float Charge, and Equalization. PWM Technology The Voyager utilizes Pulse Width Modulation (PWM) technology for battery charging. - Page 12 CAUTION When using the Voyager to charge a 24V lithium battery bank, set the system voltage to 24V instead of auto recognition. Otherwise, the over-discharged 24V lithium battery will not be activated.
-
Page 13: Troubleshooting
Troubleshooting Indicator Description Troubleshoot Use a multi-meter to check the voltage of Battery the battery. Make sure the battery voltage over voltage is not exceeding the rated specification of Flashing the charge controller. Disconnect battery. Use a multi-meter to verify the rated battery Battery voltage. -
Page 14: Maintenance
Maintenance For best controller performance, it is recommended that these tasks be performed from time to time. 1.Check wiring going into the charge controller and make sure there is no wire damage or wear. 2.Tighten all terminals and inspect any loose, broken, or burnt up connections 3.Occasionally clean the case using a damp cloth Technical Specifications Electrical Parameters... - Page 15 Mechanical Parameters Grounding Type Positive 20-6 AWG, 2-pin terminals Controller Terminals Temperature Compensation -3mV/℃/2V, excludes LI Operating Temperature -31°F ~113°F Storage Temperature -31°F ~ 167°F Operating / Storage Humidity 10% ~ 90%, No Condensation Protection Level IP67 6.08 x 3.83 x 1.40 in Dimensions 0.55 lbs Weight...
- Page 16 sales@myhqsolar.com 800-390-9264...
Need help?
Do you have a question about the Voyager and is the answer not in the manual?
Questions and answers