Advertisement
Quick Links
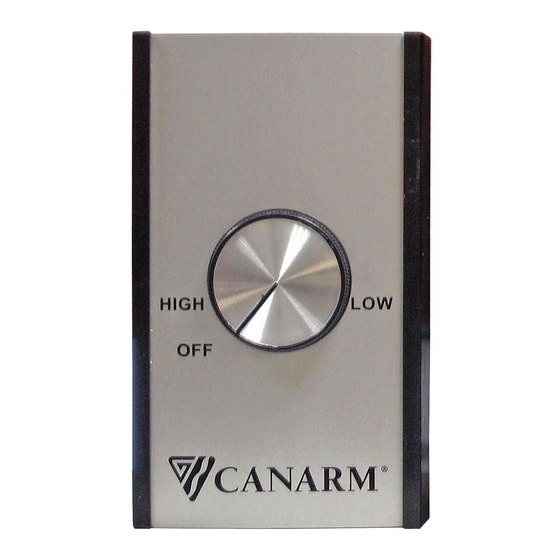
CANARM - MC SERIES- SPEED CONTROLLER
CANARM - MC SERIES- SPEED CONTROLLER
WALL MOUNT SPEED CONTROL INSTALLATION INSTRUCTIONS - MC3
WALL MOUNT SPEED CONTROL INSTALLATION INSTRUCTIONS - MC3
WARNING!
WARNING!
Power must be turned off before wiring. Connect control in series with motor and line voltage - never connect
Power must be turned off before wiring. Connect control in series with motor and line voltage - never connect
control across line. For use with Industrial Ceiling Fans only.
control across line. For use with Industrial Ceiling Fans only.
WIRING
WIRING
DOWN DRAFT
DOWN DRAFT
BLACK
BLACK
BLUE
BLUE
MOTOR
MOTOR
RED
RED
WHITE
WHITE
GREEN
GREEN
MOUNTING
MOUNTING
Controls are designed to fit a standard electrical box.
Controls are designed to fit a standard electrical box.
Secure control with outer bracket tabs.
Secure control with outer bracket tabs.
MINIMUM SPEED ADJUSTMENT
MINIMUM SPEED ADJUSTMENT
This control was designed to operate on Canarm Ltd. industrial fans. If you want to adjust the minimum speed, locate the minimum
This control was designed to operate on Canarm Ltd. industrial fans. If you want to adjust the minimum speed, locate the minimum
speed adjustment and follow these instructions.
speed adjustment and follow these instructions.
a) Motor must be in actual operating condition to achieve proper speed adjustment. (Motor will not slow down unless blades are
a) Motor must be in actual operating condition to achieve proper speed adjustment. (Motor will not slow down unless blades are
attached).
attached).
b) Turn main control knob clockwise to lowest speed position.
b) Turn main control knob clockwise to lowest speed position.
c) Locate and adjust minimum speed setting on front plate with screwdriver (rotate clockwise to increase minimum speed,
c) Locate and adjust minimum speed setting on front plate with screwdriver (rotate clockwise to increase minimum speed,
counter-clockwise to decrease minimum speed so that motor runs sufficient torque to prevent stalling. If fan stops on its own then
counter-clockwise to decrease minimum speed so that motor runs sufficient torque to prevent stalling. If fan stops on its own then
minimum setting is too low.).
minimum setting is too low.).
d) Motor will now operate from this present minimum speed to full speed.
d) Motor will now operate from this present minimum speed to full speed.
FINAL MOUNTING
FINAL MOUNTING
a) Install front dial plate (Remove protective plastic on face of dial plate).
a) Install front dial plate (Remove protective plastic on face of dial plate).
b) Turn main control until switch clicks off.
b) Turn main control until switch clicks off.
c) Push on the knob ensuring that the pointer lines up with the off position.
c) Push on the knob ensuring that the pointer lines up with the off position.
A qualified electrician in accordance with the national electrical code and other local codes, which may apply, should install unit.
A qualified electrician in accordance with the national electrical code and other local codes, which may apply, should install unit.
This control must be grounded when installed. Failure to follow these instructions may result in electrical shock or a fire hazard.
This control must be grounded when installed. Failure to follow these instructions may result in electrical shock or a fire hazard.
To reduce the risk of fire or electrical shock this control must not be used at ratings exceeding those clearly marked on the
To reduce the risk of fire or electrical shock this control must not be used at ratings exceeding those clearly marked on the
device. The manufacturer is not responsible for any expense, inconvenience or consequent damage caused by items of our
device. The manufacturer is not responsible for any expense, inconvenience or consequent damage caused by items of our
manufacture or sale.
manufacture or sale.
For service, contact your local retail outlet or distributor. The warranty period shall be 12 months from the purchase date. Proof of
For service, contact your local retail outlet or distributor. The warranty period shall be 12 months from the purchase date. Proof of
payment is required for warranty validation. In all cases, the warranty shall apply only to defects in workmanship and specifically
payment is required for warranty validation. In all cases, the warranty shall apply only to defects in workmanship and specifically
exclude any damage caused by overload, short circuit, misuse, act of vandalism, fortuitous events, acts of God, flood, fire, hail or
exclude any damage caused by overload, short circuit, misuse, act of vandalism, fortuitous events, acts of God, flood, fire, hail or
natural disaster. This warranty becomes invalid should the installation have been made contrary to our instructions.
natural disaster. This warranty becomes invalid should the installation have been made contrary to our instructions.
Installation or Product problems? Do not return to store of purchase.
Installation or Product problems? Do not return to store of purchase.
Contact Canarm Service at 1-800-265-1833 (CANADA) 1-800-267-4427 (U.S.A.)
Contact Canarm Service at 1-800-265-1833 (CANADA) 1-800-267-4427 (U.S.A.)
M0060 - 06/15/05
M0060 - 06/15/05
#2 Chootoo Road, South Aranguez, San Juan, Trinidad
INSTALLATION GUIDE
INSTALLATION GUIDE
UP DRAFT
UP DRAFT
CONTROL
CONTROL
BLACK
BLACK
120 VOLTS
120 VOLTS
MOTOR
MOTOR
SUPPLY
SUPPLY
WHITE
WHITE
SAFETY WARNING - PLEASE READ CAREFULLY
SAFETY WARNING - PLEASE READ CAREFULLY
WARRANTY
WARRANTY
Monday to Friday 8:00 - 5:00pm e.s.t.
Monday to Friday 8:00 - 5:00pm e.s.t.
CANARM LTD.
CANARM LTD.
2157 PARKEDALE AVENUE
2157 PARKEDALE AVENUE
BROCKVILLE, ONTARIO K6V 5V6
BROCKVILLE, ONTARIO K6V 5V6
TELEPHONE: (613) 342-5424
TELEPHONE: (613) 342-5424
FAX: 1-800-263-4598
FAX: 1-800-263-4598
E-MAIL: agsales@canarm.ca
E-MAIL: agsales@canarm.ca
CONTROL
CONTROL
BLACK
BLACK
RED
RED
BLUE
BLUE
WHITE
WHITE
GREEN
GREEN
CANARM LTEE.
CANARM LTEE.
CANARM LTD.
CANARM LTD.
8500 RUE GRENACHE
8500 RUE GRENACHE
808 COMMERCE PARK DRIVE
808 COMMERCE PARK DRIVE
ANJOU, QUEBEC H1J 2B1
ANJOU, QUEBEC H1J 2B1
OGDENSBURG, NY 13669
OGDENSBURG, NY 13669
TELEPHONE: (514) 353-2255
TELEPHONE: (514) 353-2255
TELEPHONE: (800) 267-4427
TELEPHONE: (800) 267-4427
FAX: (514) 353-2522
FAX: (514) 353-2522
FAX: 1-800-263-4598
FAX: 1-800-263-4598
E-MAIL: agsales@canarm.ca
E-MAIL: agsales@canarm.ca
E-MAIL: agsales@canarm.ca
E-MAIL: agsales@canarm.ca
BLACK
BLACK
120 VOLTS
120 VOLTS
SUPPLY
SUPPLY
WHITE
WHITE
Page 1 of 2
Page 1 of 2
Advertisement

Related Manuals for Canarm MC Series

Summary of Contents for Canarm MC Series
- Page 1 MINIMUM SPEED ADJUSTMENT This control was designed to operate on Canarm Ltd. industrial fans. If you want to adjust the minimum speed, locate the minimum This control was designed to operate on Canarm Ltd. industrial fans. If you want to adjust the minimum speed, locate the minimum speed adjustment and follow these instructions.
- Page 2 MINIMUM SPEED ADJUSTMENT This control was designed to operate on Canarm Ltd. industrial fans. If you want to adjust the minimum speed, locate the minimum This control was designed to operate on Canarm Ltd. industrial fans. If you want to adjust the minimum speed, locate the minimum speed adjustment and follow these instructions.
- Page 3 CANARM - MC SERIES- SPEED CONTROLLER CANARM - MC SERIES- SPEED CONTROLLER INSTALLATION GUIDE INSTALLATION GUIDE #2 Chootoo Road, South Aranguez, San Juan, Trinidad...