Alpine X902D-DU Installation Manual
Xxl premium infotainment system for fiat ducato
Hide thumbs
Also See for X902D-DU:
- Software update procedure (3 pages) ,
- Quick reference manual (165 pages)
Advertisement
Quick Links
FOR CAR USE ONLY/NUR FÜR AUTOMOBILGEBRAUCH/POUR APPLICATION AUTOMOBILE
UNIQUEMENT/SOLO PARA USO EN AUTOMÓVILES/PER IL SOLO UTILIZZO IN AUTOMOBILE
EN
R
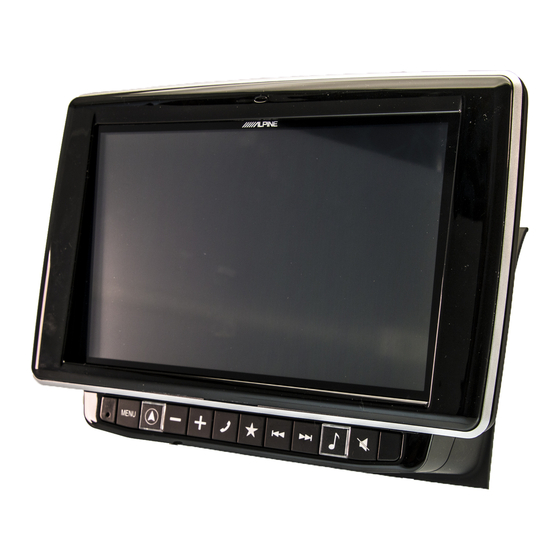
XXL PREMIUM INFOTAINMENT SYSTEM
DE
X902D-DU/ i902D-DU
Fiat Ducato
FR
ES
IT
Installation Manual
Einbauanleitung
Manuel d'installation
Manual de instalación
Manuale di installazione
Advertisement

Related Manuals for Alpine X902D-DU


Summary of Contents for Alpine X902D-DU
- Page 1 FOR CAR USE ONLY/NUR FÜR AUTOMOBILGEBRAUCH/POUR APPLICATION AUTOMOBILE UNIQUEMENT/SOLO PARA USO EN AUTOMÓVILES/PER IL SOLO UTILIZZO IN AUTOMOBILE XXL PREMIUM INFOTAINMENT SYSTEM X902D-DU/ i902D-DU Fiat Ducato Installation Manual Einbauanleitung Manuel d’installation Manual de instalación Manuale di installazione...
- Page 3 Do not tap into these leads to provide power for this THE REACH OF CHILDREN. unit. When connecting the i/X902D-DU to the fuse box, make sure the fuse for the intended circuit of the i/X902D-DU has the Swallowing them may result in serious injury. If swallowed, consult a appropriate amperage.
- Page 4 • Trennen Sie das Kabel vom (–) Batteriepol, bevor Sie Ihr Fahrzeug verlieren oder ein Feuer ausbricht. • i/X902D-DU einbauen. So vermeiden Sie die Gefahr einer KLEINE GEGENSTÄNDE WIE BATTERIEN VON KINDERN Beschädigung des Geräts, falls es zu einem Kurzschluss kommt.
- Page 5 Lors du raccordement du etc., ce qui pourrait provoquer un accident grave. • i/X902D-DU au boîtier à fusibles, s'assurer que le fusible du circuit destiné au i/X902D-DU possède la bonne intensité. Sinon, l’appareil et/ou le véhicule risquent d’être endommagés. En cas de...
- Page 6 No coja corriente de estos conductores para VOLANTE DE DIRECCIÓN O LA PALANCA DE CAMBIOS alimentar esta unidad. Cuando conecte el i/X902D-DU a la caja de DE VELOCIDAD. fusibles, asegúrese de que el fusible del circuito que piensa utilizar para el i/X902D-DU sea del amperaje adecuado.
- Page 7 L’utilizzo di queste parti può inibire il controllo del veicolo e causare incendi o altro. • Prima di installare l'unità i/X902D-DU, scollegare il cavo dal CONSERVARE LE PARTI DI PICCOLE DIMENSIONI QUALI terminale (–) della batteria. Questa operazione riduce il rischio di LE PILE FUORI DALLA PORTATA DEI BAMBINI.
- Page 8 Parts list (1-9) Teileliste (1-9) Liste de pièces (1-9) Lista de piezas (1-9) Elenco dei componenti (1-9)
- Page 9 1 AVN Unit 1 Ensemble AVN 1 Unità AVN 2 Display 2 Écran 2 Display 3 Display housing with 3 Boîtier de l'écran avec 3 Alloggiamento del keys and cable touches et câble display con tasti e cavo 4 Bracket for AVN Unit 4 Support de 4 Staffa per unità...
- Page 10 Required Tools (10-14) Werkzeuge (10-14) Outils nécessaires (10-14) Herramientas necesarias (10-14) Attrezzi necessari (10-14)
- Page 11 0 PH1 Screwdriver 0 Tournevis PH1 0 Cacciavite PH1 ! PH2 Screwdriver ! Tournevis PH2 ! Cacciavite PH2 @ T25 Screwdriver @ Tournevis T25 @ Cacciavite T25 # 2 mm Allen Key @ Clé Allen 2 mm @ Cacciavite a brugola $ 8 mm Spanner $ Clé...
- Page 12 Disconnection of battery Trennen der Batterie vom Stromnetz Déconnexion de la batterie Desconexión de la batería Distacco della batteria...
- Page 13 WARNING: ADVERTENCIA: Make sure to disconnect the cable from the Antes de proceder, asegúrese de desco- negative battery terminal before proceeding. nectar el cable del terminal negativo de la batería. Follow car manufacturer’s guidelines. Siga las instrucciones del fabricante del coche.
- Page 14 Installation (1‑4) Einbau (1‑4) Installation (1‑4) Instalación (1‑4) Installazione (1‑4)
- Page 15 Fiat Ducato with radio preparation: If the Fiat Ducato con preinstalación de radio: car is not equipped with this part (1), replace Si el coche no va equipado con esta pieza the radio dock with the following FIAT (1) sustituya el receptáculo de la radio por original part: 735535319 (more details on la siguiente pieza original de FIAT: page 34).
- Page 16 Installation (5‑8) Einbau (5‑8) Installation (5‑8) Instalación (5‑8) Installazione (5‑8)
- Page 17 Open the note pad holder. Abra el soporte para blocs de notas. Release both screws and remove the Suelte ambos tornillos y retire el soporte. holder. De esta forma ya puede acceder al espacio Now you have access to the space for GPS para la instalación de la antena GPS y de Antenna installation and routing of further otros cables de señal y de antenas.
- Page 18 Installation (9‑12) Einbau (9‑12) Installation (9‑12) Instalación (9‑12) Installazione (9‑12)
- Page 19 Fusebox Caja de fusibles Disconnect the two 60 pin connectors Desconecte los dos conectores de 60 cla- below and remove the housings. vijas de abajo y retire las carcasas. Left connecor (green): Conector izquierdo (verde): Pin 4 = Reverse Light Clavija 4 = Luz de marcha atrás Right Connector (black): Conector derecho (negro):...
- Page 20 Installation (13‑16) Einbau (13‑16) Installation (13‑16) Instalación (13‑16) Installazione (13‑16)
- Page 21 Insert the green-white lead (Speed Pulse) Introduzca el cable verde-blanco (impulso into the free chamber (56) of the black de velocidad) en el hueco vacío (56) del connector. conector negro. Connect the orange-white lead to the lead Conecte el cable naranja-blanco al cable of the reverse light (Pin 4 of the green de la luz de marcha atrás (clavija 4 del connector).
- Page 22 Installation (17‑20) Einbau (17‑20) Installation (17‑20) Instalación (17‑20) Installazione (17‑20)
- Page 23 Brackets for the AVN Unit Soportes para la unidad AVN Tilt the brackets to insert into radio dock. Incline los soportes para introducirlos en el receptáculo de la radio. Bring the brackets into the shown position. Coloque los soportes en la posición Fix the brackets with the 4 original screws.
- Page 24 Installation (21‑24) Einbau (21‑24) Installation (21‑24) Instalación (21‑24) Installazione (21‑24)
- Page 25 Brackets for AVN unit Soportes para la unidad AVN AVN Unit Unidad AVN Attach the bracket with two screws on the Fije el soporte con dos tornillos en el lado left side of the AVN unit. izquierdo de la unidad AVN. Attach the bracket with two screws on the Fije el soporte con dos tornillos en el lado right side of the AVN unit.
-
Page 26: Installation
Installation (25‑28) Einbau (25‑28) Installation (25‑28) Instalación (25‑28) Installazione (25‑28) AVN Unit... - Page 27 Connect the vehicle specific harness with Conecte el arnés específico del vehículo a the AVN unit. la unidad AVN. Key harness Arnés para las teclas Connect antenna plugs as shown (27)(28). Conectar los conectores de antena tal y como se muestra (27)(28). Verbinden Sie den fahrzeugspezifischen Collegare il cablaggio specifico per il veicolo Kabelbaum mit dem AVN-Gerät.
- Page 28 Installation (29‑32) Einbau (29‑32) Installation (29‑32) Instalación (29‑32) Installazione (29‑32)
- Page 29 Insert the vehicle‘s ISO connector. Introduzca el conector ISO del vehículo. Insert the AVN unit into the radio dock. Introduzca la unidad AVN en el receptáculo de la radio. Hex socket screws to attach brackets. Tornillos Allen para fijar los soportes. Attach the display brackets with the four hex socket screws.
- Page 30 Installation (33‑36) Einbau (33‑36) Installation (33‑36) Instalación (33‑36) Installazione (33‑36)
- Page 31 Rear display housing Carcasa trasera de la pantalla Connect the key harness to the keyboard in Conecte el arnés para las teclas al teclado the display housing. de la carcasa de la pantalla. Attach the display housing to the dash Fije la carcasa de la pantalla en el board.
- Page 32 Installation (37‑40) Einbau (37‑40) Installation (37‑40) Instalación (37‑40) Installazione (37‑40)
- Page 33 Bracket for display Soporte para la pantalla Attach to the top of the AVN bracket. Make Fije la parte superior del soporte para AVN. sure the display cables can move easily. Asegúrese de que los cables para la pantalla se pueden mover con facilidad. Fix with four supplied screws.
- Page 34 Installation (41‑44) Einbau (41‑44) Installation (41‑44) Instalación (41‑44) Installazione (41‑44)
- Page 35 Display Pantalla Connect the signal cable and the power Conecte el cable de señal y el conector de connector to the display. alimentación a la pantalla. Insert the supplied hex screws to the Introduzca los tornillos Allen incluidos en la display and screw them in halfway.
- Page 36 Installation (45‑48) Einbau (45‑48) Installation (45‑48) Instalación (45‑48) Installazione (45‑48)
- Page 37 Front display housing with two screws and Carcasa delantera de la pantalla con dos screw covers tornillos y tapas para los tornillos Connect the microphone cable. Conecte el cable del micrófono. Insert the bottom part of the display frame Introduzca la parte inferior del marco de la into the groove.
- Page 38 Installation (49‑52) Einbau (49‑52) Installation (49‑52) Instalación (49‑52) Installazione (49‑52)
- Page 39 Two screws and screw covers Dos tornillos y sus tapas Attach the frame with the two supplied Fije el marco a la carcasa de la pantalla con screws to the monitor housing. los dos tornillos incluidos. Cover the screws. Tape los tornillos. Overview Visión de conjunto Zwei Schrauben und zwei Blindstopfen...
- Page 40 Installation (53) Einbau (53) Installation (53) Instalación (53) Installazione (53) Part Nr. / Part Nr. / Réf. / N.º de pieza / N. part.: 735535319...
- Page 41 If the car is not equipped with this part, Si el coche no va equipado con esta replace the radio dock with the following pieza sustituya el receptáculo de la radio FIAT original part: 735535319. por la siguiente pieza original de FIAT: 735535319.
- Page 42 Changing the illumination Color of the Keys Farbe der Tastenbeleuchtung ändern Modification de la teinte d’éclairage des touches Cambio del color de iluminación de las teclas Variazione del colore di illuminazione dei tasti Color Presets Farbvoreinstellungen Présélections de teintes Rouge Red (dim) Rot (gedimmt) Rouge (atténué)
- Page 43 Twelve illumination presets are available to Existen doce tipos de iluminación predeter- choose from. See table for details. To toggle minados entre los que elegir. Consulte la the colors, push keys ‘Voice’ (A), ‘–’ (C) and tabla para obtener más detalles. Para ‘Mute’...
- Page 44 Model years 2006 – 2011: Année modèle 2006 – 2011: Boîte à fusibles, connecteur bleu à 52 Modelljahre 2006 ‑ 2011: broches, broche 10 dans la partie grise, câble gris / vert = vitesse. Année modèle 2006 – 2011: Boîte à fusibles, connecteur noir gauche, broche 8, câble blanc / rouge = éclairage Modelos del 2006 –...
- Page 45 Connections/ Anschlüsse/ Raccordements/ Conexiones/ Collegamenti...
- Page 46 Memo ..........................Notizen ..........................Mémo ..........................Notas ..............Note ..........................................................................................................................................................................................................................................................................................................................................................................................
- Page 48 Designed by Alpine Electronics (Europe) GmbH Printed in Germany ALPINE ELECTRONICS MARKETING, INC. ALPINE ELECTRONICS OF AUSTRALIA PTY. LTD. ALPINE ELECTRONICS FRANCE S.A.R.L. 1-7, Yukigaya-Otsukamachi, Ota-ku, 161-165 Princes Highway, Hallam 184, Allée des Erables Tokyo 145-0067, JAPAN Victoria 3803, Australia...
Need help?
Do you have a question about the X902D-DU and is the answer not in the manual?
Questions and answers