
Related Manuals for SMART Chromebox G3

Summary of Contents for SMART Chromebox G3
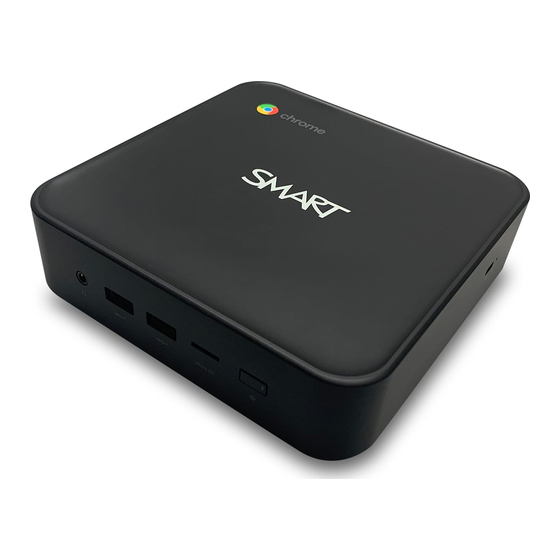
- Page 1 SMART Chromebox G3 SETUP GUIDE SCBOX-CEL-4 Was this document helpful? smarttech.com/docfeedback/171622...
- Page 2 © 2020 SMART Technologies ULC. All rights reserved. No part of this publication may be reproduced, transmitted, transcribed, stored in a retrieval system or translated into any language in any form by any means without the prior written consent of SMART Technologies ULC. Information in this manual is subject to change without notice and does not represent a commitment on the part of SMART.
-
Page 3: Important Information
Important information CAUTION Power-supply cord or plug is damaged. When using SMART Chromebox G3, basic safety Liquid has been spilled into the device. precautions should always be followed to reduce The device has been exposed to rain the risk of fire, electric shock, and injury to or moisture. -
Page 4: Federal Communication Commission Interference Statement
Management website at compliance could void the user’s authority to www.energystar.gov/powermanagement. operate the equipment. As shipped, your SMART Chromebox G3 delivers ENERGY STAR performance and savings. However, changing some settings may increase energy consumption beyond the limits required for ENERGY STAR certification. For example, increasing the time before the product transitions to sleep mode will increase power consumption. -
Page 5: Innovation, Science And Economic Development Canada Statement
Important information and operated with minimum distance 20 cm NOTE between the radiator and your body. This equipment has been tested and found to comply with the limits for a Class B digital device, pursuant to part 15 of the FCC Rules. These limits Innovation, Science and are designed to provide reasonable protection Economic Development... -
Page 6: Innovation, Science Et Développement Économique Déclaration Du Canada
Développement EU declaration of économique Déclaration conformity du Canada Hereby, SMART Technologies ULC declares that the radio equipment type computer equipment model SCB-1 is in compliance with Directive AVERTISSEMENT 2014/53/EU. The full text of the EU declaration of (i) les dispositifs fonctionnant dans la bande 5 conformity is available at the following internet 150-5 250 MHz sont réservés uniquement pour... - Page 7 Important information CAUTION: EXPOSURE TO RADIO FREQUENCY RADIATION This equipment complies with EU radiation exposure limits set forth for an uncontrolled environment. This equipment should be installed and operated with minimum distance 20 cm between the radiator and your body. For optimal performance any support equipment connected to this device must be CE compliant.
-
Page 8: Table Of Contents
Chapter 1: Welcome About this guide About the SMART Chromebox G3 More information Chapter 2: Connecting the SMART Chromebox G3 Connecting to power and an interactive display Turning on for the first time Connecting accessories and pairing bluetooth devices (optional) -
Page 9: Chapter 1: Welcome
Learn more at smarttech.com/products/education-displays/computing. More information In addition to this guide, SMART provides other resources in the Support section of the SMART website (smarttech.com/support). Scan the QR code on the cover of this guide to view links to other support resources for the SMART Chromebox G3 and related product. -
Page 10: Connecting To Power And An Interactive Display
Connecting to power and an interactive display Complete the initial installation by connecting the SMART Chromebox G3 to power and the interactive display. Connecting the Chromebox to power To connect the Chromebox to a power outlet 1. -
Page 11: Turning On For The First Time
Make sure the correct USB ports are used for the cable you have and that the ports match between the display and the SMART Chromebox G3. For example, if you use a USB 3.0 cable, connect it to the USB 3.0 (blue color) port and use the SS USB port on the SMART Chromebox G3. -
Page 12: Connecting Accessories And Pairing Bluetooth Devices (Optional)
Connect accessories such as a mouse and keyboard to the SMART Chromebox G3 so you can navigate and interact with the desktop. You can also pair Bluetooth devices for use with the SMART Chromebox G3. SMART Board interactive displays have their own on-screen keyboards and use touch interactions to navigate the desktop, so connecting accessories such as a mouse or keyboard is optional. -
Page 13: Connecting To A Wired Or Wi-Fi Network
Chapter 2 Connecting the SMART Chromebox G3 To connect a wireless mouse and keyboard Connect the USB receiver that is supplied with your wireless mouse and keyboard to the SMART Chromebox G3’s USB port. NOTE After you turn on the SMART Chromebox G3, the wireless mouse and keyboard should pair automatically. -
Page 14: Connecting Using A Wired (Ethernet) Connection
1. If the SMART Board interactive display is connected to a network, connect one end of the network cable to the SMART Chromebox G3’s LAN port and connect the other end of the cable to the display. If the SMART Board interactive display is not connected to a network, connect the network cable to the SMART Chromebox G3 and the other end to a network outlet. - Page 15 Chapter 2 Connecting the SMART Chromebox G3 To connect to Wi-Fi 1. Open the Settings window as described in the previous procedure and click Network. 2. Enable Wi-Fi. 3. Click and select the Wi-Fi network you want to connect to. Enter the network password, if required.
-
Page 16: Chapter 3: Configuring The Settings
Managing power consumption settings (optional) Complete the configuration by downloading commonly used apps Complete the set up by turning on the SMART Chromebox G3 and configuring basic settings. Configuring settings Use the Settings window to change settings for user accounts, appearance, and so on. -
Page 17: Changing The Appearance Of The Chrome Desktop
Chapter 3 Configuring the settings To manage user account settings 1. In the Settings window, click People. 2. Select the setting you’d like to manage. Four options are available: Option Description Your account Manage signed-in Google Accounts. Sync and Google services Manage your account’s sync settings. -
Page 18: Managing Device Settings
Chapter 3 Configuring the settings To change the desktop’s wallpaper 1. In the Settings window, click Personalization. 2. Click Wallpaper and select a background from the available files. Managing device settings Manage a variety of device settings, such as mice and keyboards, connected displays, and power and storage options. -
Page 19: Managing Advanced Settings
Chapter 3 Configuring the settings To manage device settings 1. In the Settings window, click Devices. 2. Select the device you’d like to manage. A number of options are available: Option Description Mouse Configure mouse settings, such as primary button and scrolling behavior. Keyboard Configure keyboard settings, such as how Ctrl, Alt, Escape, and other common keys behave. -
Page 20: Managing Power Consumption Settings (Optional)
SMART Chromebox G3 has a sleep mode to reduce its power consumption during periods of inactivity. The SMART Chromebox G3 exits sleep mode when you press the Power button. If Wake-On-Lan (WOL) is enabled, the device can also exit sleep mode in response to a network signal. You can disable WOL to reduce the device’s power consumption. -
Page 21: Complete The Configuration By Downloading Commonly Used Apps
Chapter 3 Configuring the settings Complete the configuration by downloading commonly used apps Go to the Google Play store to download commonly used apps. Begin by clicking the Google Play store icon in the App Launcher: In the Google Play Store, you can search for, download, and install the apps you want. After apps are downloaded and installed, they appear in the Launcher screen. - Page 22 Chapter 3 Configuring the settings You can pin your most commonly used apps by right-clicking them and selecting Pin to shelf. smarttech.com/kb/171622...
- Page 23 Was this document helpful? smarttech.com/docfeedback/171622 smarttech.com/kb/171622...
Need help?
Do you have a question about the Chromebox G3 and is the answer not in the manual?
Questions and answers