
Summary of Contents for fine SMART FAC-5700 TC Series
- Page 1 SMART ™ CHECK WEIGHER Operation Manual ( FAC-5700 TC series ) FINE MECHATRONICS CO., LTD. Version : 2010, January Copyright ® 2010 by FINE Mechatronics Co.,Ltd All Rights Reserved.
-
Page 2: Table Of Contents
CONTENTS Chapter 1. Overview Introduction Features Pre-cautions Installation and Function Check Chapter 2. Screen Composition Basic Screen Composition Driving and Stopping of Conveyor Modification Measurement Screen Product Number Product Name Tare Icon Display Determined Value Display Weight Display Mode 2.10 Base Weight Value Input Setting 2.11 Function Selection Button... - Page 3 Chapter 4. Setting Screen Product Item Setting User Setting Time Setting Weight Adjustment Selector Setting System Setting Chapter 5. System Setting Communication A/C Run test A/C Setting A/D Run test Touch Upgrade Data Deletion Data Backup & Date File...
-
Page 4: Chapter 1. Overview
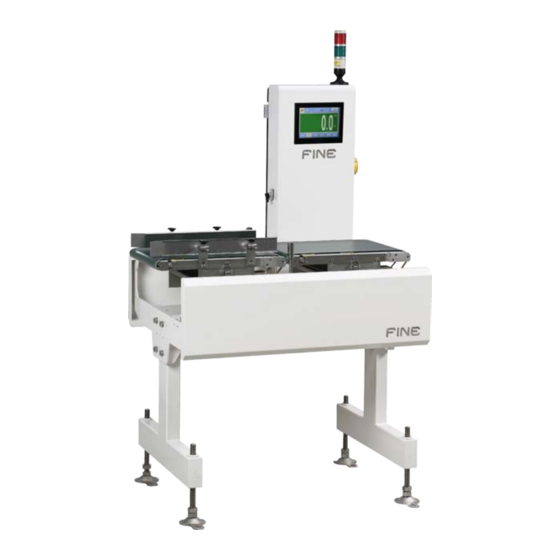
Chapter 1. Overview 1.1. Introduction Above all, thank you for purchasing FAC-5700TC. FAC-5700TC, installed at the end of manufacturing line to be used for production instrument and automatic packing machine etc in general, is used in total enumeration and selection of produced products. -
Page 5: Features
1.2. Features 1) 7 inch 16.7M color TFT LCD (resolution: 800 x 480) 2) Convenient touch screen style 3) Various screen compositions and graphics display method 4) Arbitrary setting of range of use through absolute value and deviation measuring method 5) Embedded with the function of double back-up of data in case of power outage 6) Auto calibration of span and weight 7) Auto zero tracking function... -
Page 6: Pre-Cautions
1.3. Pre-cautions 1.3.1 Touch Screen Related Pre-cautions 1) Since the instrument is of touch type, take caution not to let LCD screen stained with foreign matters while using. (In case of pollution, mal-operation may occur.) 2) Do NOT press the screen forcefully. 3) Use the instrument by touching the screen with fingertip. -
Page 7: Installation And Function Check
1.4. Installation and Functional Check 1) Maintain the conveyor of automatic weight sorting device level with ground by all means. For adjustment to level condition, tighten up fixing nut to prevent shaking while adjusting the four legs mounted at the bottom of automatic weight sorting device to level condition. -
Page 8: Chapter 2. Screen Composition
Chapter 2. Screen Composition 2.1 Composition of Basic Screen This section describes the basic screen composition of FAC-5700TC. ① Conveyor driving/stopping ② Product No. ③ Product name ④ Tare value ⑥Determined weight value ⑤ Icon ⑧ Weight set value Determined quantity ⑦... -
Page 9: Driving And Stopping Of Conveyor
2.2 Driving and Stopping of Conveyor If this button is pressed, conveyor is driven or stopped. When stopped: Red arrow is When driven: The mark "RUN" is displayed as red arrow stopped. moves. 2.3 Modification of Measurement Screen 2.3.1 Modifying Method 1 : This button selects desired item like base, level, average and weight from screen selectionby pressing “Screen”... -
Page 10: Product Number
2.4 Product Number Checks or selects the weight set value of other previously set product number from 1 through 999. Step 1 Press button. Step 2 After entering the product number to check, press The weight set value of the selected product number is displayed on the left. -
Page 11: Product Name
2.5 Product Name Checks product name and selects product number from previously entered product name list. Step 1 Press part where product name displayed. Step 2 Sorting Method: Selecting Method: 1) Select directly from the list 2) Move row by row by pressing 3) Move screen by screen by pressing Step 3 After selecting the product name desired to be... -
Page 12: Tare
2.6 Tare Displays Tare value. Values are modified in measurement screen(base, level, weight and average) and product item setting screen. 2.7 Icon Display Displays various conditions in the form of icon. All the icons change in color to yellow during operation. -
Page 13: Weight Display Mode
2.9 Weight Display Mode Weight: Displays measured actual weight Offset: Displays the value that subtracted actual weight value from the input base value. 2.10 Base Weight Value Input Setting (Under weight, Pass weight, Over weight) Under weight Pass weight Over weight Checks and modifies the weight set value( ) of produced product. -
Page 14: Chapter 3. Screen Selection
Chapter 3. Screen Selection 3.1 Basic Screen For detail, see Chapter 2. 3.2 OFF Screen This mode converts to a condition where only screen is turned OFF. If any spot on the screen is pressed, the screen restores to measurement screen. -
Page 15: Weight Screen
3.4 Weight Screen Displays weight determined value on the screen in large numeric. 3.5 Average Screen Displays the scope of weight value(under weight, pass weight and over weight) in bar graph, and shows quantity and percentage(%). Displays the average of measured values in the unit of Xn that user sets in graph. 3.6 Summary Screen Displays the accumulated data for the weight value of the products produced by the pduct numbers and distribution of determined weights... - Page 16 Displays quantity each class percentage over quantity. +> : Upper limit ○> : Fixed amount Lower limit set value mark line -> : Lower limit The weight area included in the bar graph: Example) value exceeding 0.3 and no more P : Displays the sum of fixed than 0.5.
-
Page 17: Chapter 4. Setting Screen
Chapter 4. Setting Screen 4.1 Product Item Setting Step 1 Press Setting button. Step 2 Press Product Setting button. Step 3 Put in set values like product number, product name, press Confirm button. For description by the items, see the next page. - Page 18 Product Name Input Measured value and determined value display Product Name 1 & PgUp ←Bspc PgDn “ Caps Enter Home ‘ < > Shift Shift Ctrl ← ↑ ↓ → 한/영 *CAUTION: The product name will be included in the product item setting list(P.10) only if product name is put in.
- Page 19 dynamic calibration constant. Let’s look into each method through the following example. Example) The method of obtaining dynamic calibration constant in case weight at standstill is 1,000g and the average weight during conveyance is 1,004g Method 1) Method of calculating by theoretic expression Dynamic calibration Weight value at standstill (1,000g)
-
Page 20: User Setting
4.2 User Setting Step 1 Press Setting button. Step 2 Press Setup User button. Step 3 Enter 4 digit password, and press [Enter]. Step 4 Modify the set value of desired item. * Time for which determined weight is held : The time that indicates determined weight on the screen This value is renewed once new determined... -
Page 21: Time Setting
4.3 Time Setting Step 1 Press Setting button. Step 2 Press Setup Time button. Step 3 Set up 6 digits value by pressing Date and Time buttons. Example) To enter Jan. 30, 2010, key in “100130”. Example) To enter 23 hour 12 minute 31 second, key in “231231”. -
Page 22: Weight Adjustment
4.4 Weight Adjustment Weight adjustment is done when the balance weight and the weight displayed on the screen do not coincide when the balance that serves as reference is turned to measurement part. Weight adjustment is a process that should be done beforehand by all means for accurate display of actual weight. - Page 23 Step 4 Place balance on measurement part, enter the value equal to the weight value of the placed balance in ‘Balance Weight Value’ item, and press Confirm button. Step 5 Wait while numerical operation is in automatic progress. Step 6 After weight adjustment is completed, remove balance measurement...
-
Page 24: Selector Setting
4.5 Selector Setting Step 1 Press Setting button. Step 2 Press Sorting Device Setting button. Step 3 Set up each item. * Sorting Delay Time: Sorting device operates in the delay time set after defect determination. * Sorting Driving Time: The time required to remove defect item through operation of sorting device... -
Page 25: System Setting
4.6 System Setting * If set value is improperly manipulated, the system may not operate. In case of operation failure, consult with our service personnel. Step 1 Press Setting button. Step 2 Press System Setting button. Step 3 After keying in 4 digits password, press [Enter]. -
Page 26: Communication
Chapter 5. System Setting In case set value is improperly manipulated, the system may not operate. In case of operation failure, consult with the service personnel of our company. 5.1 Communication Used for data transfer when communication with weight sorting device, PLC or PC etc is required. - Page 27 Sending Format BYTE DATA STX Product No. Class Mode Determined weight (U:Under amount) (W:Weight) (7 bytes including (P:Psss amount) (F:Offset) decimal) (O:Over amount)
-
Page 28: A/C Run Test
5.2 A/C Run test A/C run test is the test to obtain accurate measurement value by entering determined time and segment in consideration of the length and production speed of the products that pass while conveyor is driven. Step 1 Press A/C Run Test button. - Page 29 Step 4 Remove the product and drive conveyor. Step 5 Flow measured object into entrance part naturally. While the measured object passes through measured part, spots are created on the graph. Step 6 Put in proper ‘delay’ and ‘segment’ (as described below).
- Page 30 The left figure shows the graph on the change of A/D values measured while product passes through measurement part, and the right figure shows 32 A/D values chosen in the left direction based on ‘Delay’ location. ‘Delay’: Determines the duration from starting of sensor sensing to selection of 32 values of data.
-
Page 31: A/C Setting
5.3 A/C Setting If the numeric button on the right side of each setting menu is touched, numeric pad window shows up. Here, put in desired set value and press [Enter] key. * This setting is done upon shipping from factory. Arbitrary manipulation of the setting may affect system performance negatively. -
Page 32: Touch
5.5 Touch FAC-5700TC weight sorting device is of touch panel. If desired function does not work when applicable button is touched, perform as in the right figure to calibrate screen. Cross shaped mark will appear at the center of the screen. If this mark is touched with touch pen etc, the screen will move to arrow direction. -
Page 33: Data Deletion
5.7 Data Deletion If “Delete” button is pressed in Basic Screen, Level Screen, Average Screen, Weight Screen and Summary Screen above, the following screen shows up: If “Yes” is pressed, the quantity and summarized data(Summary Screen) for present product number will be deleted on the screen. At this time, the contents saved in internal memory are not deleted. -
Page 34: Data Backup & Date File
F5: Conveyor Stop * ( Pass,Over,Under,Metal,Double) Product Product yymmdd_hhmmss name •Sample 100714_091528 Snack 100714_091528 Snack 100714_091530 100714_091536 143.2 100714_091543 100.5 100714_091551 40.2 Product name Speed 100714_091555 modification modification 100714_091607 100714_091615 Fine 100714_091646 Fine2 100714_091655 Fine2 100714_091701 121.2 100714_091706 133.2 100714_091755... - Page 35 Fine Mechatronics Co.,Ltd. 67-2 Sangdaewon dong, Joongwon gu, Seongnam city, Gyeonggi province, R.O.Korea TEL : +82-31-732-5720 / FAX : +82-31-732-5725 E-mail : sales@finemecha.co.kr http://www.finemecha.co.kr FINE1008-0002 Printed in Korea...
Need help?
Do you have a question about the SMART FAC-5700 TC Series and is the answer not in the manual?
Questions and answers