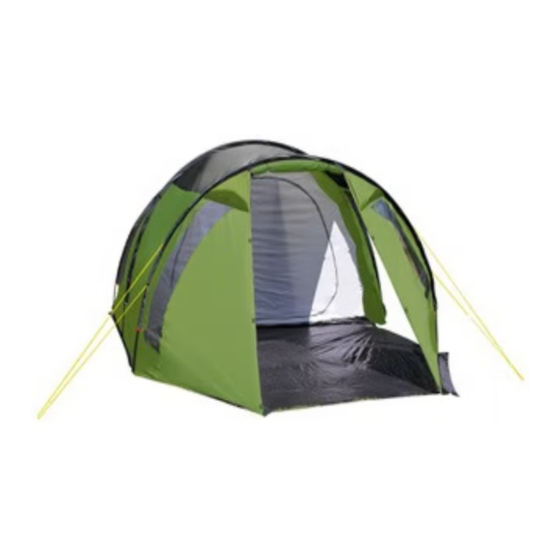
Advertisement
Quick Links
Nederlands
Model
Buitentent
Binnentent
Stokken
Grondzeil
Haringen
1) Schud de tentzak leeg en controleer of alles aanwezig is.
2) Zet de stokken in elkaar. Zoals je ziet zijn er 3 stokken met kleurcodering.
3) Leg de buitentent plat op de grond met de buitenkant (de zijde waar de scheerlijnen zitten)
naar boven. Duw vervolgens de tentstokken voorzichtig door de stoksleuven heen (let op:
kleurcodering!) (TIP: doe dit met 2 man : de een houdt de stoksleuf mooi recht voor de stok en
vervolgens duwt de ander de stok er doorheen). (afb.1+2)
4) Als alle stokken gedaan zijn moeten de stokken opgespannen worden. Dit gaat met behulp
van het pen en ringsysteem wat aan de onderkant van de buitentent bevestigd is. Het pen/ring
zit op een nylon bandwerk bevestigd. Duw de pen in het uiteinde van de stok (afb.3), bij de
ander kant moet u de stok onder spanning zetten om het pennetje erin te krijgen.
5) Vervolgens zet u een kant van de tent met haringen vast en trekt u de tent als een
harmonica overeind (afb.4+5) en zet de tent aan de voorzijde vast. U kunt de tent verder
afspannen met de overige bevestigingspunten.
6) Als de buitentent staat kan de binnentent opgehangen worden. Leg de binnentent uit in de
tent met de deur naar voren, op de hoekpunten van het grondzeil zitten haakjes die u aan de
ring bij de stokpunten kunt bevestigen (afb.6+7+8) en vervolgens kunt u de binnentent verder
ophangen.
De tent is nu klaar voor gebruik (afb.10).
Let op: dat u de tent goed afspant met de daarvoor bestemde afspanpunten en scheerlijnen
Tijdens het afspannen de deur gesloten laten. (afb.9)
KANSAS
1x
1x
3x fiberglasstokken (kleurcodering)
vast
1 zak met haringen
Englisch
Model
Fly
Innertent
Poles
Groundsheet
Pegs
1) Remove the contents of the tent bag and check to see if all items are present.
2) Connect the poles together. There are 3 poles with different colour codes.
3) Spread the outer tent flat on the ground with the outside facing up Insert the tent poles
carefully through the tent sleeves (attention: colour codes!) (pic.1+2)
(TIP: this is best done by 2 people: one person holds the pole sleeve straight while the other
person inserts the pole through it).
4) Once all poles have been connected, they have to be pulled into position. This is done with
the help of the pin and ring system which is attached to the nylon band at the bottom of the
outer tent. Insert the pin into the end of the pole (pic.3); on the other side you will need to
bend the pole (so that it will be round) in order to be able to insert the pin.
5) Anchor the tent down on one side using the stakes and pull the tent up like an accordion
(pic.4+5). Pull the tent taut by anchoring the remaining parts with the stakes provided.
6) Once the outer tent is in place, you can set up the inner tent. Lay the inner tent out on the
ground under the outer tent with the door facing towards the front. There are stakes on the
tension points of the groundsheet which you can attach to the ring next to the bottom of the
pole (pic.6+7+8). You can then proceed with setting up the inner tent.
The tent is now ready for use (pic.10).
Make sure that you pull the tent taut by using the tension points and tent ropes provided for
this purpose
Make sure that the door is closed during erecting of the tent (pic.9)
KANSAS
1x
1x
3x fiberglass poles (colour code)
Fixed groundsheet in porch
1 bag
Advertisement

Subscribe to Our Youtube Channel
Summary of Contents for EuroTrail KANSAS
- Page 1 Nederlands Englisch Model KANSAS Model KANSAS Buitentent Binnentent Innertent Stokken 3x fiberglasstokken (kleurcodering) Poles 3x fiberglass poles (colour code) Grondzeil vast Groundsheet Fixed groundsheet in porch Haringen 1 zak met haringen Pegs 1 bag 1) Remove the contents of the tent bag and check to see if all items are present.
- Page 2 Francais Deutsch Modèle KANSAS Modell KANSAS Tente extérieure Außenzelt Tente intérieure Innenzelt Tiges 3 tiges en fibre de verre (code couleur) Stöcke 3 x Glasfiberstöcke (Farbe Codierung) Tapis de sol Tapis de sol Bodenplane Bodenplane in Absis Piquets 1 sac de piquets...
- Page 3 Russian Модель KANSAS Внутренняя палатка Poles 3x стойки из фибергласса Подстилка Закрепленная на входе подстилка Колышки 1 набор 1) Вытащить содержимое из палаточного мешка и проверить наличие всех составляющих комплекта. 2) Соединить стойки вместе. Все три стойки разного цвета. 3) Растянуть внешний полог на земле наружной стороной вверх. Аккуратно продеть...


Need help?
Do you have a question about the KANSAS and is the answer not in the manual?
Questions and answers