Table of Contents
Advertisement
Quick Links
Advertisement
Table of Contents

Related Manuals for Qware QW TB-1280


Summary of Contents for Qware QW TB-1280
- Page 1 TB-1280 TB-1280 QW TB-1280 TB-1280 ANDROID 4.0 TABLET PC...
-
Page 3: Table Of Contents
User User Manual Manual User User Manual Manual Table Table Contents Contents Table Table of of Contents Contents 1. Key Features 2. Packaging contents 3. Product layout 4. Hardware Specifications 5. Startup and shutdown 6. Desktop 7. Main Menu Operation 8. - Page 4 Notes: Notes: Notes: Notes: * This is a high precision electronic product. Do not disassemble. * Avoid dropping or collision of the product. * Avoid using this product under the following conditions: high and low temperature, moisture, dust, strong magnetic fields and long-term exposure to sunlight. * Please use a wet cotton cloth and gently wipe the product shell, do not use other chemical cleaning solutions.
- Page 5 TB-1280 uses the Android 4.0 operating system and is based on a powerful Cortex A8 1.2GHz processor. The QW TB-1280 has 8GB of internal memory of which 2GB is allocated for direct application downloads. The other memory part is free to use for storage of pictures, music, movies and other data files.
-
Page 6: Key Features
1. 1. features_____________________________ features_____________________________ 1. Key Key features_____________________________ features_____________________________ Feature Advantage Fast Fast surfing surfing Down Down loading loading Incredible data rate upto 150MBPS* Fast Fast web web surfing surfing and and Down Down loading loading Accurate Accurate touch touch control control tablet... -
Page 7: Packaging Contents
Open the package carefully, and make sure that none of the items listed below are missing. Do not discard the packing materials, in case of return; the unit must be shipped back in its original package : 1. The Tablet device QW TB-1280 2. A 100~240V Power Adaptor 3. A USB cable 4. -
Page 8: Product Layout
3. 3. Product Product Layout____________________________ Layout____________________________ 3. Product Product Layout____________________________ Layout____________________________ The Android system uses the following keys: 1) Volume keys: the buttons on top Volume +, Volume- to adjust the volume. 2) Power key: To turn on and off of the unit or by short pressing it to enter or leave the standby mode. - Page 9 4. 4. Hardware Hardware specification_____________________ specification_____________________ 4. Hardware Hardware specification_____________________ specification_____________________ Product specification A10 Cortex A8 Multi-Core ARM v7 processor Frequency 1.2GHz Processor 1G DDR3 RAM Memory Memory built-in 8GB Storage Support Micro SD card to expand memory up to 32GB IEEE802.11b/g/n wireless network Wireless USB2.0 OTG high speed interface and USB1.1...
- Page 10 5. 5. Startup Startup shutdown______________________ shutdown______________________ 5. Startup Startup and and shutdown______________________ shutdown______________________ Press and hold the power button, the system will enter the startup process Startup Screen After the system has been started, the android OS will be loaded :...
- Page 11 The system displays the standby screen, press the key-lock logo and slide it outside the circle in order to unlock. Then the desktop will appear.
- Page 12 Shutdown : Press and hold the power button, a pop-up window will appear and select OK to shut down the device Click it Press the power button short to go to stand-by mode. To activate the unit, press the power button again.
-
Page 13: Desktop
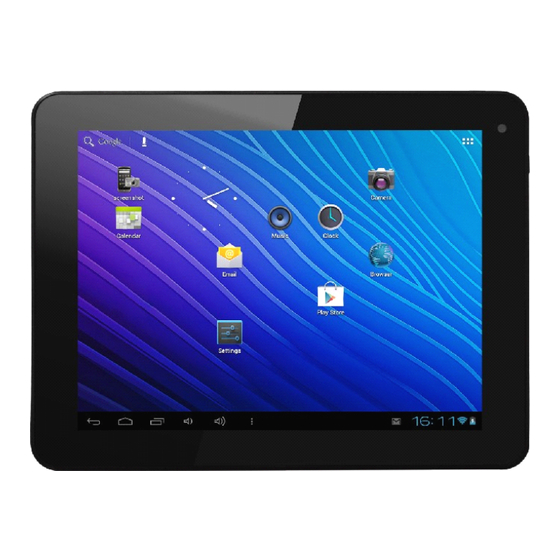
6. 6. Desktop_________________________________ Desktop_________________________________ 6. Desktop_________________________________ Desktop_________________________________ After the completion of the startup, you can see the Android4.0 Desktop.(See below picture) The default desktop contains: Status Bar、Quick Search Bar、Main menu tabs and a number of shortcut icons. - At the Left bottom side of the status bar are 3 main buttons : Return, Home and shortcut keys - At the Right bottom side of the status bar, the current system status of network, battery and time are displayed. - Page 14 7. 7. Main Main Menu Menu Operation_______________________ Operation_______________________ 7. Main Main Menu Menu Operation_______________________ Operation_______________________ Click the application button, the application screen appears: In the application screen, your can choose to start any installed application or by pressing and holding the icon move it to the desktop.
-
Page 15: System Settings
8. 8. System System Settings___________________________ Settings___________________________ 8. System System Settings___________________________ Settings___________________________ Click the setting icon in the main menu tab, the main system setting screen will appear : Select the appropriate operation of the relevant items, such as: WIRELESS & NETWORKS * WiFi DEVICE * Sound... - Page 16 Wireless Wireless Wireless & & & & Networks Networks Networks A. Wireless Networks Click the WiFi icon to “ON” to enable WiFi function if necessary Select the preferred network, and below Window will appear in case the network is protected, enter the password and press connect in the screen. If the password is entered correct, you will see on the screen that you are connected to the network.
- Page 17 B. Display Display Display Display - Output settings ® This product supports HDMI output and LCD output. Default setting is LCD output, this means all video output will be displayed on the screen of the unit. ® ® If you want to use HDMI output, please connect the HDMI cable to device and the external monitor.
- Page 18 - Brightness In the menu, choose brightness to adjust the brightness of the screen. Click it - Screen timeout : To adjust the time before the screen turns off, press the “Sleep” button and choose the desired time.
- Page 19 Date Date time time settings settings C. Date Date and and time time settings settings It is easy for date & time settings by enable “Automatic date & time” and “Automatic time zone” Otherwise, it can be set by manually as below : - Set date - Set time - Select time zone...
-
Page 20: Internet
Internet Internet ___________________________ ___________________________ 9. Internet Internet ___________________________ ___________________________ By clicking the web browser icon and enter the website address to enjoy internet. Enter... -
Page 21: Music
Music_____________________________ Music_____________________________ 10. Music_____________________________ Music_____________________________ Click the "music" icon in the application screen, you will enter the music player interface. Here you can find all audio files which are available on the device. You can copy files via USB drive or Micro SD card or download from the internet. If your play a song, below screen appears :... -
Page 22: Video
Video_____________________________ Video_____________________________ 11. Video_____________________________ Video_____________________________ Click the “Gallery” icon in the application screen, the available video files be shown as below : Click it Click the video file directly and it will be played automatically as below :... -
Page 23: Gallery
Gallery___________________________ Gallery___________________________ 12. Gallery___________________________ Gallery___________________________ Click the "Gallery” icon in the application screen, the pictures files and video files will appear as shown below : Click it Select a picture file, the picture will be shown as below. You can zoom in/out, and rotate etc operation. -
Page 24: Wallpaper
Wallpaper______________________________ Wallpaper______________________________ 13. Wallpaper______________________________ Wallpaper______________________________ The device supports static image wallpaper, as well as 3D wallpaper. A pop-up menu appears. In the desktop, hold down on any desktop area, select the option as below : Select "Live Wallpapers": You can select the system provided 3D wallpapers. Select "Gallery": You can select the photo or pictures as wallpaper. -
Page 25: Sound Recording
Sound Sound Recording________________________ Recording________________________ 14. Sound Sound Recording________________________ Recording________________________ Click the icon “Hi-Q Mp3 Recorder” in the application screen, below screen will appear. Click it to stop recording Click it to start recording Press “Record” button to start recording and press “Stop” button to stop recording. Then below screen appears :... - Page 26 For Playback, Press the menu icon and Playlists will appear as shown below: Then select the recording files and press “Play” to playback shown as below :...
-
Page 27: Camera
Camera___________________________ Camera___________________________ 15. Camera___________________________ Camera___________________________ Click the icon “Camera” in the application screen to go to the main camera screen as shown below : To save a picture, click the camera shutter (Blue button), as shown below:... - Page 28 To save video, slide the button to video position shown as below : Press Record button (Red button) to start video recording. To stop, press the Red button again :...
-
Page 29: Google Play
Google Google Play Play _____________ _____________ 16.Google Google Play Play_____________ _____________ First make sure you have connection the internet. Click the “Play Store” icon. And follow the instruction in the application screen. Below screen appears : If you have no Gmail account, please press “New” button to create a Gmail account, as shown below : Input your name... - Page 30 Please enter your name and then press “Next” and the below screen appears : Input your name Click it Set your Gmail address and press “Next”, the below screen appears : Input your password Click it...
- Page 31 Enter your desired password and press “Next”, a below screen will appear : Choose a security question and provide your answer. Then press Next. And below screen will appear.
- Page 32 You can join Google+ later if necessary in future. Then, press “Not now” button. And the below screen appears : Click it To finish Google account, please press “I accept” and below screen appears : Click it...
- Page 33 Fill in the Security code shown on the screen and press “Next. The device will contact the Google server and the screen below appears : Wait for several seconds And after a few minutes, a screen below appears : Click it...
- Page 34 Please put your credit card information to enable purchase Apps in Google Play if necessary. Otherwise, press “Skip” button and below screen appears : Click it Please press “Done” icon to finish the Google account setting and below screen appears : Click it...
- Page 35 After you press “Accept” icon to accept the terms of Google Play, now your can start downloading the APPs from Play Store...
-
Page 36: Email
E-mail___________________________ E-mail___________________________ 17. E-mail___________________________ E-mail___________________________ Make sure you are connected to the internet. In the application screen, click “Email” icon to enter the email client. The first time you use this app, you need to configure the account information. As shown below : Input your Email account Input your Email password Enter your email and password and then click “Next”, then below screen appears :... - Page 37 Please select the account type. Here we select a POP3 account type and screen appear as below : Please enter all email account detail, like User name, password, Pop3 server. Then click Next, and screen appears as below. Please also enter SMTP server, Port, Security type.
- Page 38 If the settings are correct, screen appears as below : Select "Next", then enter the account information :...
- Page 39 Then click "Next" button to enter the mail interface. It will automatically load and synchronize with e-mail server, and the below screen appears : Wait for several seconds After a while, all emails will be loading like below screen...
- Page 40 Select the email, you can read and reply or delete, or open the attachment if necessary.
- Page 41 Connect Connect ______________________ ______________________ 18. Connect Connect to to PC PC ______________________ ______________________ After you connect the device to the PC, a window message which finds a NEW Hardware wizard will pop-up. Please press “Cancel” to ignore this pop-up message. Then please touch the status bar at bottom right corner of desktop screen.
-
Page 42: Usb Keyboard And Mouse
Then please press “Turn on USB storage”. And screen will appear as below : Press “OK” and then a new drive will appear under My Computer. And the files can be copied from the Device to PC or PC to Device. To disconnect the device with PC, please press “Turn off USB storage”... -
Page 43: Firmware Upgrade
Please go to our website http://www.qware.info/ and download the correct firmware file. There are 3 main files for firmware upgrading : 1/ LiveSuit.zip – tool for firmware upgrade in PC 2/ UsbDriver.zip – driver for 8” capacitive tablet Pro3 3/ 03F2-P1-H2-M01-1652.20120330.img –... - Page 44 5/ The screen is showing below and click “Yes” to next step : 6/ Another screen is showing as below and click “Format” to next step : 7/ Click “Next” to next step. Also, please make sure the tablet is Power off state.
- Page 45 8/ Click “yes” to next step for image file selection : 9/ Find out the image file “03F2-P1-H2-M01-1652.20120330.img” and click “Open” 10/ Click “Finish” to prepare firmware upgrading.
- Page 46 Step 2) Firmware upgrading procedure : 1/ PRESS and HOLD the Volume + or Volume – button of 8” tablet Pro 3 2/ Connect the tablet with your PC via USB cable. At the same time, please press and release the Power button several times continuously. 3/ A screen will show as below and release all buttons : 4/ After click Yes, another screen is showing below and please click “Yes”...
- Page 47 and it will takes around 5 minutes. NOTE NOTE NOTE : : : : NOTE - Please DO NOT power off the device until upgrading process finished. - Please press “RESET” button if upgrading has not yet started and then repeat the procedure as above.
- Page 48 Qware Correspondence address P.O. Box 12040 3004 GA Rotterdam The Netherlands...
Need help?
Do you have a question about the QW TB-1280 and is the answer not in the manual?
Questions and answers