
Related Manuals for Wernick Xylosynth XS7s-4


Summary of Contents for Wernick Xylosynth XS7s-4
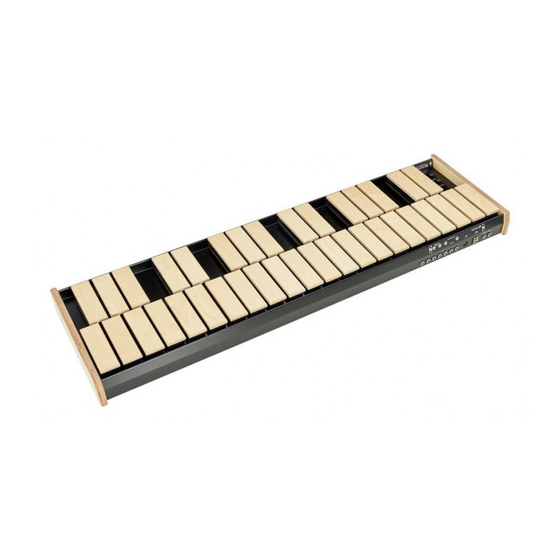
- Page 1 2a TWYCROSS STREET LEICESTER LE2 0DU ENGLAND TELEPHONE: 0116-255 6225 E-MAIL: info@wernick.net WEB-SITE: www.wernick.net Hand Built Electronic Percussion VAT No: 834748304 XS7s-4 Rev-008...
- Page 2 Index 1.0 Introduction PAGE NUMBER 2.0 Setting Up Your Xylosynth System 2.1 Sound Sources 2.2 Amplification 3.0 A Quick MIDI Lesson 3.1 MIDI Programme Number 3.2 MIDI Bank Number 3.3 MIDI Note Number 3.4 MIDI Velocity Number 3.5 MIDI Channel Number 4.0 Patches 5.0 Control Panel 5.1 Push Button Control...
- Page 3 1.0 Introduction Thank-you for choosing a Wernick Xylosynth. You are now the owner of a hand built MIDI compatible tuned percussion controller designed to put mallet players in the most comfortable MIDI environment possible. We’ve asked players like you a lot of questions over the last few years and the information gathered together has resulted in many of the unique features of the Xylosynth.
- Page 4 plates are fixed in place with the supplied hand tool. Loosen the 8 bolts clearly visible by warning instructions and slide a chrome plate under the heads of 4 of these bolts. Tighten these bolts making sure the chrome plate is as close against the side of the Instrument as possible.
- Page 5 3.0 A Quick MIDI Lesson The Xylosynth is a MIDI controller so it might be useful to include a short section on the basics. MIDI stands for Musical Instrument Digital Interface and is a digital computer code that all manufacturers in the music industry use. It means that the Xylosynth and any other MIDI device can communicate.
-
Page 6: Control Panel
6 which is always Sustain. Inputs 1- 4 can only be used with analogue/expression pedals and inputs 5-7 can only be used with digital/on/off pedals (or expression pedals with digital functionality). Pedal Type Analogue/Expression Pedals Digital On/Off Pedals Input Number Wernick Pedal – (ON/OFF ü ü ü ü ü ü... -
Page 7: Analogue Settings
So the specially adapted Wernick pedals (digital but with a stereo jack) can be used in all 7 inputs. On/Off (digital) pedals can be 'normally open'or 'normally closed' (or switchable). If you plug your pedals in first and power up the instrument the Xylosynth will recognize the difference and adjust itself accordingly to work with them. -
Page 8: Programming Section
7.2 Sensitivity Knob This is the master sensitivity control and affects all the keys equally no matter which patch you are in. It can be used to adapt the Xylosynth’s playing characteristics to your playing style and choice of mallets. At its lowest setting it will be very hard to achieve full 127 velocity. - Page 9 There are 4 main programming/edit screens. 1. Press the EDIT/EXIT button on the right of the display, keep it pressed and it will scroll through the 3 options – Global Settings – Song List – Patch Settings – Patch Template. If you want to edit Global Settings, release the button when you see Global Settings.
- Page 10 E. NOISE THRESHOLD 0-200 Threshold above which the instrument does not pick up external noise and trigger randomly (blue light flashes randomly). Will also affect the sensitivity of the lightest hits. May only need to adjust one or two notches either way. See 10.0 page 13.
- Page 11 You can link song lists – there is always a minimum of 3 linked song lists - go to song list edit screen – press octave shift button left – choose your order of song lists. PRESS 'EXIT' AT ANY TIME TO GET OUT OF A SCREEN. 9.3 Patch Settings See section 4.0 for a definition of Patch.
- Page 12 L. Polyphony Poly/Mono Selects polyphonic or monophonic mode. M. Octave Shift LATCH Shifts 1 octave and holds new value when pedal is released SINGL Shifts 1 octave but reverts when the pedal is released. N. Sustain Mode HOLD – Holds off sending out MIDI note off messages until pedal is released then all note off messages are sent.
- Page 13 C. Patch Down ⌂ Allows foot control of patch down. D. WMI Pitch bend For future use with special Wernick Pedal! E. Pitch bend Up ⌂ Movement in the pitch bend pedal sends corresponding pitch bend messages of range 8000-16000.
-
Page 14: The Noise Threshold
9.4 Patch Template This is a template for copying changes to multiple patches such as transposing all your patches to a different key or setting minimum velocity. It is the same list as the for patch settings. 1. Select the item in the list you want to change using the up/down patch buttons. 2. - Page 15 Chromatic Percussion 9. Celesta 13. Marimba 10. Glockenspiel 14. Xylophone 11. Music Box 15. Tubular Bells 12. Vibraphone 16. Dulcimer Organ 17. Drawbar Organ 21. Reed Organ 18. Percussive Organ 22. Accordion 19. Rock Organ 23. Harmonica 20. Church Organ 24.
- Page 16 Synth Pad 89. Pad 1 (New age) 93. Pad 5 (Bowed) 90. Pad 2 (Warm) 94. Pad 6 (Metallic) 91. Pad 3 (Polysynth) 95. Pad 7 (Halo) 92. Pad 4 (Choir) 96. Pad 8 (Sweep) Synth Effects 97. FX 1 (Rain) 101.
-
Page 17: General Notes
13.0 How to Replace a Key Tools Required ‘Pozi Drive’ Screwdriver. Bit size PZ1 & referred to as cross head and a 7mm socket or spanner for M4 nuts. General Notes Replacing a Key should take less than 20 minutes if you have carried out this operation before. -
Page 18: General Care
URL: htttp://www.wernick.net Contact Name: Will Wernick, Julie-Ellen John Patents: United States 5854436 UK & France (EP) 0732683 Germany 69610518 © Wernick Musical Instruments 2005 All Rights Reserved All Specifications in this manual are subject to change without notification... -
Page 19: Midi Implementation Chart
MIDI Implementation Chart Function Transmitted Remarks Basic Channel 1-16 0-15 Set within each Patch Default Mode Default Incremental Patch 1-200 0-199 Toggled with Song List/Song Link Altered Song List 1-25 Song link 1-25 Links Song Lists Note Number Default 0-127 Key range, C-1 to C9 C0 to C10 Set Chromatically set within each Patch Velocity...
Need help?
Do you have a question about the Xylosynth XS7s-4 and is the answer not in the manual?
Questions and answers