Table of Contents
Advertisement
Quick Links
Advertisement
Table of Contents

Subscribe to Our Youtube Channel
Related Manuals for MyBinding CubeX Duo

Summary of Contents for MyBinding CubeX Duo
- Page 1 CubeX Duo 3D Printer Instruction Manual...
- Page 2 CubeX 3D Printer User Guide See inside for use and safety information. CubeX User Guide version 1...
-
Page 3: Table Of Contents
Table of ConTenTs COPYRIGHT Warranty . . . . . . . . . . . . . . . . . . . . . . . . . . . . . . . . . . . . . . . . . . . . . . . . . . . . . . . . . . . . . . . . . . . . . . . . . . . . . . . . . . . . . . . . . . .3 Limitation of liability . - Page 4 fInIsHInG YOuR CReaTIOn Removing your creation from the Print Pad . . . . . . . . . . . . . . . . . . . . . . . . . . . . . . . . . . . . . . . . . . . . . . . . . . . . . . . . . . . . . . .20 Removing rafts .
-
Page 5: Warranty
CopYRIghT © 2012 by 3D systems, Inc . all rights reserved . This document is subject to change without notice . This document is copyrighted and contains proprietary information that is the property of 3D systems, Inc . The user does not have the right to copy, reproduce, or translate this document in any way or to any media without the prior written consent of 3D systems, Inc . -
Page 6: Important Safety Information
IMpoRTanT safeTY InfoRMaTIon safeTY sYMbols and defInITIons The Hot surface Hazard symbol indicates that a hot surface may be accessible in the vicinity of this sign or at the build pad and print jet . avoid contact; hot surfaces can cause severe burns . The Caution symbol indicates the possibility that something may happen which could cause loss of data, damage to equipment, or personal injury . -
Page 7: Cubex 3D Printer Features And Benefits
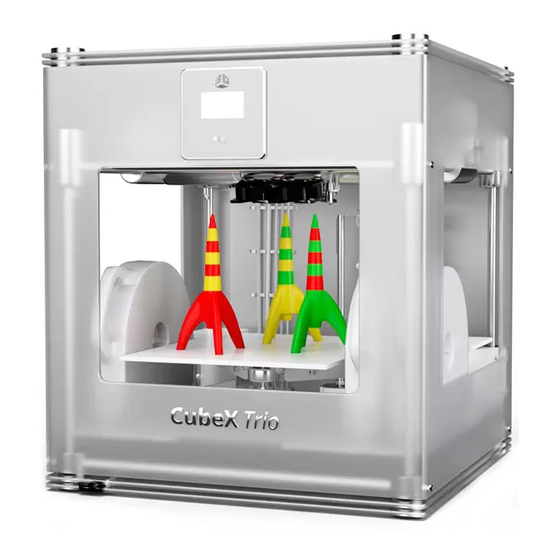
CubeX 3d pRInTeR feaTuRes and benefITs The print tip heats the material to extrude a thin string of plastic which adheres to the print pad in layers . The print pad lowers after each layer so that each one builds upon the last. This process continues through the final layer, until your creation is complete . -
Page 8: How The Cubex Works
hoW The CubeX WoRks The CubeX uses your 3D model to create a 3D printed part . • To begin the process, design a part in a CaD package or download one from Cubify .com . • before the part can be printed, it must be opened into the CubeX software (CubeX software accepts both .stl and .creation fi les). -
Page 9: Requirements For Your Cubex
ReQuIReMenTs foR YouR CubeX PC requirements: • microsoft® Windows® 7 • microsoft® Windows® XP (sP3 or higher) • microsoft® Windows® 8 software: • CubeX Client software, available for download at Cubify.com electrical requirements: • 110-240v aC MaTeRIal sToRage although all polymers degrade with time, the following condi¬tions help ensure that the material remains of high quality: •... -
Page 10: Setting Up The Cubex
seTTIng up The CubeX unpaCkIng YouR CubeX (folloW unpaCkIng guIde) Open the box and take out the top lid of the CubeX, it’s between two layers of foam . With two people take CubeX out of the box, lift from the metal frame on both sides of the machine . Place CubeX on a table . -
Page 11: Checking The Xyz Axis
CheCkIng The XYz aXIs Before you start using your CubeX you need to verify that no damage was inflicted on the X, Y or Z axes during shipping. To do this, select the ‘move’ option on the main menu . move each axis in both directions, using the arrows on the screen . -
Page 12: Loading Material Cartridge
loadIng MaTeRIal CaRTRIdge The ‘Replace’ function will take you through the process of removing a cartridge and replacing it with a new one . If you are fitting a new cartridge to an empty dock, skip ahead to loading the cartridge. INFO REPLACE EX-MAP... -
Page 13: Installing Your Cubify Invent Software
InsTallIng YouR CubIfY InvenT sofTWaRe Your Cubify Invent license code and usb Key can be found in your CubeX toolbox at the base of the CubeX packaging . Plug the usb provided with your CubeX into your computer and launch “Cubify_Invent .exe” . follow the onscreen instructions . -
Page 14: Getting Started
geTTIng sTaRTed CubeX MaIn Menu oveRvIeW further details about these menu options can be found throughout this manual . View the .cubex files that are saved are on sends the print jet carriage to its home PRINT HOME your memory stick and pick a .cubex file position located in the back left corner of to print . -
Page 15: Cubex Software
CubeX sofTWaRe oveRvIeW of The CubeX sofTWaRe The CubeX software is used to create the .cubex files that your CubeX will use to create your parts. The software allows you to orient, scale, re-size and rotate the part before printing . You will need to get to know the CubeX software before starting your first print. -
Page 16: Cubex Software User Interface
CubeX sofTWaRe useR InTeRfaCe hoMe Tab STL FILE OPEN Opens a .stl file OPen GROuP Toggle button used to open multi material parts CLOSE Close the open .stl file SAVE AS Save the current open .stl file AUTO PLACE (checkbox) Select for the software to automatically position your .stl files AUTO PLACE (button) Automatically places .stl files which already open... - Page 17 vIeW Tab ZOOm ZOOm In Press to zoom in ZOOm OuT Press to zoom out vIeW TOP vIeW Press to view the part from above fROnT vIeW Press to view the part from the front LefT vIeW Press to view the part from the left side RIGHT vIeW Press to view the part from the right side PRINT PATHS...
-
Page 18: How To Open A Single Part
hoW To open a sIngle paRT Press the open button . select your .stl or .creation and press open . The .stl will appear in the middle of the bed in the software . When printing in a single material be sure to keep single shell selected . hoW To open a MulTIple paRTs With your first .stl open, return to the open option. -
Page 19: Opening Multi-Material Parts
openIng MulTI-MaTeRIal paRTs select the Open Group toggle button . Use the open function to open each .stl file individually. Once each .stl is open press the close group button . The part will now be rotatable and scalable . You can select which print jets print which parts using the shell selector tool . -
Page 20: Using The Cubex Software To Build A .Cubex File
usIng The CubeX sofTWaRe To buIld a .CubeX fIle buILD sTYLe PROfILe use this to select previously saved print settings . To save print settings you are using for future quick selection, press the save as button and give the profile a name. LaYeR THICKness This is the resolution your part will be printed at . -
Page 21: Printing Your First Creation
pRInTIng YouR fIRsT CReaTIon Test creations have been printed on Your CubeX before leaving our factory . a different material and / or color may have been used for the test creation and may have a small amount of this test material in the print jet . Therefore, the start of your first creation may print some of this material and / or color before it transitions to your material/color of choice. -
Page 22: Finishing Your Creation
fInIshIng YouR CReaTIon ReMovIng YouR CReaTIon fRoM The pRInT pad Before you attempt to remove your creation from the print pad, please ensure that the CubeX has finished printing and that the print pad has moved to the bottom of the CubeX . Remove the print pad from the CubeX . -
Page 23: Removing Supports With The Ultrasonic Support Removal Tank
ReMovIng suppoRTs WITh The ulTRasonIC suppoRT ReMoval Tank Caustic soda can burn if handled improperly. never handle caustic soda without using all of the supplied Personal Protective equipment (PPe): gloves, goggles and tongs . If caustic soda touches the skin, wash it away immediately . -
Page 24: Caustic Soda Method
CausTIC soda MeThod Caustic soda can burn if handled improperly. never handle caustic soda without using all of the supplied Personal Protective equipment (PPe): gloves, goggles and tongs . If caustic soda touches the skin, wash it away immediately . If caustic soda touches the eyes, immediately use an eyewash treatment . never operate the unit without water in the cleaning tank . -
Page 25: Cubex Maintenance
CubeX MaInTenanCe ResToRIng Roughness To The pRInT pad To restore roughness to the print pad, run the sandpaper included in your toolkit diagonally across the bed corner to corner in both directions . levelIng The pRInT pad It is important that the print pad is level in order to get a good print . To help you out, we make every effort to ensure that the print pad is level when the machine leaves our factory . -
Page 26: Fine-Tuning Your Print Pad
fIne-TunIng YouR pRInT pad Re-install the Print Pad before fine tuning. use the up and Down arrows to reduce the gap between the print jet and print pad to approximately 2 mm . This will enable finer leveling. use the two remaining visible bolts to repeat the leveling process . Press the ‘function’... -
Page 27: Unblocking The Cubex Print Jet
unbloCkIng The CubeX pRInT JeT If the print tip still won’t jet material after unblocking it, you may need to unblock the print jet . first remove the delivery tube face plate and take out the cartridge, removing all filament from the corresponding cartridge dock, delivery tube and print jet . -
Page 28: Setting Up The Cubex Print Jet Offsets
seTTIng The CubeX pRInT JeT offseTs CauTIon: Do not use the offset menu unless you have been advised to do so by Cubify support, as changes to this may affect the quality of multi-material prints . PRINTING THE CALIBRATION FILE Download the CubeX calibration file from (enter address here) Print the CubeX calibration file as you would any other print file. - Page 29 PRINT JET 3 Y OFFSET Compare the lines on “Y scale 1” and “Y scale 3” to find the ones that most accurately line up . because variation is small, it may be easiest to spot 3 that look like they all line up . If this is the case, use the middle one as the correct one .
Need help?
Do you have a question about the CubeX Duo and is the answer not in the manual?
Questions and answers