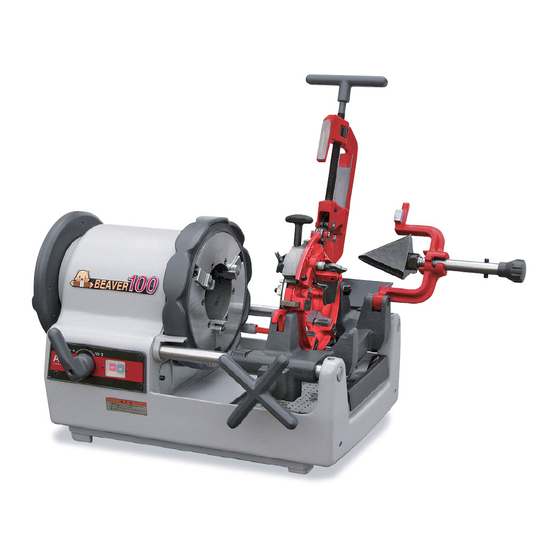

Summary of Contents for Asada Beaver 100
- Page 1 Pipe Threading Machine INSTRUCTION MANUAL 〔Read through this manual carefully before using the machine〕...
- Page 2 SAFETY PRECAUTIONS Thank you for choosing our Beaver 100. * This Instruction Manual must be retained by the user of this machine. * Read this Instruction Manual carefully and completely before use and thoroughly understand the usage, capacity, cautions, and easy repairs for correct operation.
- Page 3 CAUTIONS IN USE Electric Shock • Always ground the machine to avoid electric shock or resultant death. • Do not touch the plug with wet hands. • Do not expose the machine to rain and water and do not use it in damp or wet locations.
- Page 4 Cutting blade • Always wear gloves when replacing Dies, Reamer, Pipe Cutter and circular saw blade. Otherwise, you may cut your hands. • The saw blade and other parts coast for a while after the switch is turned off. Never touch them while they are moving. •...
- Page 5 High Temperature • Immediately after threading, Dies, chips and threaded surface are hot. Do not touch them directly with hands. Other • Fix the Carriage to avoid moving while carrying the machine, hold and lift the bottom of the machine. Do not carry the machine by the scroll or reamer to carry the machine.
- Page 6 Electric Shock • Do not put the machine or workpiece on the Power Cord. Damaged cord and current leakage will occur. Pinching • Watch the position of your finger while lowering Die-Head to avoid pinching of fingers. Falling • Do not leave the machine with a long workpiece set on it. You may tumble and get hurt.
- Page 7 Other • For proper threading, observe the following. • Use the Die-Head and Dies which match the thread size. • Install the Die-Head on the Carnage properly. • Do not put Die-Head direct on the ground and handle it carefully. •...
-
Page 8: Table Of Contents
CONTENTS 1. OVERVIEW………………………………………………………………………………… 2. COMPONENTS OF THE MACHINE 1) Main Parts 1-1)Threading Machine………………………………………………………… 1-2)Circular Saw……………………………………………………………… 1-3)Die-Head…………………………………………………………………… 2) Specifications………………………………………………………………………… 3) Standard Accessories Specification…………………………………………………… 4) Optional Accessories………………………………………………………………… 3. INSTALLATION 1) Carrying the Machine………………………………………………………………… 2) Installation…………………………………………………………………………… 4. OPERATION 1) Preparing for Operation 1-1)Checking Threading Oil………………………………………………… 2)... -
Page 9: 1. Overview
1. OVERVIEW • The pipe threading machine, model Beaver100, is intended to rotate a material such as a pipe and rod for cutting or threading.The machine consists of a motor which rotates a pipe and rod, etc. a Scroll and a Hummer Chuck to hold the work, a Cutter to cut the work, a Die-Head to thread the work, and a pump to lubricate the threading oil. -
Page 10: 1-3)Die-Head
1-3) Die-Head • The diagram illustrates main parts of Die Head. Before changing the thread size, change Dies and position of Selector Block. (1/2"-2") (1/2"-2"AT) ① ① ② ⑩ ② ③ ⑦ ⑤ ⑤ ② ⑨ ⑧ ⑪ ⑫ ⑥ ⑥... -
Page 11: 3) Standard Accessories Specification
3) Standard Accessories Specification Beaver100 Specification Manual Die Head Beaver Die Head 1/2”~2” 1/2”~2” Die-Head Beaver Die Head 21/2”~4” 21/2”~4” 1/2”~3/4” 1”~2” Dies 21/2”~4” Other 4L Threading oil, Tools, Machine Cover 4) Optional Accessories Gutter Blade for Stainless Steel Pipe Manual Die Head Beaver Die Head Threading Oil 16L... -
Page 12: 1) Carrying The Machine
3. INSTALLATION 1) Carrying the Machine • Fix the Carriage to avoid moving while carrying the machine, hold and lift the bottom of the machine. Do not hold the scroll and reamer to carry the machine. • When lifting it, bend your knees to avoid a load on your waist. •... -
Page 13: 2) Installation
2) Installation • Always ground the machine to avoid electric shock and resultant death. • An extension cord used should be a three-core cabtyre cable having an earth wire. Use a thick and durable cable for outdoor application. • Never install an earth on the gas pipe. Explosion may take place. •... -
Page 14: 1) Preparing For Operation
4. OPERATION • The following gives a general description of threading work including the pipe cutting. (1) Prepare for operation. Check threading oil. (2) Install the work on this machine. (3) For cutting a work. Pipe Cutter operation and Circular Saw operation are different. (4) In case of a pipe, ream the inner surface. -
Page 15: 2) Setting The Workpiece
2)Setting the Workpiece • Do not thread the workpiece within 90 mm from the Hammer Chuck. The Carriage will touch the frame before threading is completed and the machine may be damaged. 90mm Hammer Chuck Pipe (1) Swing the Cutter , the Die-Head and the Reamer upward to out-of-way position. (2) Insert the workpiece from the Scroll side and tighten the Scroll. -
Page 16: 3-1)Pipe Cutter
3) Cutting • Use the Pipe Cutter or Circular Saw for cutting the workpiece. Do not gather cut workpieces into the tank and take them out. 3-1)Pipe Cutter • Do not touch the cut surface with hands because it is hot and sharp. •... -
Page 17: 3-2)Circular Saw
3-2)Circular Saw • For installation and handling, refer to the Instruction Manual of the Circular Saw. Always use the machine at the voltage indicated on Machine Plate. Otherwise, the machine may become hot, emit smoke or catch fire. The saw blade and other parts coast for a while after the switch is turned off. -
Page 18: 4) Reaming
4) Reaming • Blade tip of the Reamer is very sharp. Do not touch it with bare hand. • Adjust the Shift Lever to the position of 1/2-2. (1) Ream the inner surface of the pipe cut with the Cutter. (2) The Shift Lever is adjusted to the position of 1/2-2.(to a High-Speed rotation.) (fig.14) (3) Move Reamer down into reaming position and set the pipe. -
Page 19: 5-2)Removing And Installing Dies Of Die-Head Set In Carriage
5-2) Removing and installing Dies of Die-Head set in Carriage ■ For Beaver Die-Head 1/2"-2"AT,21/2"-4" [Removal] ・Wear gloves to avoid cutting hands by the Dies. (1) Pull Locking Lever toward A to open Dies. (2) Set Selector(silver) Pin into the Dies Selector Block. (3) When the Die-Head is lowered, pull out Dies Nos. - Page 20 ■ For Beaver Die-Head 1/2"-2" [Removal] ・Wear gloves to avoid cutting hands by the Dies. (1) Remove the Location Plate. Pull locking lever toward “A” to open dies. Slide cam plate fully toward “B”. (fig.19) (2) When the Die-Head is lowered, pull out Dies Nos. 1 and 4 from above. (3) Lift and remove the Die-Head and pull Dies Nos.
- Page 21 ■ For manual Die-Head [Removal] ・Wear gloves to avoid cutting hands by the Dies. (1) Loosen The Die-Nut,lower the link fully,tighten the Die-Nut and throw the Open-Close Lever up to remove the Dies.(fig19) (2) When the Die-Head is lowered, pull out Dies Nos. 1 and 4 from above. (3) Lift and remove the Die-Head and pull Dies Nos.
-
Page 22: 5-3)Replacing Dies And Die-Head Together
5-3) Replacing Dies and Die-Head together 〔Removing and Installing Die-Head from Carriage〕 (1) Lift the Die-Head halfway. (2) Position Die-Head on the diagonal and remove. (3) Only when the Die-Head is adjusted parallel with the flat surface of the Die Head Pin, can it be removed or install ed from the machine. -
Page 23: 7) Threading
■ For Manual Die-Head (1) When the Die-Nut has been loosened,the Link goes up and down. Match the eye-work of the Link with the predetermined scale graduation on the Scale-Plate. (fig.27) Link Scale-Plate Die-Nut Loosen Open-Close Lever 〈27〉 7) Threading ・... -
Page 24: 7-1)Adjustment Of Thread Length
7-1) Adjustment of Thread Length • The thread length has been adjusted within the standard length at the factory, but can be adjusted as required. ■ For Beaver Die-Head 1/2"-2"AT,21/2"-4" (1) Pull the Locking Lever toward A to open Die-Head. (fig.30) (2) Loosen Lock Nut and turn Adjust Screw clockwise depending on the required thread length. -
Page 25: 7-2)Adjustment Of Thread Depth
7-2) Adjustment of Thread Depth ■ for Beaver Die-Head 1/2"-2"AT,21/2"-4" * Loosen the Block Screw and move the Selector Block to adjust the thread depth. Sliding toward H makes deeper threads and G makes, shallower threads. The thread depth will change by 1.5 to 2 threads under or over by one scale. -
Page 26: 8) Removing The Workpiece
8) Removing the Workpiece • The workpiece is wet and slippery with threading oil. Use utmost care not to drop on your feet. (1) Turn the Rack Handle counterclockwise and return the Carriage. (2) Loosen the Hammer Chuck. (3) Loosen the Scroll and pull out the workpiece. 9) Cleaning after Use •... -
Page 27: 5. Maintenance & Inspection
5. MAINTENANCE & INSPECTION • Always wear gloves when replacing the Cutting Blade and Threading Dies. • Disconnect the Power Plug. 1) Replacement of Parts 1-1) Replacement of Switch • Disconnect the Power Plug to avoid electric shock. (1) Remove the four screws, and pull out the switch plate on the front. (2) Remove the two screws,and remove the switch from the switch plate. -
Page 28: 1-2)Replacement Of Reamer Blade
1-2) Replacement of Reamer Blade ・ Wear gloves when working so as not to cut fingers with the Reamer Blade. (1) Lift the Cutter and Die-Head and down the Reamer. (2) Put out the Spring Pin in the neck of the Reamer Blade. (3) The Reamer Blade is detached by pulling the Reamer Shaft forward. -
Page 29: 1-4)Replacement Of Pump
1-4) Replacement of Pump ・ Oil in the pump and tube overflows, staining the floor. Spread waste cloth around the Pump. ・ Be careful not to place the code by the motor cover when you assemble the motor cover. Damaged cord and current leakage will occur. (1) Set an oil pan (3.5 liters), remove the drain plug to drain the oil. -
Page 30: 1-5)Replacement Of Jaw Inserts
1-5) Replacement of Jaw Inserts • Disconnect the Power Plug. (1) Turn the Rack Handle counterclockwise so that the Carriage moves to the right end. (2) Swing the Cutter upward to out-of-way position. (3) Turn the Hammer Chuck and open up to until the Wrench enters. (fig44) (4) Loosen the screws securing the Jaw Inserts. -
Page 31: 1-6)Replacement Of Carbon Brush
1-6) Replacement of Carbon Brush • Disconnect the Power Plug to avoid electric shock. • Keep the new carbon brush free from oil, dirt, chips, etc. Avoid the stain of gloves from attaching to the Carbon Brush. • Be careful not to damage the code with the motor cover when you assemble the motor cover. -
Page 32: 2) Adjustment Of Parts
2) Adjustment of Parts 2-1) Adjustment of Amount of Discharging Thread Oil (1) Ensure the oil is filled into the tank up to the Strainer wire netting. (2) If the amount of threading oil discharged from the Die-Head is not appropriate, adjust the discharging amount with the Oil Adjust Screw. -
Page 33: 3) Daily Inspection And Maintenance
3) Daily Inspection and Maintenance • Do not wet the motor with water or oil. * Immediately replace Power Plug, Power Cord and extension cord, if damage. * Ensure the oil is filled up to the tank lid wire netting. If not, replenish. * Adjust with the Oil Adjust Screw if the amount of threading oil discharged from the Die-Head is not appropriate. -
Page 34: 6. Before Asking For Repairs
6. Before asking for Repairs 1) In case the oil does not come out: * Is the Oil Tank fall of oil? * Are the Suction Pipe , the Strainer and the Filter clear ? * Is the Pump in order ? 2) In case power is not enough: * Has the power voltage not dropped ? * Is the extension cord not too long or slim ? - Page 36 CUSTOMER NOTE Please enter the following use. This note will be useful in making inquiries and placing purchase orders for parts. SERIAL No.: DATE OF PURCHASE: SALES REPRESENATIVE: Code No.BE231 Ver.04...
Need help?
Do you have a question about the Beaver 100 and is the answer not in the manual?
Questions and answers