Table of Contents
Advertisement
Available languages
Available languages
Touch & Go® Advance
S
y m b o l S
Warning
NEVER touch moving parts. Keep hands and
utensils out of container
Electrical Shock Hazard
High temperature when blending hot liquids
DO NOT insert items into the container while
the blender is in use
Unplug while not in use, before cleaning, changing accessories or approaching parts that move while the
blender is in use
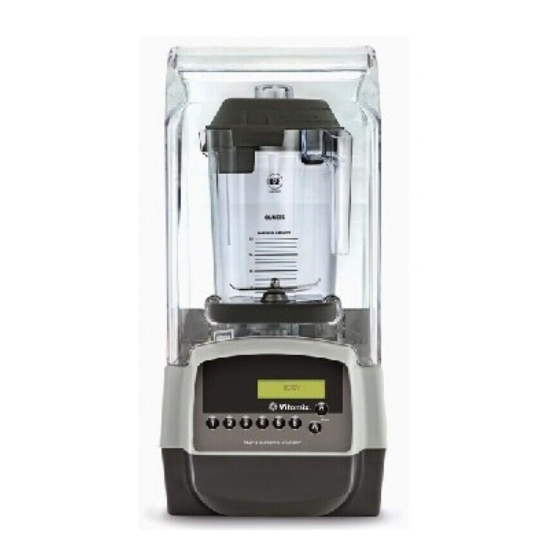
Dimensions:
• 18.0 in. / 45,7 cm high with lid closed
• 24.5 in. / 62,2 cm high with lid open
• Depth: 10.7 in. / 27,2 cm with handle
• Width: 8.5 in. / 21,6 cm
Do not use extension cords with machine.
VM#
Rating
VM0214
120V, 50-60 Hz, 12 Amps
To see the complete line of Vitamix products,
visit vitamix.com.
Caution
Operate with lid and lid plug in place
Read and understand owner's manual
Do not immerse
l / O
On/Off
R
e c yc l i n g
This product has been supplied from an environmentally aware manufacturer.
This product may contain substances that could be harmful to the environment if
disposed of in places (landfills) that are not appropriate according to legislation.
The 'crossed-out wheelie bin' symbol is placed on this product to encourage you to
recycle wherever possible.
Please be environmentally responsible and recycle this product through your
recycling facility at the end of its life.
Additional information
Tel: +1 440 235 0214 Email: international@vitamix.com
i
n f o R m at i o n
8615 Usher Road, Cleveland, Ohio 44138 U.S.A.
Vita-Mix® Corporation
Advertisement
Table of Contents

Summary of Contents for Vitamix Touch & Go Advance
- Page 1 Do not use extension cords with machine. Rating Additional information VM0214 120V, 50-60 Hz, 12 Amps Vita-Mix® Corporation To see the complete line of Vitamix products, 8615 Usher Road, Cleveland, Ohio 44138 U.S.A. visit vitamix.com. Tel: +1 440 235 0214 Email: international@vitamix.com...
-
Page 2: To Avoid Injury
Keep this appliance and it’s cord out of reach of children. 5. Unplug the power cord from the wall outlet when the Vitamix® machine is not in use, before disassembling, when putting on or taking off parts, and before cleaning, other than washing the container. - Page 3 . SAVE THESE SAFETY INSTRUCTIONS • The Vitamix blender’s U.S.A. power cord comes equipped with a three-prong (grounding) plug which mates with a standard three-prong wall outlet (Figure A). This cord will vary for countries outside the USA. •...
-
Page 4: Limited Warranty
How to Obtain Warranty Coverage and Repair Who to Contact For Warranty Service and Repair. In the event your Vitamix blender needs service or repair covered by the terms of this warranty, please call the Vita-Mix Corporation, an authorized service center or a local distributor for warranty assistance. -
Page 5: Blending Tips
• When the thermal protector shuts the motor off, review your processing techniques and your instructions. Your recipes may be too thick or have too much material in them. Consider adding more liquid and consult Vitamix® Customer Service or your local Vitamix Distributor for further assistance. - Page 6 Display Window: This area, depending on which button is pressed, displays a variety Vitamix®. Call your distributor or customer service for more information. Programming Pre-Set Buttons of operation messages. A “Ready” message appears when there is power to the machine.
-
Page 7: Recipe Options
Blade Agitator Assembly: The blade assembly includes a precision-hardened The following programs are designed to be used with the Vitamix Aerating Container (sold separately). Contact your local Vitamix Dealer/ stainless steel blade with enclosed double sealed steel ball bearings for maximum Distributor to puchase the Aerating Container. - Page 8 Twist Lock Compact Cover Twist Lock Compact Cover Removal Installation Note: The twist lock cover is designed 1. Put the twist lock compact cover on to be removed without the use of tools. top of the blender base. Align the four DO NOT force the cover to rotate with locking tabs on the motor adapter plate tools or other objects.
- Page 9 6. To reinstall the cover door, gently spread the sides of the door and place the door hinge cutouts over the round hinges. (See Figures F and G). FIGURE F FIGURE G a R i n g f o R o u R a c h i n e IMPORTANT NOTES!
- Page 10 Call Vitamix technical support. • Machine stops in the middle of its blend cycle and resets; display window a. Plug the machine into its own dedicated outlet. reads “VITAMIX GENERAL PROGRAM” then “READY” ® ©2020 Vita-Mix Corporation. No part of this publication may be reproduced or transmitted in any form or by any means or...
-
Page 11: Renseignements Supplémentaires
à la fin de son cycle de vie. N'utilisez aucune rallonge électrique avec l'appareil. No VM Caractéristiques Renseignements supplémentaires VM0214 120V, 50-60 Hz, 12 A Vita-Mix® Corporation 8615 Usher Road, Cleveland, Ohio 44138 É.-U. Pour voir la gamme complète de produits Vitamix, Tél. : +1 440 235-0214 Adresse courriel : international@vitamix.com visiter vitamix.com. - Page 12 5. Débranchez le cordon d'alimentation de la prise murale lorsque l'appareil Vitamix® n'est pas utilisé, avant le démontage, lors de la mise en place ou du retrait de pièces, et avant le nettoyage, autre que le lavage du récipient.
- Page 13 CONSERVEZ CES DIRECTIVES DE SÉCURITÉ • Le cordon d'alimentation américain du mélangeur Vitamix est équipé d'une fiche à trois broches (mise à la terre) conçue pour être insérée dans une prise d'alimentation à trois alvéoles standard (figure A). Le cordon d'alimentation différera pour les autres pays.
-
Page 14: Garantie Limitée
GARANTIE LIMITÉE Afin de maximiser la durée de vie de votre produit Vitamix® et de le garder en bon état de marche, il est important de suivre quelques conseils d'entretien simples : Inspectez périodiquement la prise d'entraînement à la recherche de signes visibles d'usure, de fissures ou de frein sur la prise. Si vous constatez des dommages, remplacez la prise d'entraînement par celle de rechange fournie avec votre mélangeur. -
Page 15: Conseils Pour Mélanger
• Si le protecteur thermique éteint le moteur, passez en revue vos techniques de mélange et vos instructions. Vos recettes pourraient être trop consistantes ou trop volumineuses. Songez à ajouter davantage de liquide et consultez le Service à la clientèle Vitamix® ou votre distributeur Vitamix local pour obtenir une aide supplémentaire. - Page 16 Vitamix®. Téléphonez à votre distributeur ou au service à la clientèle pour obtenir de plus Écran d'affichage : En fonction du bouton enfoncé, cet écran affichera différents...
- Page 17 Les programmes suivants sont conçus pour être utilisés avec le récipient d'aération Vitamix (vendu séparément). Communiquez avec votre Le couvercle une pièce est facile à nettoyer et facile à détaillant ou distributeur Vitamix local pour vous procurer le récipient d'aération. Communiquez directement avec le service à la clientèle de mettre, à enlever et à sceller.
- Page 18 Retrait couvercle Installation ducouvercle compact verrouillable compact Twist Lock Remarque : Le couvercle verrouillable est 1. Posez le couvercle compact verrouillable conçu pour être retiré sans devoir recourir sur le dessus du socle du mélangeur. à des outils. NE forcez PAS l'ouverture Positionnez les quatre languettes de du couvercle à...
- Page 19 6. Pour replacer capot, écartez délicatement les côtés et placez les encoches sur les charnières rondes du couvercle. (Voir figures F et G). FIGURE F FIGURE G n t R e t e n i R v o S a p pa R e i l S REMARQUES IMPORTANTES! Produits de nettoyage : N'utilisez pas des produits de nettoyage abrasifs ou des agents de blanchiment concentrés lors du nettoyage.
- Page 20 • Tous les boutons font fonctionner le mélangeur à la même vitesse. • L'écran d'affichage indique « CORRUPT DATA ». Communiquez avec le soutien technique de Vitamix. • L'appareil s'arrête au milieu de son cycle de mélange et se réinitialise; a. Branchez l'appareil à une prise lui étant uniquement dédiée.
-
Page 21: Información Adicional
# de modelo VM Valores nominales eléctricos Información adicional VM0214 120 V, 50-60 Hz, 12 Amps Vita-Mix® Corporation Para ver la línea completa de productos Vitamix, 8615 Usher Road, Cleveland, Ohio 44138 EUA visite vitamix.com. Tel.: +1 440 235 0214, C. electrónico: international@vitamix.com... -
Page 22: Peligro De Descarga Eléctrica
5. Desconecte el cable de alimentación a la toma de corriente de pared cuando la máquina Vitamix no esté en uso, antes de desarmar, colocar o retirar piezas, y antes de la limpieza, siempre que no se trate de lavar el vaso. - Page 23 • El cable de alimentación de la licuadora Vitamix para EUA cuenta con un enchufe de tres clavijas (con conexión a tierra) diseñado para tomas de corriente de pared estándar con tres orificios (Figura A). Este cable varía para países fuera de EUA.
-
Page 24: Garantía Limitada
Cualquier devolución de Equipo deberá tener el número de autorización de devolución ("RA") claramente marcado en el exterior de la caja. Cualquier Equipo que se envíe a Vitamix sin previa autorización o aprobación, será devuelto a la dirección del remitente "tal como se encuentre" sin haber sido reparado. -
Page 25: Consejos De Mezclado
• Si el protector térmico apaga el motor, revise las técnicas de procesamiento y las instrucciones. Es posible que las recetas sean muy espesas o contengan demasiados ingredientes. Pruebe agregando más líquido y póngase en contacto con el área de Servicio al cliente de Vitamix® o con su distribuidor Vitamix local para solicitar asistencia. - Page 26 20 recetas disponibles. Debido a las diferencias en las recetas, los de software programador ofrecido por Vitamix®. Póngase en contacto con su resultados pueden variar.
- Page 27 Los siguientes programas están diseñados para usarse con el vaso para aireación de Vitamix (vendido por separado). Póngase en contacto con • Esta tapa no cuenta con tapón. su proveedor o distribuidor Vitamix local para adquirir el vaso para aireaci´´on. Comuníquese directamente con el área de Servicio al cliente de • Los ingredientes se puede agregar por el orificio Vitamix para confirmar la disponibilidad y obtener información sobre el producto.
- Page 28 Extracción de la cubierta Instalación de la cubierta compacta de cierre por compacta de cierre por torsión torsión Nota: La cubierta de cierre por torsión 1. Coloque la cubierta compacta de cierre está diseñada para retirarse sin utilizar por torsión sobre la base de la licuadora. herramientas.
- Page 29 6. Para volver a instalar la puerta de la cubierta, separe con cuidado las partes laterales de la misma y coloque las muescas para las bisagras sobre las bisagras redondas. (Ver las figuras F y FIGURA F FIGURA G u i d a d o d e S u m á q u i n a ¡OBSERVACIONES IMPORTANTES! Productos de limpieza: no use agentes abrasivos ni cloro concentrado cuando limpie la unidad.
- Page 32 • La máquina se detiene a la mitad del ciclo de mezclado y después a. Conecte la máquina en una toma de corriente exclusiva para esta. se reinicia; la pantalla de visualización muestra el mensaje “VITAMIX GENERAL PROGRAM” (PROGRAMA GENERAL DE VITAMIX) y luego el mensaje “READY”...
Need help?
Do you have a question about the Touch & Go Advance and is the answer not in the manual?
Questions and answers