Table of Contents
Advertisement
Quick Links
Advertisement
Table of Contents

Related Manuals for Micromax X260


Summary of Contents for Micromax X260
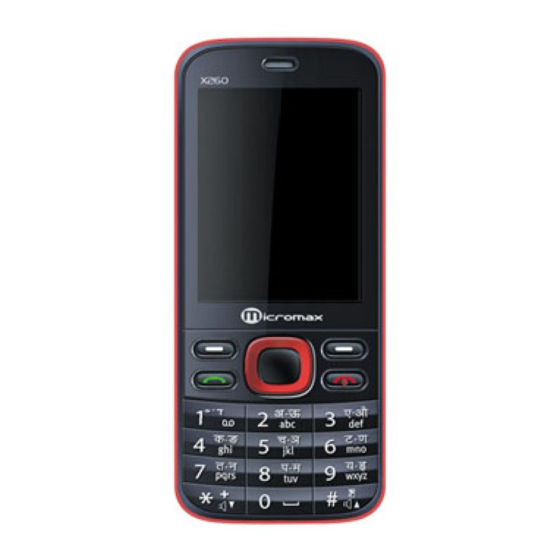
- Page 1 X260 User Guide...
-
Page 2: Table Of Contents
Legal Information .................. 4 Important Notice ................... 4 Getting Started ..................5 3.1. Packing Contents ................5 3.2. Installing SIM, Battery and Attaching other Accessories ....5 SIM Card & Battery Installation (Figure 2) ..........5 Memory Card Installation (Ref Figure 2) ..........6 Connecting Hands-free Kit (Ref Figure 3) .......... - Page 3 Settings: ....................13 4.2. Messages ..................14 Text Message: ..................14 MMS: ....................15 Chat: ....................15 Voice Mail Server: ................15 Broadcast Message: ................15 Voice MMS: ..................15 4.3. Call Logs ..................15 4.4. Organizer ..................16 Calendar ....................16 Alarm ....................
-
Page 4: Legal Information
Under no circumstances shall Micromax be responsible for any loss of data or income or any special, incidental, consequential or indirect damages howsoever caused. -
Page 5: Getting Started
3. Getting Started 3.1. Packing Contents Before using Micromax X260 mobile phone, carefully remove the contents from shipping carton and check for any damages or missing contents. If found any, contact your Authorized Distributor or Shipping agent immediately. The standard packing contents are as follows: •... -
Page 6: Memory Card Installation (Ref Figure 2)
When properly connected, the phone will display a message ‘Earphone Plugged In!’ with an icon displayed on top of the screen. NOTE: Only use Micromax specified accessories. -
Page 7: Connecting The Charger/Charging The Battery (Ref Figure 4)
Figure-3 Connecting the charger/Charging the Battery (Ref Figure 4) 1. Plug the charger’s transformer into a standard AC outlet. 2. Insert the charger’s output plug into the phone’s connecting socket as shown in figure. NOTE: It may take up-to 30 minutes before the battery icon/charging icon appears on the screen when charging. -
Page 8: Powering On And Off The Phone
Figure-4 Powering ON and OFF the Phone To Power your phone ON or OFF, press and hold the End (RED) key for at least 3 seconds or until the display lights up or goes off. Enter the lock code if necessary and select OK to Power ON. -
Page 9: Call Key
Call Key • Make calls • Answer calls • Press when idle to see the list of calls. End Key End or reject calls; Press and hold this key to turn phone on/off. Up and Down Direction Keys • Scroll to select options •... -
Page 10: Keypad Lock Icon
Call Option The Micromax X260 phone offers multiple functions during a call. During a call, following functions can be actualized if you operate according to the instructions on the screen. Press up and down direction keys to choose the wanted function and press select key to enter. -
Page 11: Menu Layout
• Mute: Turn off the Microphone during an active call. • DTMF (Dual-tone Multi-frequency): You can choose on/off; which is to send dual-tone multi-frequency sound. This can offer dialing to the telephone numbers with extensions or IVR systems installed for menu driven options. •... -
Page 12: Function Menu
Photos Camera Video Player Video Recorder Audio Player FM Radio Sound Recorder • Extra Function File Manager Converter Calculator Torch • Applications Games Game Settings 4. Function Menu 4.1. -
Page 13: Search Contact
Search Contact: Unlike Quick search, Search option enables the user to search an entry by its complete name. Add New Contact: Select this option in order to add a new entry into the SIM memory or to the phone memory. Multi Operation: Multi Operation has the following options •... -
Page 14: Messages
Owner Number lets you input your own phone number and name. If set to ON, the phone’s main screen displays the name or your number on the screen. NOTE: This is a SIM Card dependant service. • Fields: Gives you an option to select the fields to be edited at the time of a adding a new entry in the Phone book. -
Page 15: Mms
• Common setting: These settings include the following - Delivery Report and Reply Path • Memory Status: Memory status gives you the information about the storage status of the phone memory as well as the SIM memory. • Preferred Storage: Lets you select the default storage location of the messages between Phone and SIM. -
Page 16: Organizer
• SIM Call Settings Caller ID Call Waiting Call Divert Call Barring Line Switching Auto Redial • Auto Redial • Call Time Display • Call Time Reminder • Auto Quick End 4.4. Organizer Calendar You can use the calendar to keep track of important meetings. After entering the calendar function menu you can select year, month and date using direction keys. -
Page 17: To Do List
To Do List All tasks saved in calendar, can be viewed in To-Do list. World Clock World clock can be used to know the time in various cities across the world. You can see a world map and instantaneous time in those cities using world clock. Enter world clock to view world cities time using the direction keys. -
Page 18: Bluetooth
GPRS Data. NOTE: Select the appropriate setting from the list for using a particular feature depending on the availability of the operator services. Data Accounts contain two types of accounts used to establish GSM/GPRS connections for WAP, MMS and WWW browsing. -
Page 19: Time And Date
Phone Setup You have following options listed under phone settings: • Language: The Micromax X260 currently supports only English language. • Preferred Input Method: This enables you to select the text input method from 5 options. They are – Multitap ABC, Multitap abc, Numeric, Smart ABC,... -
Page 20: User Profiles
• Shortcuts: Shortcuts help you use certain key features of the phone instantly. You can choose the features at your own wish and set them in the menu. You can add new features to the list, delete, edit, disable and change the order. -
Page 21: Security Setup
Selecting this option will ask you to enter the password to restore the phone to factory settings 4.7. Multimedia The Micromax X260 comes with a host of multimedia applications to provide you with unlimited entertainment. Photos: Image Viewer stores all your pictures which are preloaded as well as those taken by the phone camera. -
Page 22: Camera
Camera: The Micromax X260 comes with a digital camera to take pictures and record videos. It has a number of setting options to capture quality images. • Camera Settings Banding – To select between 50Hz and 60 Hz band. Delay Timer – Delay Timer enables you to set the time (Off, 5sec, 10sec, 15sec) before a picture is taken after pressing the capture key. -
Page 23: Sound Recorder
Sound Recorder You can record sound/voice on your Micromax X260 phone. Just select sound recorder, go to options and press record. Select Stop to rename the file and save it. Select pause to ‘pause’ the recording and ‘continue’ to resume the recording. -
Page 24: Schedule Fm Recorder
‘skip to previous channel’ etc. Schedule FM Recorder Micromax X4i comes with a unique feature of FM Scheduling. This feature enables you to schedule the radio to power ON itself and record your favorite program. You can set the time, date, and channel and record functions to record the desired program. - Page 25 ON/OFF and to increase/decrease the volume levels. The contents of the manual may differ/vary from the actual product. The contents in this manual may be updated without any prior notices. For latest updates please refer to Micromax website at www.micromaxinfo.com...
Need help?
Do you have a question about the X260 and is the answer not in the manual?
Questions and answers