Table of Contents
Advertisement
Quick Links
Advertisement
Table of Contents

Subscribe to Our Youtube Channel
Summary of Contents for Brookstone BKWIFICAM2
- Page 1 SMART CAMERA USER MANUAL FCC ID: 2AT5D-ZS-GX1...
- Page 2 — Consult the dealer or an experienced radio/TV technician for help. To maintain compliance with FCC’s RF Exposure guidelines, This equipment should be installed and operated with minimum distance between 20cm the radiator your body: Use only the supplied antenna. For more products please visit www.brookstone.com...
-
Page 3: Specifications
WARRANTY INFORMATION One Year Limited Warranty. Customer Service Number: 732-994-2301 The BROOKSTONE trademark. names and logos are owned by BKST Brand Holdings LLC ©2019. All rights reserved Manufactured, marketed and distributed by Smartpoint LLC, under license Google and Google Play are trademarks of Google LLC. - Page 4 FEATURES • Wi-Fi remote controlled through App • Remotely control tilt and pan movement of lens for 360° of coverage • Night vision • Motion detection • Two way audio • Live video • Video recording • Takes still photos...
-
Page 5: Product Configuration
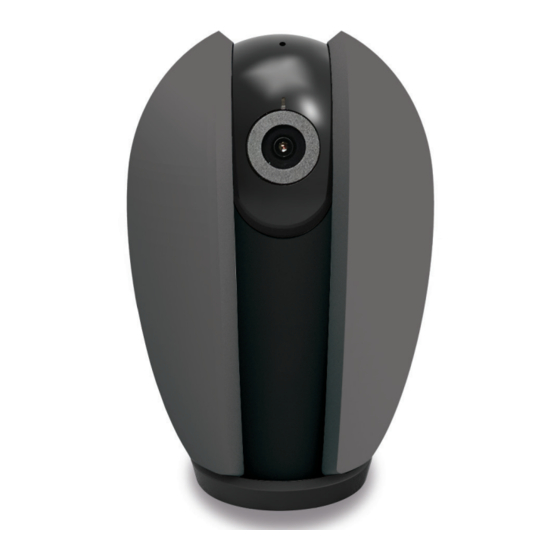
PRODUCT CONFIGURATION Microphone Status light Lens SD card slot Reset button (SD card slot and reset button can only be seen when camera lens is pointed all the way up) USB port Speaker Items included in package: Camera, Adapter, USB Cable, Mounting kit and User Manual. -
Page 6: Download App
DOWNLOAD APP 1. Android: download “Brookstone Smart” app on GooglePlay. 2. iPhone: download “Brookstone Smart” app from the App Store. Brookstone Smart... -
Page 7: Registration And Login
REGISTRATION AND LOGIN 1. Run the “Brookstone Smart” app from your smart phone. 2. Register and login. -
Page 8: Add Device
ADD DEVICE 1. Plug in Wi-Fi Camera into the wall. After about 20 seconds it will make a chiming sound and then the red light will start blinking rapidly. Camera is now ready to be set up. 2. Make sure phone is connected to your Wi-Fi network and that it is a 2.4GHz network. - Page 9 4. Press the “next step” button 5. Make sure phone is connected to the Wi-Fi network that the device will be connected to. Enter your password for the Wi-Fi network. 6. Follow the directions in the app and hold the QR code on the screen in front of the view of the camera.
- Page 10 7. Connecting process will begin and status light will turn blue. Do not turn off Smart Camera or phone while connecting. Wait for connection process to complete. 8. Once device has been successfully added, name the device what you would like it to be called in the app.
-
Page 11: Push Notifications
PUSH NOTIFICATIONS You can turn on/off notifications for all devices connected to app by clicking on the “Me” button at the bottom right of the screen. 2. Then click on ”Settings” button. From there you can turn on/off all notifications. -
Page 12: Remove A Device
REMOVE A DEVICE From the home screen, click on the device you would like to remove. 2. Then click on the edit symbol on the top right of the screen. 3. From there you would then click the “Remove Device” button at the bottom of the screen. -
Page 13: App Functions
APP FUNCTIONS Live Video To view live video simply click on the device under “All devices” and you will see your live video at the top immediately. Tilt your phone sideways or hit the full screen button in the bottom right corner of the live video to see your live footage at full screen on your phone. -
Page 14: Video Recording
Video Recording To record video press the “record” button at the bottom left corner of the screen. To end recording, press “record” button again. To view recordings, press “playback” button at the middle, right of the screen. Note: You must have an SD Card in camera to record video in app. -
Page 15: Taking A Photo
Taking a Photo To take a photo, press “take a photo” and the photo will be saved to your phone in the photos and video section. Infrared Night Vision Infrared night vision is controlled by camera automatically. When the area around the camera becomes too dark, the infrared night vision will activate automatically. -
Page 16: Two Way Audio
Two Way Audio To activate two way audio, press the “speak” button. When the button is blue, whatever you say into your phone will come out of the speaker on the camera. You can also hear at the same time any sounds from the live video on the camera. -
Page 17: Motion Detection
Motion Detection The camera uses infrared sensors when someone/something appears within its detection area. Push notifications will be sent your phone once motion is detected. To access control of motion detection press the camera setting button at the top right. On the next page you can select “motion detection”. - Page 18 Remotely Controlling the Camera Lens To remotely control the camera press the “Direction” button on the main camera screen. From here you can rotate pan or tilt on the camera lens. You can also control the pan and tilt movement of the lens by turning your phone sideways and dragging your finger in any direction on the screen.
- Page 19 Hub controls (sound, video quality, signal strength) You can control features from the live video feed. There is a volume button that is used to mute and unmute the live feed. Next to that button is the video quality button and it can be used to switch between standard and high definition video.
- Page 20 Device”. On the next page press “Add Sharing” at the bottom. After that, enter the email on the person’s Brookstone Smart account that you would like to share the camera with. They will get a notification to accept and after that the other person will have access to view your camera through the Brookstone Smart app on their phone.
Need help?
Do you have a question about the BKWIFICAM2 and is the answer not in the manual?
Questions and answers