Advertisement
Certifications & Information
• NSF Certified
• UPC & cUPC Certified
• Lead-Free Construction
Tools
Gather the necessary tools as shown to complete the installation of this faucet.
The following tools are optional:
Safety Glasses
Configuration
Sir
Faucet
One-Hole Installation
Three-Hole Installation with Base Plate
* This measurement is only suggestive and may vary
according to the sink model.
Installation Guide
• ADA Approved
• Limited Lifetime Warranty
Adjustable Wrench
Channel Lock
Installation Guide
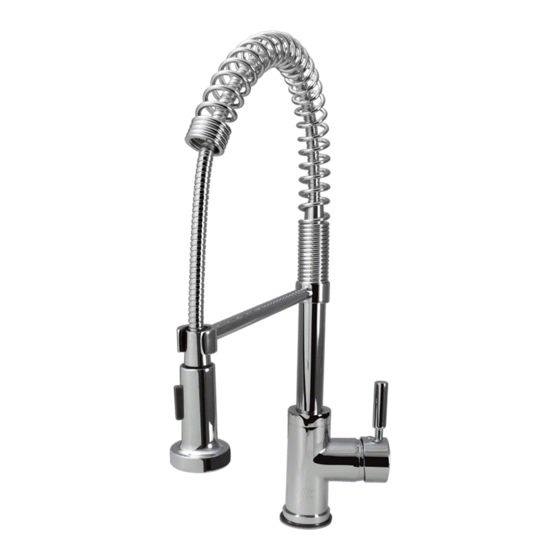
Model 766
Spring-Spout Kitchen Faucet
Phillips Screwdriver
Pliers
Connect to water supply lines with TWO
3/8" Compression Faucet Connectors
Aerator Flow Rate
2.08gpm at 60PSI
Spray Flow Rate
2.05gpm at 60PSI
Flashlight
Water supply
Connector
1
Advertisement
Table of Contents

Related Manuals for MRdirect 766

Summary of Contents for MRdirect 766
- Page 1 Installation Guide Model 766 Spring-Spout Kitchen Faucet Certifications & Information • NSF Certified • ADA Approved Aerator Flow Rate • UPC & cUPC Certified • Limited Lifetime Warranty 2.08gpm at 60PSI • Lead-Free Construction Spray Flow Rate 2.05gpm at 60PSI Tools Gather the necessary tools as shown to complete the installation of this faucet.
- Page 2 Installation Guide Faucet Installation Turn off the water supply. Remove the faucet with the mounting hardware attached from the package. Remove all mounting hardware from the shank. shank Insert the shank of the faucet body into the hole of the sink deck. If installing a base plate, insert the faucet shank through the base plate first, and then into the holes of the sink deck.
- Page 3 Installation Guide Important Turn on the water supply SLOWLY, to test for leaks before completely opening the water lines. Pull the spray head from the faucet body and disconnect it by unscrewing it from the spray hose. Once the spray head is disconnected, remove the aerator washer from the hose and direct the open end of the hose into the sink.
- Page 4 www.mrdirectint.com sales@mrdirectint.com 1-877-946-5725 Notes Warranty Information MR Direct warrants to the original consumer purchaser that our sinks and faucets will be free from defects in material and workmanship under normal use for the lifetime of the product. MR Direct may elect to repair or replace any defective MR Direct product covered by our warranty.
Need help?
Do you have a question about the 766 and is the answer not in the manual?
Questions and answers