Advertisement

INSTRUCTION MANUAL
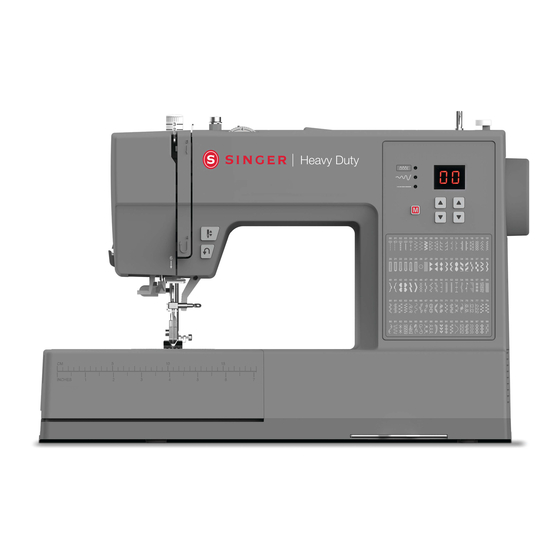
HD 6600C • HD 6605C
00 01 02 03 04 05 06 07 08 09 10 11 12 13 14 15 16 17 18 19
20 21 22 23 24 25 26 27 28 29 30 31 32 33 34 35 36 37 38 39
40 41 42 43 44 45 46 47 48 49 50 51 52 53 54 55 56 57 58 59
60 61 62 63 64 65 66 67 68 69 70 71 72 73 74 75 76 77 78 79
80 81 82 83 84 85 86 87 88 89 90 91 92 93 94 95 96 97 98 99

Advertisement

Table of Contents
loading
Need help?

Need help?

Do you have a question about the HD 6600C and is the answer not in the manual?

Questions and answers

Carolyn Scholl
April 12, 2025

Can I order a manual already printed

Subscribe to Our Youtube Channel

Summary of Contents for Singer HD 6600C

  • Page 1 INSTRUCTION MANUAL HD 6600C • HD 6605C 00 01 02 03 04 05 06 07 08 09 10 11 12 13 14 15 16 17 18 19 20 21 22 23 24 25 26 27 28 29 30 31 32 33 34 35 36 37 38 39...
  • Page 2 This household sewing machine is designed to comply with IEC/EN 60335-2-28 and UL1594. IMPORTANT SAFETY INSTRUCTIONS When using an electrical appliance, basic safety precautions should always be followed, including the following: Read all instructions before using this household sewing machine. Keep the instructions at a suitable place close to the machine.
  • Page 3 • If the cord connected with the foot control is damaged, it must be replaced by the manufacturer or its service agent or a similarly qualified person, in order to avoid a hazard. SAVE THESE INSTRUCTIONS FOR CENELEC COUNTRIES ONLY: This appliance can be used by children aged from 8 years and above and persons with reduced physical, sensory or mental capabilities or lack of experience and knowledge if they have been given supervision or instruction concerning use of the appliance in a safe way and understand the hazards involved.
  • Page 4: Table Of Contents

    TABLE OF CONTENTS INTRODUCTION ..........1 Button Sewing ............23 Intended Use...............1 One-Step Buttonhole ..........24 Machine Overview ............1 Sew Zippers ..............25 Needle Area Overview ..........2 Centered Zipper ............25 Top of Machine ............2 Hand-Look Quilt Stitch ..........26 Overview Accessories..........3 MAINTENANCE..........27 Included Accessories (Not Pictured).......
  • Page 5: Introduction

    Intended Use Optimal use and maintenance are described in these instructions. This product is not intended for industrial use. Additional assistance, by region, may be found on the web at www.singer.com. Machine Overview 00 01 02 03 04 05 06 07 08 09 10 11 12 13 14 15 16 17 18 19...
  • Page 6: Needle Area Overview

    Needle Area Overview 1. Needle Plate — provides a flat area around presser foot for sewing. Guide lines make it easy to guide the fabric straight when sewing. 2. Feed Teeth — feed the fabric under the presser foot when sewing.
  • Page 7: Overview Accessories

    Overview Accessories Bobbin x4 — Only use the type of transparent bobbins delivered with your machine (SINGER® Class 15 transparent bobbins). One of the bobbins is inserted in the machine upon delivery. Felt Pad — Used to cushion the spool of thread when using the Auxiliary Spool Pin.
  • Page 8: Presser Feet

    The machine will automatically sew a buttonhole to fit that button size. Satin Stitch Foot (A) This foot is used for satin stitches and other decorative stitches. Optional Accessories Additional optional accessories are available for your machine. Visit the SINGER® website for more information. 4 – Introduction English...
  • Page 9: Stitch Overview

    Stitch Overview Utility Stitches The stitches described in the below chart are utility stitches, used mainly for utility sewing. The stitches available on your machine are printed on the front of the sewing machine. When sewing, use a thread tension between 3–5. Always test sew on a piece of scrap fabric, and adjust the tension if necessary. Application Straight Stitch The basic stitch used for sewing.
  • Page 10: Decorative Stitches

    Closed Sew decorative hems and overlapped seams, belts and bands. For medium/heavy Overlock Stitch stretch fabrics. Honeycomb For elastic insertion, decorative stitching, smocking, couching and hemming. Stitch Buttonhole Sew buttonholes on home decór, garments, crafts and more. Rounded For light weight fabrics. Bartack Buttonhole, Reinforced...
  • Page 11 00 01 02 03 04 05 06 07 08 09 10 11 12 13 14 15 16 17 18 19 20 21 22 23 24 25 26 27 28 29 30 31 32 33 34 35 36 37 38 39 40 41 42 43 44 45 46 47 48 49 50 51 52 53 54 55 56 57 58 59 60 61 62 63 64 65 66 67 68 69 70 71 72 73 74 75 76 77 78 79 80 81 82 83 84 85 86 87 88 89 90 91 92 93 94 95 96 97 98 99...
  • Page 12: Preparations

    PREPARATIONS Unpacking the Machine 1. Place the box on a steady, flat surface. Lift the machine out of the box, and remove the packaging. 2. Remove all outer packing material and the plastic bag. 3. Wipe off the machine with a dry cloth to remove any lint and/or excess oil around the needle area. Note: Your sewing machine is adjusted to provide the best stitch result at normal room temperature.
  • Page 13: Free Arm/Removable Accessory Tray

    Free Arm/Removable Accessory Tray Store presser feet, bobbins, needles and other accessories in the accessory tray so that they are easily accessible. Keep the accessory tray on the machine to provide a larger, flat work surface. Use the free arm to facilitate sewing trouser legs and sleeve hems.
  • Page 14: Spool Pin

    Spool Pin Your machine has two spool pins, a main spool pin and an Auxiliary Spool Pin. The spool pins are designed for all types of thread. The main spool pin is used in a horizontal position (the thread reels off the spool) and the Auxiliary Spool Pin in a vertical position (the thread spool rotates).
  • Page 15: Wind The Bobbin

    Wind the Bobbin 1. Place the thread spool on the spool pin. Slide a spool cap 5. Push the bobbin winding spindle to the right. Hold the firmly against the spool. thread end, and press the foot control to start winding. After a few turns, take your foot off the foot control to stop 2.
  • Page 16: Thread The Machine

    Thread the Machine Important! Make sure that the presser foot is raised and the needle is in its highest position by turning the handwheel toward you. This is very important to help ensure that the machine is correctly threaded. Not doing so can result in poor stitch quality when you start to sew.
  • Page 17: Needle Threader

    Needle Threader The built-in needle threader allows you to thread the needle quickly and easily. The needle must be in its highest position to use the built-in needle threader. Turn the hand wheel towards you until the needle is in its highest position, or press the needle up/down button.
  • Page 18: Important Needle Information

    Important Needle Information Change the needle often. As a general rule, needles should be changed every 6-8 hours of actual stitching time. Always use a straight needle with a sharp point and make sure the point is not bent or damaged (A). A damaged needle (B) can cause skipped stitches, breakage or snapping of the thread.
  • Page 19: Thread Tension

    Thread Tension To set the thread tension, turn the dial on top of the machine. Depending on the fabric, thread, etc, the tension may need to be adjusted. For the best stitch appearance and durability, make sure the needle thread tension is correctly adjusted. For general sewing, the threads evenly meet between the two layers of fabric (A).
  • Page 20: Change The Presser Foot

    Change the Presser Foot 1. Make sure that the needle is in the highest position and the presser foot is lifted. The presser foot release lever extends out the back of the presser foot holder. Press this lever to release the presser foot. 2.
  • Page 21: Navigation Arrows

    Navigation Arrows Press the up and down arrows to select stitch and/or to adjust the stitch settings. The left set of arrows change the left number on the display and the right arrows changes the right number. Note: Make sure that the correct menu is selected before using the selection arrows. A light next to the menu is lit when a menu is active.
  • Page 22: Sewing

    SEWING Sewing Next to each stitch or sewing technique described in this section of the manual is a chart showing the recommended settings and presser foot. See sample of the chart to the right. Note: Some fabrics have a lot of excess dye which can cause discoloration on other fabric but also on your sewing machine.
  • Page 23: Finish Sewing

    Finish Sewing Press and hold the Reverse button and sew a few stitches in reverse when you reach the end of the seam. Release the button and sew forward again to the end of the seam. This will secure the seam so the stitches don't unravel. Turn the handwheel toward you to raise the needle to its highest position.
  • Page 24: Slant Overedge Stitch

    Slant Overedge Stitch The slant overedge stitch sews the seam and overcasts the edge all at one time, perfect for stretch fabrics. This stitch is more elastic than normal seams, very durable and quickly sewn. 3–5 Place the fabric under the presser foot aligning the edge of the presser foot with the edge of the fabric.
  • Page 25: Darning And Mending

    • Finish the raw edge of the hem if sewing on a woven fabric. There is no need to finish the raw edge first on most knits. • Fold and press the hem allowance to the wrong side. • Fold the hem back on itself so approximately 3/8" (1 cm) of the finished edge extends beyond the fold.
  • Page 26: Repair Tears

    Repair Tears On tears, frayed edges or small holes it is useful to lay a piece of fabric on the wrong side of the fabric. The underlayed fabric reinforces the damaged area. Lay a piece of fabric underneath the damaged fabric. It must be a little larger than the damaged area.
  • Page 27: Jeans Hem

    Jeans Hem When sewing over seams in extra heavy fabric or a jeans hem, the presser foot may tip as it rides over the seam. To be able to obtain even feed also over thicker seams, the All-Purpose Foot (T) is equipped with a “lock in place” button, that locks the 3–5 foot in a horizontal position.
  • Page 28: One-Step Buttonhole

    One-Step Buttonhole Sew buttonholes perfectly sized for your button. The fabric should be interfaced and/or stabilized where buttonholes are to be sewn. 3–5 1. Mark the start position of the buttonhole on the fabric (A). 2. On the One-Step Buttonhole Foot, push the button holder Set up for buttonhole open by pushing the lever backwards (B).
  • Page 29: Sew Zippers

    Sew Zippers The Zipper Foot can be attached on either the right or the left of the needle, making it easy to sew both sides of the zipper. To sew the right side of the zipper, attach the foot in the left 2.0–3.0 3–5 presser foot position (A).
  • Page 30: Hand-Look Quilt Stitch

    Hand-Look Quilt Stitch Simulate the look of handmade quilting with the Hand-look Quilting stitch. Thread the needle with either transparent thread or with a thread that blends with the color of the top of the fabric. Thread the bobbin with a thread color that 2.0–3.0 6–9 coordinates or contrasts with the top of the fabric, depending...
  • Page 31: Maintenance

    MAINTENANCE Cleaning the Machine To keep your sewing machine operating well, clean it often. No lubrication (oiling) is needed. Wipe the exterior surface of your machine with a soft cloth to remove any dust or lint built up. Cleaning the Bobbin Area Raise the needle and turn off the machine.
  • Page 32: Troubleshooting

    Clean bobbin holder (page 27). Possible cause: Wrong bobbins being used. Solution: Use bobbins that are the same style as those that come with the machine (SINGER® Class 15 transparent bobbins) – don’t substitute. Bobbin Thread Showing on Top of Fabric Possible cause: Top thread too tight.
  • Page 33 Make sure power cord/foot control are correctly seated in machine and power supply (page 8). Possible cause: Wrong bobbins being used. Solution: Use bobbins that are the same style as those that come with the machine (SINGER® Class 15 transparent bobbins)– don’t substitute. Maintenance – 29 English...
  • Page 34 Needles Breaking Possible cause: Bent, dull or damaged needle. Solution: Discard needle, insert new needle (page 14). Possible cause: Wrong size needle for fabric. Solution: Insert appropriate needle for fabric type (page 13). Possible cause: Machine not threaded correctly. Solution: Rethread the machine completely (page 12).
  • Page 35: Technical Specification

    Possible cause: Sewing was started with no fabric under the presser foot. Solution: Place fabric under foot, making sure that needle comes down into fabric; lightly hold both thread tails for first few stitches. Possible cause: Stabilizer may be needed for technique. Solution: Place stabilizer underneath fabric.
  • Page 37 INTELLECTUAL PROPERTY Singer, and the Cameo “S” Design are exclusive trademarks of The Singer Company Limited S.à.r.l. or its Affiliates. Please note that on disposal, this product must be safely recycled in accordance with relevant National legislation relating to electrical/electronic products.
  • Page 38 4710717-26E · English · © 2020 The Singer Company Limited S.à.r.l. or its Affiliates. · All rights reserved...

This manual is also suitable for:

Hd 6605c

Table of Contents

Save PDF