Table of Contents
Advertisement
Available languages
Available languages
Quick Links
Advertisement
Table of Contents

Subscribe to Our Youtube Channel
Related Manuals for inventum IOM6170RK


Summary of Contents for inventum IOM6170RK
- Page 1 BUILT - IN OVEN inbouw oven IOM6170RK • gebruiksaanwijzing • instruction manual...
- Page 2 •...
-
Page 3: Table Of Contents
Nederlands veiligheidsvoorschriften pagina 4 product omschrijving pagina 7 voor het eerste gebruik pagina 7 bediening van de oven pagina 8 reiniging & onderhoud pagina 11 storingen & oplossingen pagina 12 installatievoorschrift pagina 12 product kaart pagina 14 Algemene service- en garantievoorwaarden pagina 26 English safety instructions... -
Page 4: Veiligheidsvoorschriften
Nederlands veiligheidsvoorschriften • Lees eerst de gebruiksaanwijzing aandachtig en geheel door voordat u het apparaat gaat gebruiken en bewaar deze zorgvuldig voor latere raadpleging. • Gebruik dit apparaat uitsluitend voor de in de gebruiksaanwijzing beschreven doeleinden. Gebruik geen agressieve reinigingsmiddelen in dit apparaat. - Page 5 • In geval van rook de oven uitschakelen en de stekker uit het stopcontact verwijderen. Houd de deur gesloten om de vlammen te verstikken. • Controleer of het apparaat is uitgeschakeld voordat u de lamp vervangt om het risico op een elektrische schok te vermijden. •...
- Page 6 aparte afstandsbediening. • Sluit het apparaat alleen aan op wisselstroom, op een randgeaarde wandcontactdoos, met een netspanning overeenkomstig met de informatie aangegeven op het typeplaatje van het apparaat. • Laat het apparaat niet onbeheerd achter indien het apparaat in werking is. •...
-
Page 7: Product Omschrijving
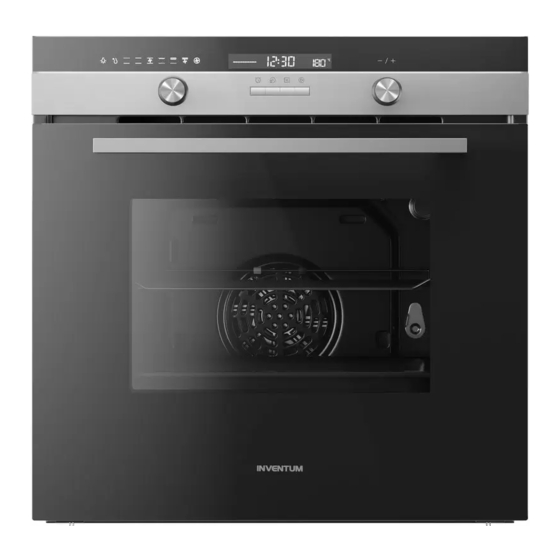
product omschrijving Handgreep ovendeur Ovendeur Ovenstandenknop Display Kookwekkertoets Kloktoets Starttoets Pauze/ stoptoets Instelknop [- / + ] 10. Ovenlamp Insteekniveaus [9] 12. Bakplaat 13. Rooster voor het eerste gebruik Voordat u het apparaat voor de eerste maal in gebruik neemt, dient u als volgt te werk te gaan: pak de oven voorzichtig uit en verwijder al het verpakkingsmateriaal. -
Page 8: Bediening Van De Oven
bediening van de oven Om de oven te bedienen, beschikt deze over twee verzinkbare draaiknoppen en vier druktoetsen. Ovenstandenknop voor het selecteren van een ovenfunctie Instelknop [ - / + ] voor het instellen van de tijd en de temperatuur Kookwekker toets Klok toets Pauze/ en stop toets... - Page 9 klok instellen Zodra u de stekker van de oven in het stopcontact heeft gedaan, verschijnt in het display 0:00. Zorg dat u de juiste tijd instelt voordat de oven wordt gebruikt. Let op: het is een 24-uurs klok, bijvoorbeeld 2PM wordt getoond als 14.00. •...
- Page 10 Onderstaande tabel is ter indicatie voor het bereiden van verschillende gerechten. Worst Rundvlees Varkensvlees Gevogelte Taart Cupcakes & koekjes Functie °C 170-190 170-190 170-190 150-170 225-250 160-180 210-230 160-190 Niveau Tijd 35-45 35-45 20-40 10-40 10-15 120-150 120-160 90-120 90-120 50-60 45-60 (min.)
-
Page 11: Reiniging & Onderhoud
reiniging & onderhoud Zet het apparaat uit als u deze wilt reinigen en laat het apparaat volledig afkoelen. Het apparaat mag niet gereinigd worden met een stoomreiniger of hogedruk reiniger. Binnenzijde Maak de binnenzijde van het apparaat na elk gebruik schoon. Gebruik een vochtige doek. Voor een grondige reiniging mag een ovenspray gebruikt worden. -
Page 12: Storingen & Oplossingen
storingen & oplossingen Storing Oplossing De ovenverlichting brandt niet. Vervang de ovenlamp volgens de instructies. De oven wordt niet warm. - Is de juiste temperatuur en ovenfunctie ingesteld? - Is de deur van de oven goed gesloten? Het display brandt niet. - Is de energiebesparende modus actief? Druk op een willekeurige toets om het LED display te activeren. - Page 13 INBOUWMATEN In onderstaande afbeeldingen zijn de afmetingen van de uitsparingen aangegeven in mm. ELEKTRISCHE AANSLUITING De netspanning moet overeenstemmen met de spanning weergegeven op het typeplaatje in de oven. De groep in de meterkast moeten gezekerd zijn met minimaal 16 Ampère elk. De aansluitkabel moet een aderdoorsnede hebben van minimaal 2,5 mm²...
-
Page 14: Product Kaart
Fabrikant INVENTUM Typenummer IOM6170RK Type apparaat inbouw oven Aantal ovenruimten Warmtebron per ovenruimte elektrisch Volume per ovenruimte Energieverbruik volgens de EN50304 standaard 0,99 kWh Energie-efficiëntie-index per ovenruimte Uitvoering Materiaal glas en rvs Bediening knoppen en toetsen Accessoires bakplaat... -
Page 15: Safety Instructions
English safety instructions • Please read these instructions before operating the appliance and retain for future use. • The appliance is intended solely for domestic use within the home. Do not use corrosive chemicals or vapors in this appliance. This oven is especially designed to prepare food. - Page 16 • Do not place accessories on the open oven door. • Never cover the bottom of the oven with aluminium foil. The foil blocks the heat flow, which may result in inferior cooking results. This can also damage the enamel of the bottom of the oven. •...
- Page 17 the socket. We also recommend making all potentially dangerous parts of the appliance harmless, particularly for children who might be tempted to play with it. • Never immerse any part of the main body, lid, power cord and plug in water or any other liquid to protect against electrical hazards.
-
Page 18: Appliance Description
appliance description Handle Oven door Oven function knob (retractable) Display Cooking timer key Clock key Start key Pause/ stop key [- / + ] knob (retractable) 10. Oven lamp Insertion slots [9] 12. Baking tray 13. Rack before first use Before you use the appliance for the first time, please do as follows: Carefully unpack the appliance and remove all the packaging material. -
Page 19: Using The Oven
using the oven To set the oven, use the two retractable knobs and the four keys. Oven function knob for selecting an oven function [ - / + ] knob for setting the time and the temperature Cooking timer key Clock key Pause/ and stop key for pausing, stopping or canceling a program selection... - Page 20 setting the time of day As soon as you plug the appliance in, 0:00 appears in the display. Ensure the correct time of day is set before using the oven. Attention: the clock is a 24 hour clock, for example 2PM is shown as 14.00. •...
- Page 21 The table below is indicative for preparing different dishes. Sausages Beef Pork Poultry Cake Cupcakes & cookies Function °C 170-190 170-190 170-190 150-170 225-250 160-180 210-230 160-190 Slot Time 35-45 35-45 20-40 10-40 10-15 120-150 120-160 90-120 90-120 50-60 45-60 (min.) switching on the oven lamp •...
-
Page 22: Cleaning & Maintenance
cleaining & maintenance Switch the appliance off before cleaning and let it cool down. Do not clean the appliance with a pressure cleaner or steam cleaner. Interior Clean the inside of the appliance after every use. Use a damp cloth. To clean the oven thoroughly, an ovenspray may be used. Rinse well. -
Page 23: Problems & Solutions
problems & solutions Problem Solution The oven lamp is not lit. Replace the oven lamp according to the instructions. The oven is not heating up. - Has the correct temperature and oven function been set? - Is the door of the oven closed properly? The display is not lit. - Page 24 INSTALLATION DIMENSIONS In the drawing below, all the dimensions are displayed in mm. ELECTRICAL CONNECTION Check that the voltage in your home corresponds with the voltage printed on the appliance. These groups in the meter must be secured with at least 16 amps each. The connection cable must have a cross-section of at least 2.5mm²...
-
Page 25: Product Fiche
Manufacturer INVENTUM Model number IOM6070GK Type of appliance built-in oven Number of oven cavities Heat source per oven cavity electric Volume per oven cavity Energy consumption according to the EN50304 0,99 kWh Energy efficiency index per oven cavity... -
Page 26: Algemene Service- En Garantievoorwaarden
3. Om aanspraak te maken op de 5 jaar Inventum garantie kun je teruggaan naar de winkel waar je het product hebt gekocht of contact opnemen met de consumentenservice van Inventum via het formulier op www.inventum.eu/service-aanvraag. - Page 27 Als je beschadigingen aantreft, dien je deze binnen 5 werkdagen na aankoop te melden bij de winkel waar je het product hebt gekocht, of bij de consumentenservice van Inventum via het contactformulier op de website www.inventum.eu/service-aanvraag.
-
Page 28: General Terms And Conditions Of Service And Warranty
3. The 3-year extended warranty can only be applied for if you are in the possession of a copy of the original receipt and the Inventum 5-year warranty certificate. - Page 29 3. The inspection to establish whether repair is possible involves a charge. You need to grant your permission for this, in advance. 4. In the event of a large domestic appliance, Inventum, at your request, can send out a service engineer. In that case, you will be charged the call-out costs, as well as parts and labour.
- Page 30 •...
- Page 31 •...
- Page 32 Inventum Huishoudelijke Apparaten B.V. Meander 861 6825 MH Arnhem Tel: 0800-4583688 info@inventum.eu www.inventum.eu twitter.com/inventum1908 facebook.com/inventum1908 youtube.com/inventum1908 IOM6170RK/02.0418V Wijzigingen en drukfouten voorbehouden/ Änderungen und Druckfehler vorbehalten/ Sous réserve de modification / Modifications and printing errors reserved...
Need help?
Do you have a question about the IOM6170RK and is the answer not in the manual?
Questions and answers