Advertisement
Quick Links
Advertisement

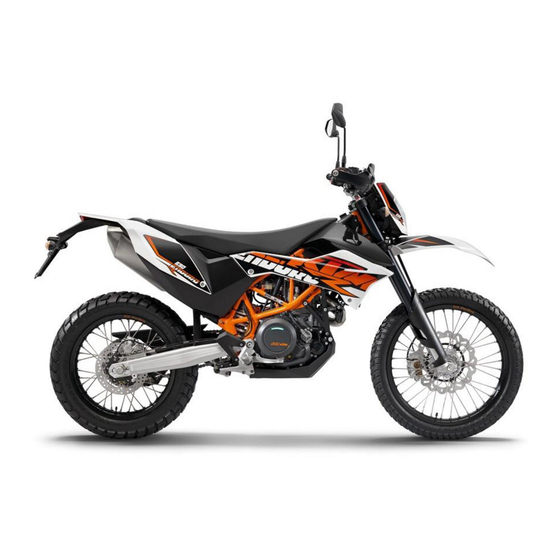
Summary of Contents for KTM 690 Enduro R EU 2014
- Page 1 SETUP INSTRUCTIONS 2014 690 Enduro R EU 690 Enduro R AU/GB 690 Enduro R US Art. no. 3213154en...
- Page 3 KTM accepts no liability for delivery options, deviations from illustrations and descriptions, as well as misprints and other errors.
-
Page 4: Means Of Representation
MEANS OF REPRESENTATION Symbols used The meaning of specific symbols is described below. Indicates an expected reaction (e.g. of a work step or a function). Indicates an unexpected reaction (e.g. of a work step or a function). Indicates a page reference (more information is provided on the specified page). Indicates information with more details or tips. - Page 5 SETUP Unpacking and setting up the vehicle – Remove the box and the plastic packaging. Info To avoid damaging the motorcycle during assembly, leave the protective film on the vehicle until you have finished. – Check the vehicle for transport damage. –...
- Page 6 SETUP – Mount and tighten the rear mirror adapter and rear mirror on both sides. – Exactly position all controls on the handlebar. Tighten all screws. – Fit and tighten the M8 screw of the right hand guard. 100309-01 – Mount the footrests with the springs and bolts.
- Page 7 – Fit the heel protector. ( p. 10) – Refuel. ( p. 11) – Print out the current PDI form found on KTM DEALER.NET and perform the delivery inspection. – Set kilometers or miles. ( p. 12)
- Page 8 – Do not discard batteries with the household waste. Dispose of faulty batteries in an environmentally compatible manner. Give the battery to your authorized KTM dealer or dispose of it at a collection point for used batteries. Warning Environmental hazard Hazardous substances cause environmental damage.
- Page 9 WORK Preparatory work – Switch off all power consumers and switch off the engine. – Remove the seat. ( p. 6) – Remove the battery. ( p. 7) Main work – Connect the battery charger to the battery. Switch on the battery charger. Battery charger (58429074000) You can also use the battery charger to test rest potential and start potential of the battery, and to test the alternator.
- Page 10 WORK – Disconnect negative cable of the battery. – Take off the positive terminal cover and disconnect the positive cable from the battery. – Remove screws – Pull retaining bracket of the battery forward and remove it. –...
- Page 11 WORK Warning Environmental hazard Improper handling of fuel is a danger to the environment. – Do not allow fuel to get into the ground water, the ground, or the sewage system. – Lift the cover of filler cap and insert the ignition key. –...
- Page 12 WORK Fitting rear fairing – Position the license plate holder and cable harness. – Open the filler cap. ( p. 8) – Position the rear fairing and grab handles as shown in the figure. Fit and slightly tighten the screws of the grab handles. –...
- Page 13 WORK Warning Forfeiture of homologation and insurance cover The vehicle is homologated as 2-seater. If the heel protector is fitted instead of the footrest bracket, the vehicle no longer conforms to the homologation and must not be operated in this form without alterations to the registration papers. –...
- Page 14 WORK 3.14 Setting the clock Condition The motorcycle is stationary. – Switch on the ignition by turning the ignition key to position ON – Press the MODE button repeatedly until the ODO mode is active. – Keep the MODE button and the SET button pressed simultaneously. The time display begins to flash.
-
Page 15: Technical Data - Tightening Torques For Chassis
TECHNICAL DATA - TIGHTENING TORQUES FOR CHASSIS – Screw, chain guard EJOT 2 Nm (1.5 lbf ft) – Screw, combination instrument EJOT 1 Nm (0.7 lbf ft) – Screw, license plate holder, bottom EJOT 3 Nm (2.2 lbf ft) – Screw, side cover on spoiler EJOT 1 Nm (0.7 lbf ft) - Page 16 TECHNICAL DATA - TIGHTENING TORQUES FOR CHASSIS Loctite ® 243™ Screw, connection lever on frame 30 Nm (22.1 lbf ft) Screw, foot brake lever 25 Nm (18.4 lbf ft) Loctite ® 243™ – Screw, fork stub 15 Nm (11.1 lbf ft) Screw, front brake caliper 25 Nm (18.4 lbf ft) Loctite...
- Page 17 SUBSTANCES Super unleaded (ROZ 95/RON 95/PON 91) Standard/classification – DIN EN 228 (ROZ 95/RON 95/PON 91) Guideline – Only use unleaded super fuel that matches or is equivalent to the specified fuel grade. – Fuel with an ethanol content of up to 10 % (E10 fuel) is safe to use. Info Do not use fuel containing methanol (e.
- Page 18 *3213154en* 3213154en 01/2014 KTM-Sportmotorcycle AG 5230 Mattighofen/Austria Photo: Mitterbauer/KTM http://www.ktm.com...


Need help?
Do you have a question about the 690 Enduro R EU 2014 and is the answer not in the manual?
Questions and answers