Advertisement
Quick Links
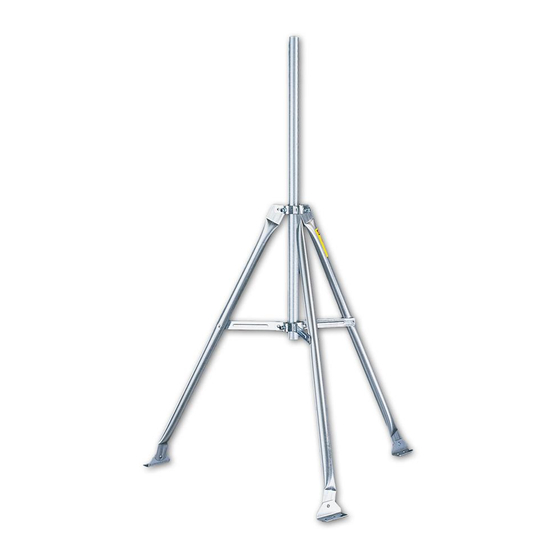
For use with Davis's Wireless, EZ-Mount, and Vantage Pro Weather Stations,
the Mounting Tripod simplifies installation. The tripod supports the sensor
array, and features an adjustable foot pad which enables mounting on any sur-
face: flat, inclined, or level. The anemometer extension tube can be used to ele-
vate the anemometer in installations where wind flow obstruction is a concern.
C
OMPONENTS
The Mounting Tripod includes the following poles and mounting hardware.
Please make sure you have everything you need before beginning.
Poles
M
O U N T I N G
T
R I P O D
(swaged end)
Tripod
Anemometer
Extension
Tube
Long
Extension
Tube
Product # 7716
Advertisement

Related Manuals for DAVIS Tripod Kit

Summary of Contents for DAVIS Tripod Kit
- Page 1 For use with Davis’s Wireless, EZ-Mount, and Vantage Pro Weather Stations, the Mounting Tripod simplifies installation. The tripod supports the sensor array, and features an adjustable foot pad which enables mounting on any sur- face: flat, inclined, or level. The anemometer extension tube can be used to ele- vate the anemometer in installations where wind flow obstruction is a concern.
-
Page 2: This Manual
Hardware 5/16" Bolts Hex Nuts Square Nuts 1/4" x 2" Lag Screws Cable Ties OOLS FOR ETUP Adjustable wrench Compass or local area map Drill with 3/16" or 13/64" (5 mm) bit for the 1/4" lag screws ONTENTS OF Tripod assembly, page 3 Mounting the tripod, page 5 Attaching the ISS to the anemometer extension tube, page 6 Securing the ISS on the tripod, page 7... -
Page 3: Tripod Assembly
RIPOD SSEMBLY Follow the instructions below to assemble the tripod. Assemble nuts and bolts in Tripod brackets. Do not tighten. 1. Unfold the tripod so the two foot pads which come pre-installed on the tripod legs are flat on the ground. 2. - Page 4 8. Attach the foot bracket to the tripod leg as shown below. Apply pitch pads to the bottom of the foot bracket and the two foot brackets that come pre-installed on the tripod. Washer Page 4 Front Leg Foot Bracket Lock Pitch Pad 1/4"...
- Page 5 OUNTING THE RIPOD Mount the tripod with long extension tube on the desired surface, as shown below. On the following pages are instructions for securing your sensor array or ISS onto the long extension tube. Field Sensor Array or ISS Long Extension Tube (use level or plumb line to find true vertical)
-
Page 6: Extension Tube
TTACHING THE For Vantage Pro, the anemometer extension tube provided as part of the mounting tripod will be used to support the ISS, which does not come on its own pole. You can mount your ISS on this tube with both sides together or sep- arate. - Page 7 Configuration B — Anemometer Above the Rain Collector Side Secure the rain collector side to the anemometer extension tube as shown in the illustration on the left. Then mount the anemometer above it as shown on the right. 1/4" Hex Nut 1/4"...
- Page 8 NOTE: For Vantage Pro, the anemometer arm must point northward when mounted, or you will have to re-orient the wind vane. (Re-orienting instructions are located in ISS Installation Manual : Appendix C.) TTACHING ENSOR Insert the sensor array pole into the top of the long extension tube and secure using U-bolts and saddles provided with the mounting tripod.
- Page 9 SING NEMOMETER LESS YSTEMS If you need the anemometer mounted higher, install the anemometer extension tube as shown below. Anemometer Uncoil about 3-1/2' extra anemometer cable Anemometer Extension Tube Use three Cable Ties Using Anemometer Extension Tube on EZ-Mount and Wireless Systems XTENSION UBE ON Lock...
- Page 10 Page 10...
- Page 11 Using Anemometer Extension Tube on EZ-Mount and Wireless Systems Page 11...
- Page 12 Rev. D Manual (1/25/01) This product complies with the essential protection requirements of the EC EMC Directive 89/336/EC. © Davis Instruments Corp. 2000. All rights reserved. 3465 Diablo Avenue, Hayward, CA 94545-2778 510-732-9229 • Fax: 510-732-9118 E-mail: info@davisnet.com • www.davisnet.com...
Need help?
Do you have a question about the Tripod Kit and is the answer not in the manual?
Questions and answers