Advertisement
Quick Links
Advertisement

Related Manuals for LUJAN USA Sniper 5405

Summary of Contents for LUJAN USA Sniper 5405
- Page 1 Lujan USA Lujan USA Ver 020308 Ver 020308...
- Page 3 Aiming High Beam and Auxiliary Lights 17 Aiming Fog Lights 18 Aiming European Beam 19 Beam Slope Compensation 20 Calibrating the aimer 21 Warranty Information 26 Lujan USA Po Box 411 Camillus, NY 13031-0411 (315) 468-4140 www.lujanusa.com Index - Page 1...
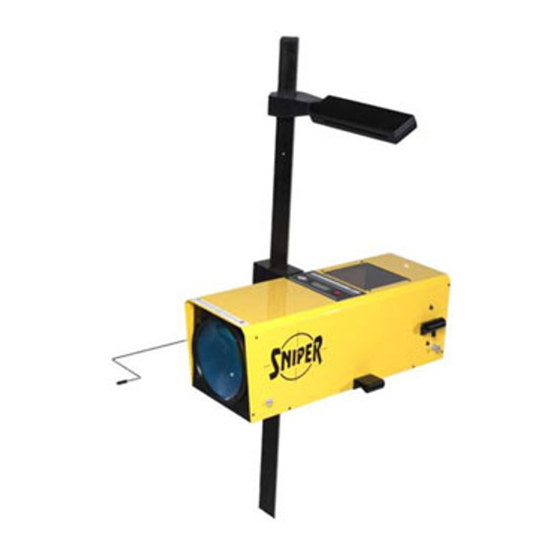
- Page 5 THE SNIPER OPTICAL HEADLIGHT AIMER MODEL 5405 Thank you for purchasing the Sniper 5405 OpticalHeadlight Aimer. You have made a wise purchase decision. The 5405 is a high quality, durable piece of equipment that will give you years of trouble free operation. Your aimer has over 25 years of engineering refinement built-in.
- Page 6 COMPONENTS: . Optical aimer head . Heavy-duty mast . Reinforced base with wheels . Hardware to attach the mast to the base: 1 Bolt DIN 912, M 10 x 50 1 Washer DIN 7980, 10 mm 1 Flat washer, 10 mm .
- Page 7 STEP 1 Bolt the mast to the base aligning the mast as shown in Fig. 1 fig. 1. Fig. 2 STEP 2 Install optical aimer head on mast as shown in fig.2 by pressing trigger lock (fig. 3) and sliding it down the mast. Fig.
- Page 8 STEP 4 Fig. 5 Install the lateral alignment visor (fig. 5). The narrow slot in the visor should face the rear of the aimer (the wide slot faces the front). Hardware for Pointer Positioning System STEP 5 Install the pointer positioning system using hardware as shown in fig.
- Page 9 INITIAL FLOOR SLOPE COMPENSATION Vehicle and aimer are both located on a flat and level floor. Floor compensation is required. Fig. 12 Vehicle and aimer are both located on a flat floor with a constant slope. Floor compensation is required. Fig.
- Page 10 RECORDING THE FLOOR SLOPE SETTING … Near the floor slope adjustment knob , there is a † register consisting of a small cylinder that can be … used to count the turns of the knob . This register Floor slope adjustment knob sinks or raiseswitheach turn of the knob (fig.
- Page 11 PREPARING THE VEHICLE FOR HEADLAMP AIM OR INSPECTION Before checking the aim, the inspector shall; Remove ice or mud from under fenders. Set tire inflation pressures to the values specified on the tire sidewall or information label. Check car springs for sag or broken leaves. See that there is no load in the vehicle other than the driver.
- Page 12 POSITIONING THE AIMER TO VEHICLE Place the aimer in front of one 10-14 in headlamp at a distance between 10 25-35 cm to 14 in. (25 to 35 cm). M o s t beam patterns are clearest if the optical lens is about 12”...
- Page 13 POSITIONING AIMER TO VEHICLE With aimer in front of the headlight, choose two symmetrical points of the vehicle located also at the same height (i.e. the upper part of the lamps, strut bolts, radiator support bolts). Points located too high, such as the vehicles roof, should be avoided: the best accuracy is obtained using lower points.
- Page 14 DESCRIPTION OF THE INTERNAL SCREEN OF THE AIMER The Sniper 5405 is designed to reproduce, at a smaller scale, an aiming test screen compliant with the Standard SAE J599 (revised Aug. 1997). The beam projections appear on the internal screen of the aimer as they would appear on a screen located 25 feet from the headlamps.
- Page 15 Lujan USA has developed a beam elucidation adjusting headlights on some vehicles. Lujan USA has developed a beam elucidation filter to make it easier to view these beam patterns.
- Page 16 AIMING LOW BEAM HEADLAMPS Low Beam Headlamps are aimed so that the top edge of the high-intensity zone is at the NOMINAL VERTICAL AIM line, and the left edge of the high-intensity zone is at the vertical center line of the screen. 4"...
- Page 17 DIFFERENT LOW BEAM PATTERNS DIFFERENT LOW BEAM PATTERNS DIFFERENT LOW BEAM PATTERNS DIFFERENT LOW BEAM PATTERNS There are many different beam patterns used in domestic vehicles. When checking There are many different beam patterns used in domestic vehicles. When checking There are many different beam patterns used in domestic vehicles.
- Page 18 INSPECTION LIMITS FOR LOW BEAM HEADLIGHTS INSPECTION LIMITS FOR LOW BEAM HEADLIGHTS INSPECTION LIMITS FOR LOW BEAM HEADLIGHTS INSPECTION LIMITS FOR LOW BEAM HEADLIGHTS INSPECTION LIMITS FOR LOW BEAM HEADLIGHTS INSPECTION LIMITS FOR LOW BEAM HEADLIGHTS 4" 4" 0" 0" 4"...
- Page 19 AIMING HIGH BEAM HEADLAMPS AND AUXILIARY DRIVING LIGHTS High beam headlamps and auxiliary driving lights are aimed so that the center of the high- intensity zone is located at the horizontal and vertical center of the screen. The figure shows the high-intensity zone (shaded area) of a properly aimed HIGH BEAM...
- Page 20 AIMING FOG LAMPS AIMING FOG LAMPS The correct aim for fog lamps with symmetrical beams (as described in SAE J583) is with The correct aim for fog lamps with symmetrical beams (as described in SAE J583) is with the top edge of the high-intensity zone at or below the horizontal centerline and the center the top edge of the high-intensity zone at or below the horizontal centerline and the center of the high-intensity zone centered on the screen.
- Page 21 AIMING EUROPEAN LOW BEAM HEADLAMPS AIMING EUROPEAN LOW BEAM HEADLAMPS European low beams do not have a high-intensity zone, all the illuminated area has a European low beams do not have a high-intensity zone, all the illuminated area has a similar intensity.
- Page 22 BEAM SLOPE COMPENSATION NOMINAL VERTICAL AIM FOR LOW BEAMS The revised SAE J599 standard (8/97) requires low beam headlight aim to be adjusted based on headlamp height from the ground. The NOMINAL VERTICAL AIM position on low beam headlamps, as introduced in the new revision of the Standard SAE J599, "shall be adjusted based on the headlamp mounting height, from the ground to the light source center of the headlamp".
- Page 23 CHECKING CALIBRATION CAUTION OF THE LASER LASER RADIATION Use a ruler with increments of at least 1/16" DO NOT STARE (or 1 mm) to determine that the laser beam INTO BEAM height from the bottom is the same at the POWER OUTPUT <...
- Page 24 CHECKING THE LATERAL ALIGNMENT VISOR Check calibration of the visor by looking through the visor at the lateral calibration edge of the three aligned holes on the aimer head. If the visor is not perfectly aligned, turn the small allen (1.5 mm) screw at the bottom of the visor until the lines match. Adjust the visor Adjust the visor line here...
-
Page 25: Calibrating The Screen
CALIBRATING THE SCREEN To check the aimer for accuracy, place a car in front of a screen or a flat vertical wall, at a distance of 25 feet (7.6m). Trace or mark with tape the lines as shown in the figure below. If the headlamp mounting height of the vehicle used for the test is more than 36in, then a Nominal Vertical Aim line at the distance specified in the Table 1 shall be traced. - Page 26 AIMING LOW BEAM HEADLAMPS Aim Low Beam Headlamps so that the top edge (the cutoff) of the high-intensity zone is at the NOMINAL VERTICAL AIM line, and the left edge of the high-intensity zone is at the vertical centerline of the headlamp. AIMING the LOWER BEAM VERTICAL CENTERLINE VERTICAL CENTERLINE...
-
Page 27: Alternative Procedure
ALTERNATIVE PROCEDURE The same procedure may be done by checking the aimer using the high beam instead of the low as a reference. AIMING HIGH BEAM HEADLAMPS High beam headlamps and auxiliary driving lights are aimed so that the center of the high- intensity zone is located at the horizontal and straight ahead vertically. -
Page 28: Two Year Limited Warranty
TWO YEAR LIMITED WARRANTY The Lujan USA model 5405 headlight aimer is warranted to be free from defects in material and workmanship under normal user operation for a period of TWO YEARS from the date of purchase. The sole obligation under this warranty shall be to repair or replace any product or parts which are found by Lujan USA to be defective. - Page 29 NOTES...
- Page 31 See our other automotive shop equipment at www.lujanusa.com Lujan USA shop equipment simply makes more money for you! Thank you for purchasing the Sniper 5405. Lujan USA provides several valuable options for your aimer. Protective cover Light intensity meter Beam elucidation filters Extended warranty...
- Page 32 Professional Model Optical Headlight Aimer Lujan USA Po Box 411 Camillus, NY 13031-0411 (315) 468-4140 Headlight Aiming Made Easy..www.lujanusa.com...
Need help?
Do you have a question about the Sniper 5405 and is the answer not in the manual?
Questions and answers