Advertisement
Quick Links
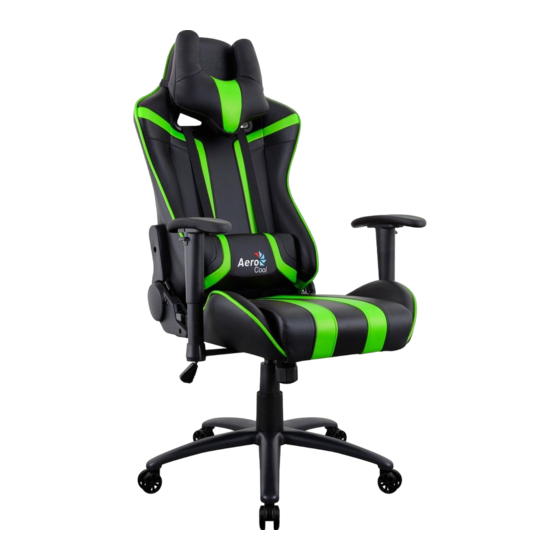
AC120
How to Assemble
Manual del usuario
Podręcznik użytkownika
Bedienungsanleitung
Руководство пользователя
Manuel d'utilisation
Manual de utilizador
Manuale dell'utente
使用說明書
Contents
Chair Parts
How to assemble AC120
How to attach cushions
Pictures are for reference only. Chair parts, accessories and assembly steps are the
same as indicated in the manual.
ES
Las imágenes solamente son de referencia. Las piezas, los accesorios y los pasos de montaje de la silla son los
mismos que los indicados en el manual.
DE
Die Bilder dienen nur der Veranschaulichung. Stuhlteile, Zubehör und Montageschritte sind mit den Angaben in der
Anleitung identisch.
FR
Les images sont fournies uniquement à titre indicatif. Les pièces du fauteuil, les accessoires et les étapes
d'assemblage sont les mêmes que ceux indiqués dans le manuel.
IT
Le immagini sono solo per riferimento. Le parti della sedia, gli accessori e le istruzioni per l'assemblaggio sono uguali a
quelle indicate nel manuale.
PL
Ilustracje służą wyłącznie jako odniesienie. Części fotela, akcesoria i czynności montażowe, są takie same jak
wskazane w podręczniku.
RU
Изображения представлены для общей информации. Детали кресла, принадлежности и этапы установки
соответствуют инструкциям руководства.
PT
As ilustrações servem apenas como referência. As peças, os acessórios e os passos de montagem são idênticos aos
indicados no manual.
繁中
圖片僅供參考。椅子零件,配件和安裝步驟與手冊中所示相同。
簡中
图片仅供参考。椅子零件,配件和安装步骤与手册中所示相同。
JA
写真は参照用です。 椅子の部品、付属品、および組み立て手順は、マニュアルに示されているものと同じです。
使用说明书
KZ
Суреттер тек анықтама үшін берілген. Орындық бөліктері, керек-жарақтары жəне құрастыру қадамдары
нұсқаулықта көрсетілгендермен бірдей.
ユーザーズマニュアル
нұсқаулары
TR
Resimler yalnızca başvuru amaçlıdır. Koltuk parçaları, aksesuarlar ve kurulum adımları kılavuzda belirtilenlerle aynıdır.
Talimatlar
02
04
12
01
Advertisement

Related Manuals for Aerocool AC120


Summary of Contents for Aerocool AC120
- Page 1 Contents AC120 How to Assemble Chair Parts How to assemble AC120 How to attach cushions Pictures are for reference only. Chair parts, accessories and assembly steps are the same as indicated in the manual. Las imágenes solamente son de referencia. Las piezas, los accesorios y los pasos de montaje de la silla son los mismos que los indicados en el manual.
- Page 2 Please check and ensure the following parts are in the package. En la sección 'Where to Buy (Dónde comprar)' del sitio web aerocool.com.tw puede obtener información sobre el If any parts are missing or not included, please call the local distributor for assistance.
- Page 3 Caution: Use protective gloves/cloth for this setup. Work Gloves Required! Using bare hands may cause serious injury. - Ostrzeżenie: Do tych ustawień należy użyć rękawice ochronne. Wymagane rękawice robocze! Używanie gołych rąk może spowodować poważne obrażenia. A. Assemble the seat: Parts of Group 1 - rzed naciśnięciem dźwigi, chwyć...
- Page 4 1. Attach the backrest to the seat. 2. Fasten with screws provided. 3. Fasten the protective covers with provided screws. 3. Fije las tapas de protección con los tornillos proporcionados. 1. Acople el respaldo a la silla. 2. Fíjelos con los tornillos proporcionados. 3.
- Page 5 4. Align the butterfly mechanism with the screw holes at NOTE : Place the screws by hand before tightening them in an 4. Совместите механизм "бабочка" с отверстиями ПРИМЕЧАНИЕ. Установите винты вручную, а затем the bottom of the seat as shown in image below. X-Pattern with the allen key.
- Page 6 B. Assemble the wheel base: Parts of Group 2 1. Push and twist the wheels into the star base. 2. Place the cylinder cover over the gas lift. 3. Place the chair face down and insert the star base into the butterfly mechanism. 1.
- Page 7 Attach headrest cushion Attach back cushion 1. Put headrest cushion on the backrest. 2. Pull the straps through the shoulder belt holes and click them 1. Slide the back cushion straps between the backrest 2. Pull the straps through the shoulder belt holes and click them into place.
Need help?
Do you have a question about the AC120 and is the answer not in the manual?
Questions and answers