Table of Contents
Advertisement
Available languages
Available languages
Quick Links
Advertisement
Chapters
Table of Contents

Related Manuals for ETNA FIV760RVS


Summary of Contents for ETNA FIV760RVS
- Page 1 GEBRUIKSAANWIJZING INSTRUCTIONS FOR USE FORNUIS COOKER FIV760RVS...
- Page 2 Handleiding NL 3 - NL 35 Manual EN 3 - EN 35 Gebruikte pictogrammen - Pictograms used Belangrijk om te weten - Important information...
-
Page 3: Table Of Contents
INHOUD Uw fornuis Inleiding Beschrijving Bedieningspaneel Vóór het eerste gebruik Gebruik van de oven Gebruik van de inductiekookplaat Pannen voor inductiekoken Inductiegeluiden Bediening van de oven Instellen van de klok Handbediening van de oven Ovenfuncties Bediening van de oven met elektronische schakelklok Kookwekker Het geluidssignaal instellen Bediening inductiekookplaat... -
Page 4: Uw Fornuis
UW FORNUIS Inleiding Gefeliciteerd met de aanschaf van dit Etna fornuis. In het ontwerp van dit product heeft optimale gebruikersvriendelijkheid centraal gestaan. Het fornuis biedt een uitgebreide reeks instellingen, zodat u altijd de juiste bereidingswijze kunt kiezen. In deze handleiding leest u hoe u dit fornuis het best kunt gebruiken. -
Page 5: Beschrijving
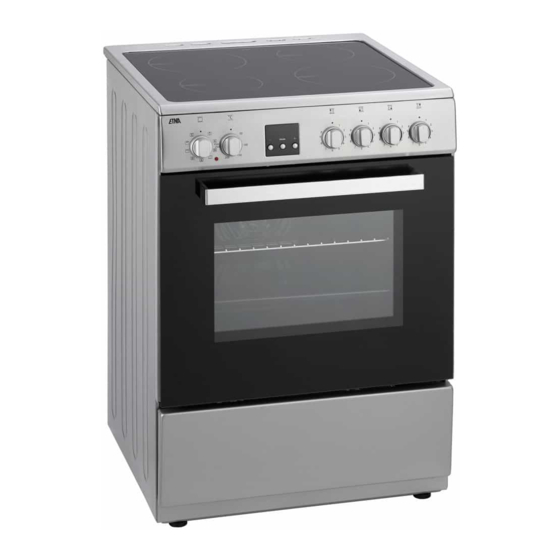
UW FORNUIS Beschrijving 1. Kookzone linksachter 2. Kookzone rechtsachter 3. Kookzone linksvoor 4. Kookzone rechtsvoor 5. Timertoets, - toets, + toets en stand-by indicatie A. Bedieningspaneel B. Oven C. Opbergvak D. Stelvoeten NL 5... -
Page 6: Bedieningspaneel
UW FORNUIS Bedieningspaneel 1. Functieknop oven 5. Bedieningsknop kookzone linksachter 2. Thermostaatlampje oven 6. Bedieningsknop kookzone linksvoor 3. Thermostaatknop oven 7. Bedieningsknop kookzone rechtsvoor 4. Elektronische schakelklok 8. Bedieningsknop kookzone rechtsachter 4a. - toets 4b. ‘mode’ toets 4c. + toets NL 6... -
Page 7: Vóór Het Eerste Gebruik
VÓÓR HET EERSTE GEBRUIK Gebruik van de oven • Verwijder alle delen van het toebehoren uit de oven en reinig ze met een warm sopje. Gebruik geen schurende schoonmaakmiddelen. • Schakel de oven één uur lang in op de hoogste temperatuur met boven- en onderwarmte (zie ‘Bediening van de oven’). - Page 8 VÓÓR HET EERSTE GEBRUIK • Haal alles wat u niet nodig heeft voor de bereiding uit de oven. • Schakel de oven uit voordat u het gare gerecht eruit haalt. Ovenservies • In principe kunt u elk soort hittebestendig servies gebruiken. •...
- Page 9 VÓÓR HET EERSTE GEBRUIK Vlees braden • Het meest geschikt is ‘groot vlees’ vanaf 1 kg. Het vlees krijgt een regelmatig gevormde, krokante korst, waarbij vrijwel geen gewichtsverlies optreedt. • Wrijf het vlees een kwartier van tevoren in met zout en kruiden. Gebruik voor het braden 80 tot 100 g boter of vet (of een mengsel hiervan) per 500 g vlees.
-
Page 10: Gebruik Van De Inductiekookplaat
VÓÓR HET EERSTE GEBRUIK Gebruik van de inductiekookplaat Koken op een inductiekookplaat verschilt met koken op een traditioneel toestel. Inductiekoken maakt gebruik van een magnetisch veld om warmte op te wekken. Snel In het begin zult u verrast zijn door de snelheid van het toestel. Vooral het op een hogere stand aan de kook brengen gaat zeer snel. -
Page 11: Pannen Voor Inductiekoken
VÓÓR HET EERSTE GEBRUIK Pannen voor inductiekoken Inductiekoken stelt eisen aan de kwaliteit van de pannen. Let op • Pannen waarmee al eerder op een gaskookplaat is gekookt, zijn niet meer geschikt voor inductiekoken. • Gebruik alleen pannen die geschikt zijn voor elektrisch- en inductiekoken met: ▷... -
Page 12: Inductiegeluiden
VÓÓR HET EERSTE GEBRUIK en de panbodem kan smelten. Schade, ontstaan door het gebruik van ongeschikte pannen of droogkoken, valt buiten de garantie. Minimale pandiameter De minimale pandiameter bedraagt 12 cm. Het beste resultaat bereikt u door een pan te nemen met dezelfde diameter als de kookzone. Bij te kleine pannen schakelt de kookzone niet in. -
Page 13: Bediening Van De Oven
BEDIENING VAN DE OVEN Instellen van de klok Als u het toestel voor de eerste keer aansluit, knippert de tijds- aanduiding ‘0 00’. De juiste dagtijd moet nog worden ingesteld. 1. Druk tegelijkertijd op de + en de - toets. Er verschijnt een kooksymbool in de display. - Page 14 BEDIENING VAN DE OVEN Hetelucht De ventilator in de achterwand verspreidt de hete lucht in de oven. Hiermee worden de gerechten verwarmd. U kunt op meerdere niveaus tegelijk bakken, waardoor u energie kunt besparen. Het heteluchtsysteem is uitermate geschikt voor het bakken van cakes, koekjes en appeltaarten.
-
Page 15: Bediening Van De Oven Met Elektronische Schakelklok
BEDIENING VAN DE OVEN Bediening van de oven met elektronische schakelklok De elektronische schakelklok kunt u op verschillende manieren gebruiken: • U kunt de tijdsduur van het bakken/braden/grillen bepalen. De oven schakelt uit zodra de ingestelde tijd is verstreken. Is de tijd verstreken, dan klinkt er een geluidssignaal. - Page 16 BEDIENING VAN DE OVEN Het einde van de baktijd programmeren 1. Selecteer een temperatuur met de thermostaatknop en een ovenfunctie met de functieknop. Het thermostaatlampje van de oven gaat branden en de oven is ingeschakeld. 2. Druk op de ‘mode’ toets totdat ‘End’ in de display verschijnt. Afwisselend worden nu ‘End’...
- Page 17 BEDIENING VAN DE OVEN 3. Druk op de ‘mode’ toets totdat ‘End’ in de display verschijnt. Afwisselend worden nu ‘End’ en de vroegst mogelijke eindtijd in de display getoond en de ‘A’ knippert. 4. Gebruik de + en de - toets (terwijl de ‘A’ knippert) om de juiste eindtijd in te stellen.
-
Page 18: Kookwekker
BEDIENING VAN DE OVEN Kookwekker De kookwekker geeft alleen een signaal na het verstrijken van de ingestelde tijd. De kookwekker schakelt de oven niet uit. 1. Druk op de ‘mode’ toets. Er verschijnt een klokje in de display en de punt in het midden van de tijdsaanduiding knippert. -
Page 19: Bediening Inductiekookplaat
BEDIENING INDUCTIEKOOKPLAAT Inschakelen en instellen Op het glazen werkoppervlak worden de vier kookzones aangeduid door middel van een cirkel. De diameter van de panbodem moet zoveel mogelijk overeenkomen met de diameter van de kookzone. Een symbool bij de bedieningsknop geeft aan welke kookzone wordt bediend. -
Page 20: Restwarmte-Indicatie
BEDIENING INDUCTIEKOOKPLAAT Restwarmte-indicatie Restwarmte wordt met een ‘H’ per kookzone op de glasplaat aangegeven. De indicatie geeft aan dat de kookzone nog warm is en dooft zodra de glasplaat een veilige temperatuur heeft bereikt. Timer functie Als de kookplaat ingeschakeld is, kunt u voor elke kookzone een aparte timer instellen (van 1 tot 99 minuten). -
Page 21: Kookstanden
BEDIENING INDUCTIEKOOKPLAAT 2. Draai gelijktijdig de bedieningsknoppen van de kookzones linksvoor en rechtsvoor weer naar links en laat de knoppen 4 seconden in die stand staan om het kinderslot uit te schakelen. In de display van elke kookzone verschijnt een ‘0’; het kinderslot is uitgeschakeld. -
Page 22: Temperatuurbeveiliging
BEDIENING INDUCTIEKOOKPLAAT Gebruik stand 1 t/m 5 voor: trekken van bouillon; bereiden van stoofvlees; smoren van groenten; smelten van chocolade; smelten van kaas. Temperatuurbeveiliging Elke kookzone is voorzien van een sensor. Deze sensor controleert ononderbroken de temperatuur van de bodem van de kookpan en van de onderdelen van de kookplaat om elk risico op oververhitting, bij bijvoorbeeld een drooggekookte pan, te vermijden. -
Page 23: Comfortabel Koken
COMFORTABEL KOKEN Bak-, braad- en grilltips Inzethoogten Afhankelijk van de hoogte van gebak of koekjes plaatst u de bakplaat op de tweede of derde richel van onderen. Bakvormen plaatst u op het rooster op de eerste of tweede richel van onderen. Bakvormen zijn belangrijk Vooral voor ovens met boven-/onderwarmte is het ma teriaal waaruit de bakvormen zijn vervaardigd, erg belangrijk. -
Page 24: Grilltijdentabel
COMFORTABEL KOKEN te snel bruin en smaakt dan bitter. Zet de volgende keer de vorm iets lager in de oven en stel de temperatuur 10 °C lager in. De koekjes plakken aan het bakblik vast Schuif het bakblik nog even in de oven en haal de koek jes er daarna onmiddellijk af. -
Page 25: Baktijdentabel Conventioneel
COMFORTABEL KOKEN Baktijdentabel conventioneel Gerecht Temp. °C Richelhoogte Tijd in min. van onderen Roerdeeg Cake 160 - 180 65 - 70 Kruidkoek 160 - 180 70 - 80 Notentaart 160 - 180 60 - 70 Vruchtentaart 170 - 180 2, 3 35 - 45 bakblik Vruchtentaart... -
Page 26: Onderhoud
ONDERHOUD Let op! Maak het toestel spanningsloos voordat met reparatie of schoonmaken wordt gestart. Bij voorkeur door de stekker uit het stopcontact te halen of de schakelaar in de meterkast op nul te zetten. Gebruik geen stoomreiniger of hogedruk-stoomreiniger om het toestel te reinigen. - Page 27 ONDERHOUD Geëmailleerde delen De binnenkant van de ovendeur, de gehele binnenzijde van de oven en de bak- en braad plaat zijn geheel geëmailleerd. U kunt ze het beste reinigen met een warm sopje. Buitenkant Reinig de buitenkant van het fornuis met een warm sopje of vloeibare zeep.
- Page 28 ONDERHOUD • Open de deur daarna volledig en draai de pallen weer in de beginpositie. Sluit de deur langzaam en controleer of hij goed sluit. Als de deur niet goed open of dicht gaat, controleer dan of de inkepingen van de scharnieren goed in de scharnierhouders geplaatst zijn.
-
Page 29: Vervangen Van Het Ovenlampje
ONDERHOUD Vervangen van het ovenlampje De fitting van het ovenlampje staat onder spanning. Er bestaat gevaar van een elektrische schok! Let op! De lamp in dit huishoudelijke apparaat is uitsluitend bedoeld voor verlichting van dit apparaat. De lamp is niet geschikt voor de verlichting van een huishoudelijke ruimte. -
Page 30: Storingen
Wanneer u twijfelt over de goede werking van uw toestel, betekent dit niet automatisch dat er een defect is. Controleer in elk geval de volgende punten in onderstaande tabel of kijk voor meer informatie op de website ‘www.etna.nl’. Storing bij de kookplaat Mogelijke oorzaak... - Page 31 STORINGEN Storing bij de kookplaat Mogelijke oorzaak Oplossing Foutcode F7. De omgevingstemperatuur is Zet alle warmtebronnen in de niet goed. omgeving van de kookplaat uit. Foutcode F8 en F08. Toestel oververhit. Het toestel laten afkoelen en opnieuw beginnen met koken. Foutcode F9 en/of continu Spanning te hoog en/of niet Laat uw aansluiting wijzigen.
-
Page 32: Installatie
• de stekker uit het stopcontact is getrokken. Defecte onderdelen mogen alleen vervangen worden door originele ETNA onder delen. Alleen van die onderdelen kan ETNA garanderen dat zij aan de veiligheidseisen voldoen. Indien de aansluitkabel beschadigd is mag deze alleen worden vervangen door de fabrikant, zijn service-organisatie of gelijkwaardig gekwalificeerde personen, teneinde gevaarlijke situaties te voorkomen. -
Page 33: Elektrische Aansluiting
INSTALLATIE Elektrische aansluiting 230V~/400V 3N~ - 50/60 Hz • Wandcontactdoos en stekker moeten altijd bereikbaar blijven. • Zorg ervoor dat de aansluitkabel niet in contact kan komen met delen van het apparaat die heet kunnen worden. • Als u een vaste aansluiting wilt maken, moet u er voor zorgen dat er een omnipolaire schakelaar met een contactafstand van minimaal 3 mm in de toevoerleiding wordt aangebracht. -
Page 34: Technische Gegevens
INSTALLATIE • Als het fornuis vast tussen keukenkastjes wordt ingebouwd dan moet de bekleding van het meubel bestand zijn tegen temperaturen van minimaal 90 °C. Waterpas stellen Met de stelvoetjes is het fornuis in hoogte verstelbaar. Wilt u het fornuis op een verhoging plaatsen, zorg er dan voor dat deze hier niet vanaf kan glijden. -
Page 35: Milieuaspecten
MILIEUASPECTEN Verpakking en toestel afvoeren Bij de vervaardiging van dit toestel is gebruik gemaakt van duurzame materialen. Dit toestel moet aan het eind van zijn levenscyclus op verantwoorde wijze worden afgevoerd. De overheid kan u hieromtrent informatie verschaffen. De verpakking van het toestel is recyclebaar. Gebruikt kunnen zijn: •... - Page 37 CONTENTS Your cooker Introduction Description Control panel Before first use Using the oven Using the induction hob Pans for induction cooking Induction sounds Operating the oven Setting the clock Manually operating the oven Oven functions Operating the oven with electronic timer Kitchen timer Setting the audible signal Operating the induction hob...
-
Page 38: Your Cooker
YOUR COOKER Introduction Congratulations on the purchase of this Etna cooker. This product is designed to offer optimum user-friendliness. The cooker has a wide range of settings, so you can always select the correct cooking method. Read this manual to learn how to get the most out of your cooker. In addition to information about operating the oven, you will also find background information that may be useful when using the appliance. -
Page 39: Description
YOUR COOKER Description 1. Left rear cooking zone 2. Right rear cooking zone 3. Left front cooking zone 4. Right front cooking zone 5. Timer key, - key, + key and stand-by indicator A. Control panel B. Oven C. Storage compartment D. -
Page 40: Control Panel
YOUR COOKER Control panel 1. Oven function knob 5. Control knob - left rear cooking zone 2. Oven thermostat light 6. Control knob - left front cooking zone 3. Oven temperature knob 7. Control knob - right front cooking zone 4. -
Page 41: Using The Oven
PRIOR TO FIRST USE Using the oven • Remove all accessories from inside the oven and clean them with warm soapy water. Do not use any abrasive cleaning materials. • Set the oven at its highest setting for one hour with top and bottom heat (see ‘Operating the oven’). - Page 42 PRIOR TO FIRST USE • Remove everything you don’t need for the dish from the oven. • Turn the oven off before taking out the cooked dish. Ovenware • In principle, you can use any type of heat-resistant ovenware. • Do not rinse glass ovenware with cold water immediately after use. The sudden temperature difference can cause the glass to crack.
- Page 43 PRIOR TO FIRST USE Roasting meat • Large pieces of meat, from 1 kg, are the most suitable. The meat will get a regularly shaped, crispy crust, with virtually no weight loss. • Rub the meat with salt and spices fifteen minutes beforehand. Use 80 to 100 g of butter or fat (or a mixture of the two) per 500 g of meat for roasting.
-
Page 44: Using The Induction Hob
PRIOR TO FIRST USE Using the induction hob Cooking on an induction hob is different from cooking on a traditional appliance. Induction cooking makes use of a magnetic field to generate heat. Quick At first, you will be surprised by the speed of induction cooking. Especially at higher settings, foods and liquids will come to a boil very rapidly. -
Page 45: Pans For Induction Cooking
PRIOR TO FIRST USE Pans for induction cooking There are some quality requirements for the pans used in induction cooking. Please note • Pans that have already been used for cooking on a gas hob are no longer suitable for use on an induction hob. •... -
Page 46: Induction Sounds
PRIOR TO FIRST USE Minimum pan diameter The diameter of a pan must be at least 12 cm. You will achieve The best results are achieved by using a pan with the same diameter as the cooking zone. If a pan is too small, the cooking zone will not work. Pressure cookers Induction cooking is very suitable for pressure cookers. -
Page 47: Operating The Oven
OPERATING THE OVEN Setting the clock When the unit is connected for the first time, the time will flash ‘0·00’. The correct time of day has yet to be set. 1. Press the + and - keys at the same time. A cooking symbol will appear in the display. - Page 48 OPERATING THE OVEN Hot Air The fan in the back wall distributes the hot air in the oven. This heats the dishes. You can bake on multiple levels simultaneously, which will save energy. The convection fan system is excellent for baking cakes, cookies and apple pies. Top and bottom heat (conventional) The dish is heated by radiant heat from the bottom and top elements.
-
Page 49: Operating The Oven With Electronic Timer
OPERATING THE OVEN Operating the oven with electronic timer The electronic timer can be used in different ways: • It allows you to determine the duration of baking / roasting / grilling. The oven switches off when the set time has elapsed. An audible signal will sound once the time is up. - Page 50 OPERATING THE OVEN Programming the end of the baking time 1. Select a temperature with the temperature knob and an oven function with the function knob. The thermostat light for the oven lights up and the oven is switched on. 2.
- Page 51 OPERATING THE OVEN 3. Press the ‘mode’ key until ‘End’ appears in the display. The display will now alternate between ‘End’ and the earliest possible end time and the ‘A’ flashes. 4. Use the + and - keys to set the desired end time (while the ‘A’...
-
Page 52: Kitchen Timer
OPERATING THE OVEN Kitchen timer The audible signal of the kitchen timer will only sound after the expiry of the set time. The kitchen timer will not switch off the oven. 1. Press the ‘mode’ key. A small clock appears in the display and the dot in the middle of the time display flashes. -
Page 53: Operating The Induction Hob
OPERATING THE INDUCTION HOB Switching on and settings The four cooking zones on the glass work surface are indicated with circles. The diameter of the pan bottom must be as similar to the diameter of the cooking zone as possible. A symbol next to the control knob indicates which cooking zone is being operated. -
Page 54: Residual Heat Indicator
OPERATING THE INDUCTION HOB Residual heat indicator Residual heat is indicated with an ‘H’ for each cooking zone on the glass cooktop. This indicates that the cooking zone is still warm and goes out once the glass cooktop has reached a safe temperature. Timer function When the hob is switched on, you can set a separate timer for each cooking zone (from 1 to 99 minutes). -
Page 55: Cooking Settings
OPERATING THE INDUCTION HOB 2. Simultaneously turn the control knobs for the left-front and right- front cooking zones anticlockwise again and leave the knobs in this position for 4 seconds to disable the child lock. A ‘0’ appears in the display for each cooking zone; the child lock is now deactivated. -
Page 56: Temperature Safety
OPERATING THE INDUCTION HOB Use settings 1 to 5 to: simmer bouillon; stew meats; simmer vegetables; melt chocolate; melt cheese. Temperature safety Each cooking zone is equipped with a sensor. This sensor measures the temperature of the base of the pan and the sections of the hob to avoid any risk of overheating, for example, a pan boiling dry. -
Page 57: Easy Cooking
EASY COOKING Baking, roasting and grilling tips Oven heights Depending on the height of the pastry or cookies, place the baking tray on the second or third rack position from the bottom. Place baking molds on the rack on the first or second rack position from the bottom. Baking molds are important The material that the baking mold is made of is very important, especially for ovens with top/bottom heat. -
Page 58: Grilling Time Table
EASY COOKING The cookies get stuck to the baking sheet Place the baking sheet back into the oven briefly and then remove the cookies immediately. The cake does not come out of the mold when inverted Loosen the edge carefully using a sharp knife. Invert the mold again and cover the whole thing with a wet, cold cloth a few times. -
Page 59: Conventional Baking Time Table
EASY COOKING Conventional baking time table Dish Temp °C Rack position Time in min from the bottom Pastry dough Cake 160 - 180 65 - 70 Spice cake 160 - 180 70 - 80 Nut pie 160 - 180 60 - 70 Fruit tart baking tray 170 - 180 2, 3... -
Page 60: Maintenance
MAINTENANCE Warning! Disconnect the appliance from the power supply before carrying out any repairs or cleaning. Preferably unplug the appliance, switch off the fuses, or set the switch in the meter cupboard to zero. Do not use steam cleaners or high-pressure steam cleaners to clean the appliance. - Page 61 MAINTENANCE Enamelled parts The inside of the oven door, the entire interior of the oven and the baking and roasting tray are fully enamelled. They are best cleaned with warm soapy water. Exterior Clean the oven exterior with warm soapy water or liquid soap. Rinse with clean water.
- Page 62 MAINTENANCE • Then open the door fully and turn the pawls back to their initial position. Close the door slowly and check that it closes properly. If the door does not open or close properly, make sure the hinge notches are positioned correctly in the hinge holders. In the event of stubborn stains, the following should be observed: The oven should be cooled down before cleaning.
-
Page 63: Replacing The Oven Light Bulb
MAINTENANCE Replacing the oven lamp The oven lamp fitting is live. There is a danger of electric shock! Attention! The lamp in this household appliance is only suitable for illumination of this appliance. The lamp is not suitable for household room illumination. •... -
Page 64: Faults
Try to deal with the problem yourself first by checking the points mentioned below in the table or visit our website ‘www.etna.nl’ for more information. Problem with the hob Possible cause... - Page 65 FAULTS Problem with the hob Possible cause Solution Fault code F8 and F08. Appliance overheated. Let the appliance cool down and then start again. Fault code F9 and/or The appliance has been Have your connection continuous beep. connected incorrectly and/or changed.
-
Page 66: Installation
• the plug has been pulled out of the socket. Faulty parts may only be replaced with original ETNA parts. Only these parts are guaranteed by ETNA to meet the safety requirements. If the connecting cable is damaged, it may only be replaced by the manufacturer, the manufacturer’s service organisation or equivalently... -
Page 67: Electrical Connection
INSTALLATION Electrical connection 230V~/400V 3N~ - 50/60 Hz • The wall plug socket and plug should always be accessible. • Make sure that the cable does not come into contact with parts of the oven that may become hot. • If you want to make a fixed connection, make sure that an omnipolar switch with a contact separation of at least 3 mm is fitted in the supply cable. -
Page 68: Technical Data
INSTALLATION • If the cooker is built in between kitchen cabinets, the lining of the units must be able to withstand temperatures up to 90°C. Levelling The height of the cooker can be adjusted with the adjusting feet. If you want to install the cooker on a platform, make sure that it is securely fastened. -
Page 69: Environmental Aspects
ENVIRONMENTAL ASPECTS Disposal of packaging and appliance Sustainable materials have been used during manufacture of this appliance. This appliance must be disposed of responsibly at the end of its service life. Ask your local authorities for more information about how to do this. The appliance packaging is recyclable. - Page 70 EN 36...
- Page 71 EN 37...
- Page 72 541974 541974...
Need help?
Do you have a question about the FIV760RVS and is the answer not in the manual?
Questions and answers