Advertisement
Quick Links
For instruction video,
scan QR-code.
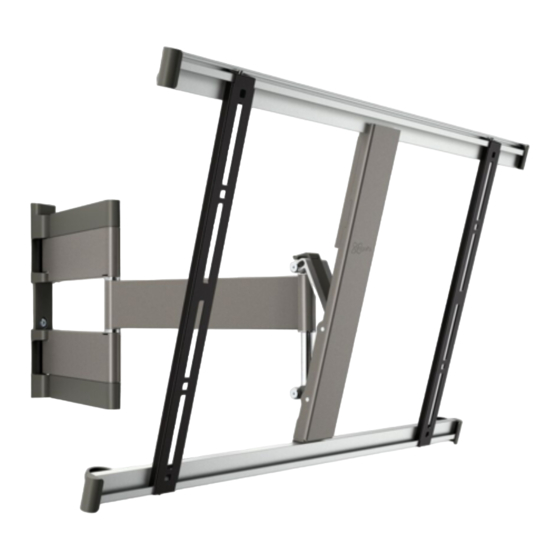
THIN 345
EN
Mounting instructions
DE
Montageanleitung
FR
Consignes d'installation
NL
Montagevoorschrift
ES
Instrucciones de montage
IT
Istruzioni di montaggio
PT
Manual de montagem
EL
SV
Montageföreskrifter
PL
InstrukcEa montażu
RU
Инструкция по сборке и установке
CS
Návod k montáži
SK
Návod na montáž
HU Szerelési előírás
TR
Montaj kılavuzu
RO Instrucţiuni de montaj
UK
Вказівки по монтажі
BG Инструкции за монтаж
設置の説明書
JA
ZH
www.vogels.com
for more information
Advertisement

Related Manuals for vogel's THIN 345


Summary of Contents for vogel's THIN 345
- Page 1 For instruction video, scan QR-code. THIN 345 Mounting instructions Montaj kılavuzu Montageanleitung Montageföreskrifter RO Instrucţiuni de montaj Consignes d’installation InstrukcEa montażu Вказівки по монтажі Montagevoorschrift Инструкция по сборке и установке BG Инструкции за монтаж 設置の説明書 Instrucciones de montage Návod k montáži Istruzioni di montaggio Návod na montáž...
- Page 2 Important Before mounting the wall mount, first read the warnings at the back of the supplied parts list (separate card). DE - Wichtig Lesen Sie vor der Montage des Wandhalters zuerst die Warnhinweise auf der Rückseite der mitgelieferten Teileliste (getrennte Karte). FR - Important Avant de procéder au montage du support mural, lisez les avertissements au dos de la liste de pièces fournie (fiche séparée).
- Page 3 1-2 (Optional) (Optional) Screw the strips (C) onto the TV. Position the strips as close as possible to the middle of the screen. DE - Schrauben Sie die Leisten (C) auf das Fernsehgerät. HU - Csavarozza a tartólemezeket (C) a TV-készülékre. Positionieren Sie die Leisten so nah an der Mitte des Bildschirms wie möglich.
- Page 4 2.1 Remove the caps. 2.2 Slide the bars (D) over the strips (C). DE - Entfernen Sie die Kappen. DE - Schieben Sie die Stangen (D) über die Leisten (C). - Déposez les embouts. - Faites glisser les barres (D) sur les languettes (C). NL - Verwijder de afdekdoppen.
- Page 5 3.1 Tighten the bolts. 3.2 Place the caps back onto the bars (D). DE - Ziehen Sie die Schrauben fest. DE - Bringen Sie die Kappen wieder an den Stangen (D) an. - Serrez les boulons. - Remettez les embouts en place dans les barres (D). NL - Draai de schroeven vast.
- Page 6 • • SV - Fastställ var väggfästet (B) ska monteras. • Observera att TV:ns hemläge (TV:n platt mot väggen) ska vara på motsatt sida jämfört med kontaktplaceringen. • Använd mallen för att definiera hålens position. - Określ lokalizację mocowania ściennego (B). •...
- Page 7 ø 5mm 20mm/0.8" ø 13/64" 80mm/3.2" ø 10mm 20mm/0.8" ø 25/64" Drill the holes. DE - Bohren Sie die Löcher. - Forez les trous. NL - Boor de gaten. - Perfore los agujeros. - Eseguire i fori con un trapano. - Abra os orifícios.
- Page 8 80mm/3.2" ø 5mm ø 13/64" Drill the holes. DE - Bohren Sie die Löcher. - Forez les trous. NL - Boor de gaten. - Perfore los agujeros. - Eseguire i fori con un trapano. - Abra os orifícios. SV - Borra hålen. - Wywiercić...
- Page 9 Screw the wall mount (B) onto the wall. DE - Schrauben Sie den Wandhalter (B) an die Wand. - Vissez le support mural (B) sur le mur. NL - Schroef de wandsteun (B) op de muur. - Atornille el soporte de pared (B) a la pared. - Avvitare la piastra (B) alla parete.
- Page 10 Remove the upper bolt; loosen the lower bolt. Place the wall mount cover (A); 8.1 Loosen the upper thumbscrew; remove the lower thumbscrew. tighten both bolts. DE - Entfernen Sie die obere Schraube. Lösen Sie die untere Schraube. Bringen Sie die Abdeckung des Wandhalters (A) an. DE - Lösen Sie die obere Flügelschraube.
- Page 11 8.2 Hook the TV onto the wall mount (B). Hook the upper thumb screw into the V-shaped recess. DE - Haken Sie das Fernsehgerät am Wandhalter (B). HU - Akassza a TV-készüléket a fali tartóra (B). Haken Sie die obere Fügelschraube in den V-förmigen Rücksprung ein. Akassza be a kézzel húzható...
- Page 12 8.3 Position the TV level. 8.4 Replace the lower thumbscrew; tighten both thumbscrews. DE - Richten Sie das Fernsehgerät aus. DE - Bringen Sie die untere Flügelschraube wieder an. Ziehen Sie beide Flügelschrauben fest. - Positionnez le téléviseur parfaitement de niveau. - Remettez la molette inférieure en place ;...
- Page 13 9.1 Remove the cover at the bottom of the wall mount (B) by sliding it in the direction of 9.2 Lead the cables into the conduit. the arrow. DE - Entfernen Sie die Abdeckung unten am Wandhalter (B), indem Sie sie in Pfeilrichtung schieben. DE - Verlegen Sie die Kabel im Kabelkanal.
- Page 14 9.3 Replace the cover. 9.4 Click the cable clip (E) onto the lower bar (D). Lead the cables through the clip (E). Push until it clicks into position. DE - Bringen Sie die Abdeckung wieder an. Drücken Sie, bis sie einrastet. DE - Klicken Sie die Kabelklemme (E) auf die untere Stange (D).
- Page 15 • If the tilt option is not used you can place the tilt lock. DE - Wenn die Neigeoption nicht verwendet wird, können Sie die Neigesperre anbringen. - Si l’option d’inclinaison n’est pas utilisée, vous pouvez installer le dispositif de verrouillage. NL - Als de kanteloptie niet wordt gebruikt, kunt u nu de kantelvergrendeling plaatsen.
- Page 16 • Remove the TV from the wall mount (B). Loosen the upper thumbscrew; remove the lower thumbscrew. Remove the TV. DE - Nehmen Sie das Fernsehgerät vom Wandhalter (B). HU - Vegye le a TV-készüléket a fali tartóról (B). Lösen Sie die obere Flügelschraube. Entfernen Sie die untere Flügelschraube. Nehmen Sie das Fernsehgerät ab. Lazítsa meg a kézzel húzható...
- Page 17 Guarantee terms and conditions 2 indien op de garantie een beroep wordt gedaan, dient het product aan Vogel’s te worden • Se o produto for utilizado para equipamento diferente do mencionado no produto ou na Congratulations on the purchase of this Vogel’s product! The product you now have in your aangeboden onder overlegging van de originele aankoopbon (factuur, kassabon of embalagem.
- Page 18 Гарантия компании Vogel’s утрачивает силу в следующих случаях: Garanti şart ve koşullari Гаранцията на Vogel’s престава да действа в следните случаи: • Если при установке и эксплуатации изделия были нарушены инструкции по Bu Vogel’s ürününü aldığınız için sizi tebrik ediyoruz! ve detayına kadar iyi düşünülmüş bir tasarıma •...
- Page 20 www.vogels.com © Vogel’s Holding BV 201 1 All rights reserved...
Need help?
Do you have a question about the THIN 345 and is the answer not in the manual?
Questions and answers