Table of Contents
Advertisement
Available languages
Available languages
Quick Links
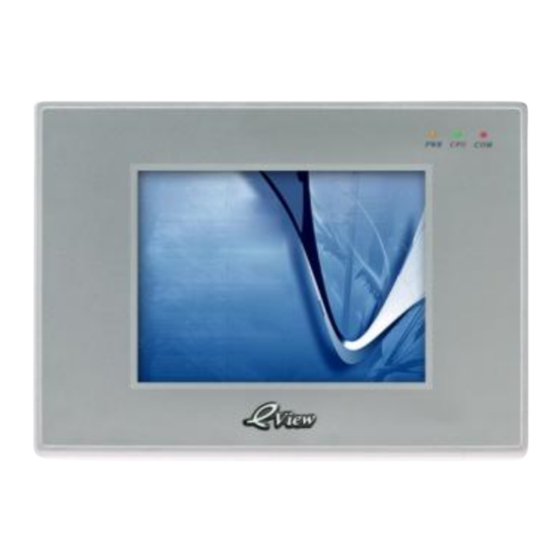
EOP5-057 Serisi Human Machine Interface
EOP5-057AT, EOP5-057AT-DP, EOP5-057AT-CAN, EOP5-057AT-MPI
1.0 Kurulum Hakkında Genel Bilgiler
1.1 Çevre Şartları
EOP5–057 serisi cihazlar fabrika uygulamaları için tasarlanmıştır. Çalışma
Kullanıldığı
sıcaklığı -10°C ile 70°C arasında değişir. Dış mekânlarda uygun değildir. Dış
Yerler
mekânlarda kullanım için lütfen teknik servisimizle bağlantıya geçiniz.
Ulusal
EOP5–057 serisi cihazların ön paneli NEMA 4 kategorisindedir.
Elektrik Cihaz
biçimde NEMA 4 paneline kurulduğu zaman tehlike oluşturmayacaktır. Bu da
Üreticileri
yıkayıp temizleme esnasında sıvıların panel içerisine girmeyeceği anlamına
Birliği(NEMA)
gelmektedir.
EOP5–057 serisi cihazlar Avrupa Birliği CE standartları ile uyumludur. Doğru
Elektriksel
bir şekilde yapılan kablo taşıma ve topraklama, cihazın uygun çalışmasını
Koşullar
sağlayacaktır
Mekanik
Koşullar
Kurulum birimlerini sarsıntılı veya titreşimli bölgelerden uzak tutunuz.
2.0 Kurulum Açıklamaları
2.1 Montaj Talimatları
2.1.1 Yer Belirleme
Cihazın montajı yapılırken, AC güç kablolarının, PLC çıkış modüllerinin, kontaktörlerin, starterlerin,
rölelerin ve buna benzer diğer elektriksel birimlerin cihazın arka bölgesinden uzakta olmasına özen
gösterilmelidir.
Operatör Panel
Kurulum Talimatları
1
Uygun
Advertisement
Table of Contents

Summary of Contents for ENDA EOP5-057 Series
- Page 1 EOP5-057 Serisi Human Machine Interface Operatör Panel EOP5-057AT, EOP5-057AT-DP, EOP5-057AT-CAN, EOP5-057AT-MPI Kurulum Talimatları 1.0 Kurulum Hakkında Genel Bilgiler 1.1 Çevre Şartları EOP5–057 serisi cihazlar fabrika uygulamaları için tasarlanmıştır. Çalışma Kullanıldığı sıcaklığı -10°C ile 70°C arasında değişir. Dış mekânlarda uygun değildir. Dış Yerler mekânlarda kullanım için lütfen teknik servisimizle bağlantıya geçiniz.
- Page 2 2.1.2 NEMA–4 Montajının Yapılması EOP5–057 serisi cihazlar panellerin içine 105mm derinliğe kadar monte edilebilir. Operatör panelinin, çelik panonun ön paneline uygun yuva açılarak monte edilmesi Panel tavsiye edilir. Montaj donanımı için operatör panelinin çevresinde en az 25mm boşluk bırakmalısınız. Panelin arkasında en az 105mm derinlik bırakılması Bilgileri planlanmalıdır.
- Page 3 DC güç kaynaklarının kablo uzunlukları en aza indirgenmelidir. (Maksimum 500mt. blendajlı kablo, 300mt. blendajsız bükümlü tel çifti olmalıdır). Eğer kablolar yıldırım veya gerilim dalgalanmasına maruz kaldıysa, Uyarı! uygun yıldırımdan koruma önlemleri alınız. Kablolama Güç kaynağını haberleşme kablolarından uzak tutunuz. Topraklanmış DC güç kaynaklarını topraklama ile paralel olarak, direnç...
- Page 4 Güvenlik konusunda, programlanabilir kontrolörden bağımsız çalışan acil durdurma fonksiyonunun kullanımına dikkat edilmelidir. Makine parçası yükleme ve indirme gibi konularda kullanıcı makine karşı karşıya kaldığında veya makinenin otomatik döngüsünün devam ettiğinde çalışma döngüsünü başlatmak veya durdurmak için programlanabilir kontrolörden bağımsız olarak otomatik sistem elektromekanik çalıştırılmalıdır. Cihaz çalışır durumdayken, programın değiştirilmesi gerekirse, kilitlerin veya diğer araçların kullanılması...
- Page 5 Sembol PLC [RS-485] PLC [RS-485] PLC [RS-232] PC[RS-232] 4 kablo 2 kablo Rx-(A) RS-485 Rx RS485A RxD_PLC RS-232 Rx TxD_PLC RS-232 Tx RS-485 Tx Toprak Rx+(B) RS-485 Rx RS485B RxD_PC RS-232 Rx TxD_PC RS-232 Tx RS-485 Tx Bağlantıları 9 pinli dişi D-SUB‟un COM1‟e bağlantısı. Bu port EOP5–057 serili cihazı RS–232/485/422 kontrolöre bağlamak için kullanılır.
- Page 6 MT54 ile Bilgisayar Kablo Bağlantı Şeması 2.3.3 USB Bağlantısı Kasanın arkasında bulunan USB portu, konfigürasyon yüklemeleri ve operatör panel ayarları için bilgisayarın bağlantı kurmasını sağlayan USB Slave‟dir. Bu port USB yazıcısı gibi dış kaynaklı cihazlar ile bağlantı kurması için kullanılamaz. Bağlantı...
- Page 7 2.3.5 PROFIBUS-DP Ara Yüzü Bağlantı Port, diğer cihazlara özel PROFIBUS-DP haberleşme kablosu üzerinden bağlanır. EOP5–057 serisi operatör paneller PROFIBUS-DP ağına PROFIBUS-DP Port genişleme modülü üzerinden bağlanır. Böylece ağ sistemi üzerinden operatör Fonksiyonu panel ve diğer cihazlar arasında veri alışverişi yapılır. 9 pinli dişi D-SUB‟un Profibus-DP‟ye bağlantısı.
- Page 8 9 pinli dişi D-SUB‟un MPI‟ya bağlantısı. Açıklama Sembol RS-485 Veri Alış / Veriş _P RXD/TXD_P B/B’ Bağlantısı DGND C/C’ Toprak Ağ Sistemi O RXD/TXD_N A/A’ Veri Alış / Veriş _N Kontrol sinyali Not: MPI_RTS, SIEMENS_PLC terminaline 9 pinli ile bağlanır 2.3.8 USB HOST Ara Yüzü...
- Page 9 2.3.11 DIP Anahtarı SW1 SW2 Çalışma modu Sistem ayar modu OFF ON Dokunmatik ekran modu OFF Yazılım yenileme ve temel parametre ayar modu OFF OFF Uygulama (çevrim içi çalışma) modu Sistem ayar modu: Operatör panel bu moddayken tarih, başlangıç ara yüzü, parlaklık ve sesli ikaz gibi parametrelerin ayarlanabileceği yerleşik sistem ayarları...
-
Page 10: Ürün Özellikleri
3.0 Ürün Özellikleri 3.1 Parametreler Model EOP5-057AT EOP5-057AT-DP EOP5-057AT-CAN EOP5-057AT-MPI Performans Özellikleri Display tipi 5.7 TFT Çözünürlük 320*240 Renk 65536 Arka ışık 1CCFL Parlaklık 500cd/m Arka ışık ömrü 50000 saat. 4-kablolu hassas direnç devresi Dokunmatik ekran İşlemci 32-bit RISC CPU 520MHz Bellek 16M FLASH, 32M SDRAM Ön bellek &... - Page 11 4.0 EOP5-057 Ebatları Birim: mm (inç) Önden Görünüş Yandan Görünüş Üstten Görünüş Arkadan Görünüş Yuva Kesiti Boyutu...
-
Page 12: Installation Instructions
Please consult your suppliers for advised usage in outdoor applications. EOP5-057 series front panel is NEMA 4 rated. When installed properly in a NEMA rating NEMA 4 panel, the NEMA 4 rating of the panel will not be compromised. It means that fluids will not enter the panel during wash downs. -
Page 13: Power Connections
2.1.2 Making a NEMA-4 Mounting The EOP5-057 series can be mounted into panels with a depth of over 105mm. It is recommended that the unit be mounted on the front panel of a steel enclosure, Panel through an appropriate opening. Allow a clearance of at least 25mm around the sides of the unit for mounting hardware. - Page 14 2.2.3 CE Requirements To make the EOP5-057 series comply with EMC directives, and to reduce susceptibility to electrical interference, a separate #14 AWG ground wire should be taken to the chassis ground terminal of the power connector. This ground connection should be run directly to the star earth connection point.
- Page 15 Pin assignment of the 9-pin male, D-SUB, COM0. This port is used to connect the Designations EOP5-057 series to controller with RS-232/485/422 port. Note: RS232/485/422 communication functions are supported by COMO. COM2 supports RS232 communication function, not only can connect with the controller of RS232, but also can be used in HMI program downloading and COM0 &...
- Page 16 RS-232 Rx TxD_PC RS-232 Tx RS-485 Tx Designations Pin assignment of the 9-pin female, D-SUB, COM1. This port is used to connect the EOP5-057 series to controllers with RS-232/485/422 port. COM1 Symbol PLC [RS-485]4 wire PLC [RS-485]2 wire PLC [RS-232]...
- Page 17 MT54 to PC Wiring Diagram 2.3.3 USB Connection The USB port on the back of the case is the USB Slave device used to connect with a PC for con- figuration downloading and HMI setting. It cannot be used to connect with peripheral equipment such as the USB printer.
-
Page 18: Profibus-Dp Interface
2.3.5 PROFIBUS-DP Interface The port can be connected with other equipments via a dedicated PROFIBUS-DP Connection communication cable. EOP5–057series HMIs can be connected to PROFIBUS-DP network via a Port PROFIBUS-DP expansion board, Thus, data can be exchanged between HMIs Function and other equipments via fieldbus. - Page 19 Pin assignment of the 9-pin female, D-SUB, MPI. Symbol RS-485 Description RXD/TXD_P B/B’ Receiving / Sending data_P Designations DGND C/C’ Signal ground Field Bus O RXD/TXD_N A/A’ Receiving / Sending data_N Control Signal Note: MPI_RTS connect with the pin-9 of the SIEMENS_PLC terminal 2.3.8 USB HOST Interface Connection Connect with USB interface devices or U disks...
- Page 20 2.3.11 DIP Switch SW1 SW2 Working Mode System Setting Mode OFF ON Touch Screen Calibrate Mode OFF Firmware Update and Basic Parameter Setting Mode OFF OFF Application (Online Operation) Mode System Setting Mode: In this mode, the HMI will start a built-in system setting interface, where you can set parameters such as date, startup interface, brightness and buzzer.
-
Page 21: Product Specifications
3.0 Product Specifications 3.1 Basic Parameters Model EOP5-057AT EOP5-057AT-DP EOP5-057AT-CAN EOP5-057AT-MPI Performance specification Display 5.7 TFT Resolution 320*240 Color 65536 Backlight 1CCFL Brightness 500cd/m Backlight life 50000 hr. Touch Panel 4-wire precision resistance network Processor 32-bit RISC CPU 520MHz Memory 16M FLASH, 32M SDRAM Recipe memory &... - Page 22 4.0 Dimensional Drawing of EOP5-057 Unit: mm (inch) Front View Side View Top View Rear View Cutout Size...
Need help?
Do you have a question about the EOP5-057 Series and is the answer not in the manual?
Questions and answers