Table of Contents
Advertisement
Quick Links
Advertisement
Table of Contents

Related Manuals for HKC 24C2NB


Summary of Contents for HKC 24C2NB
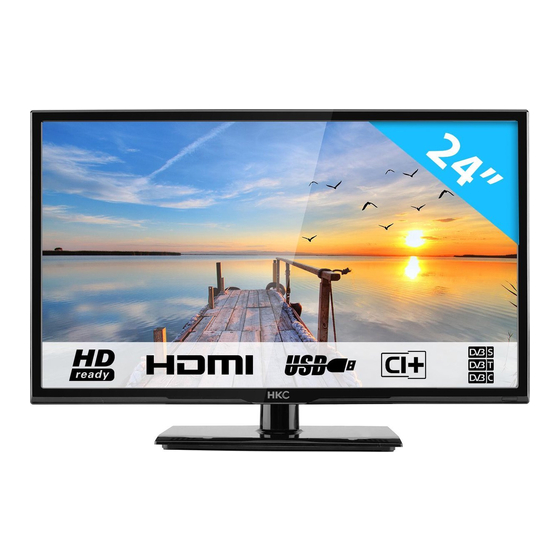
- Page 1 User Manual HKC 24C2NB...
-
Page 2: Table Of Contents
Index Introduction Channel settings ........16 Installation ..........3 Auto search ......... 17 Safety ............3 Channel Management ...... 18 Favorite Management ...... 19 Warning/Caution ......... 4 Feature settings ......... 20 Main unit descrription ......... 7 PVR/Timeshift ..........21 Remote control ........... 8 Set Up ............ -
Page 3: Introduction
Do not overload outlets or extension cords, as this may result in the risk of fire or electric shock. Use a soft, dry cloth (without volatile substances) to clean the television. Do not attempt to repair the television yourself if it is defective. Contact us by sending an email to service@hkc-europe.com. -
Page 4: Warning/Caution
Warning CAUTION RISK OF ELECTRIC SHOCK DO NOT OPEN CAUTION: TO AVOID THE RISK OF ELECTRIC SHOCK. DO NOT REMOVE COVER (OR BACK). NO USER- SERVICEABLE PARTS INSIDE. REFER SERVICING TO QUALIFIED SERVICE PERSONNEL. This symbol is intended to alert the user to avoid the risk of electric shock, do not disassemble this equipment by anyone except a qualified service personnel. - Page 5 Caution Caution High voltages are used in the operation of this product. Do not open the product’s casing. Refer servicing to qualified service personnel. Caution To prevent fire or electrical shock hazard, do not expose the main unit to moisture. Do not place objects filled with liquids, such as vases, on the TV.
- Page 6 Caution Caution Never stand on, lean on or suddenly push the product or its stand. You should pay special attention to children. Caution Do not place the main unit on an unstable cart stand, shelf or table. Serious injury to an individual, and damage to the television, may result if it should fall.
-
Page 7: Main Unit Descrription
Main unit description tekst Control Panel Button Function VOL+ : Volume up. VOL- : Volume down CH+: TV channel up. CH- : TV channel down. MENU : Press to select the main menu. SOURCE : Select the input signal. POWER : Switch on when in standby mode or to enter the standby mode. TV Connections 10 11 1. -
Page 8: Remote Control
Remote Control tekst Indicator light. The red indicator light flashes red to show that the remote is working and sending a signal. ASPECT Switch the TV between on and standby mode. Watch the screen in various formats: Auto/4:3/16:9/Zoom/ Subtitels/Smart-zoom. Mute and restore your TV sound. REPEAT 0-9 numbers. - Page 9 Remote Control tekst • Access the Teletext items (ATV/DTV mode). • Access menu options. PROG (RED) ASPECT • Display the channel menu (ATV/DTV mode). • Access menu options. STEP (GREEN) Access menu options. GO TO (YELLOW) Access menu options. REPEAT A-B (BLUE) LIST Access menu options.
-
Page 10: Osd Basic Adjustments
OSD basic adjustment (First time installation) tekst Installation Guide If this is the first time you are turning on the TV and there are no programs in the TV memory, the INSTALLATION GUIDE menu will appear on the screen. Energy Mode selected Press to select your preferred picture mode. -
Page 11: Osd Language
OSD basic adjustment (First time installation) tekst OSD language selected Press to select the local language. Press to go to next page or EXIT MENU to go to previous page. No operation TV AUTO POWER OFF setting selected Press to select the time of no operation TV auto power ... -
Page 12: Auto Search
OSD basic adjustment (First time installation) Auto search channel way selected Press to select auto search channel way. Press to go to the EXIT MENU previous page. Note: The picture is provided for reference only since the info displayed may be different. -
Page 13: Osd Menu
OSD basic adjustment 1. Press to enter the OSD menu. MENU MENU 2. Then press to select the item you want to enter (Picture, Sound, Channel, Feature or Setup). Press on to go to the submenu. Press to go to the previous ... -
Page 14: Picture Settings
Picture Picture (image settings) You can select the type of image that best suits your personal preference. Press to enter the OSD menu. Press to select PICTURE in the main MENU MENU menu, then press to confirm. EXIT MENU You can change various image options here. -
Page 15: Sound Settings
Sound Sound (sound settings) You can select the type of sound that best suits your personal preference. Press to enter the OSD menu. Press to select SOUND in the main MENU MENU menu, then press to confirm. EXIT MENU You can change various sound options here. -
Page 16: Channel Settings
Channel Channel (channel settings) Press to enter the OSD menu. Press to select CHANNEL in the main MENU MENU menu, then press to confirm. EXIT MENU You can change various channel options here. Item Adjustable Standard Description • Channel Management •... -
Page 17: Auto Search
Channel Auto Search Select AUTO SEARCH with the buttons. Press to enter the sub EXIT MENU menu AUTO SEARCH. Note: Searching for platform will take a long time, please be patient and don’t turn off the TV. -
Page 18: Channel Management
Channel Channel Management Select CHANNEL MANAGEMENT with the buttons. Press to enter EXIT MENU the sub menu CHANNEL MANAGEMENT. Delete channels Press to select the channel. Then press on the remote control to delete the program. Lock channels Press to select the channel. -
Page 19: Favorite Management
Channel Favorite Management Select FAVORITE MANAGEMENT with the buttons. Press to enter EXIT MENU the sub menu FAVORITE MANAGEMENT. Then you can add channels to different favorite list by pressing buttons. You can call the favorite list by press ‘FAV’ button after setting. -
Page 20: Feature Settings
Feature Feature Press to enter the OSD menu. Press to select FEATURE in the main MENU MENU menu, then press to confirm. EXIT MENU You can change various feature options here. Item Adjustable Standard Description • Lock • Language •... -
Page 21: Pvr/Timeshift
PVR Operation (Personal Video Recorder) PVR/Timeshift Select PVR/TIMESHIFT with the buttons. Press to enter the sub EXIT MENU menu PVR/TIMESHIFT. Press the numeric keys and in this menu. You can set channel, date, start time, mode, type and recording length. Note: You will need to check first your inserted USB storage device if the recording speed is sufficient and if the format is right. -
Page 22: Set Up
Set Up Press to enter the OSD menu. Press to select SET UP in the main menu, MENU MENU then press to confirm. EXIT MENU 1. Press to select OSD TIMER and press to enter sub-menu, then you EXIT MENU can select OSD display time you desire. - Page 23 Set Up A. Press to select AUTO ADJUST menu and press to do auto EXIT MENU adjustment. B. Press to select HORIZONTAL POSITION and press the to adjust. C. Press to select VERTICAL POSITION and press the to adjust.
-
Page 24: Usb Features
USB Features Press to select drive disk you want to watch, and press to enter. EXIT MENU Press the to select the file you want to watch in the file selecting EXIT MENU menu, then press to play picture. -
Page 25: Music
USB Features Press to select the ‘MUSIC’ option and press to enter. EXIT MENU Press to select drive disk you want to watch, and press to enter. EXIT MENU Press the to select the file you want to listen in the file selecting ... -
Page 26: E-Book
USB Features Press to select the ‘E-BOOK’ option and press to enter. EXIT MENU Press to select drive disk you want to watch, and press to enter. EXIT MENU Press the to select the file you want to watch in the file selecting ... -
Page 27: Specifications
Specifications RGB-input Mode Resolution Horizontal Frequency (KHz) Vertical Frequency (KHz) 720 x 400 31.5 640 x 480 31.5 SVGA 800 x 600 37.9 1.024 x 768 48.4 WXGA 1.366 x 1.080 47.7 HDMI-input Mode Resolution Horizontal Frequency (KHz) Vertical Frequency (KHz) 640 x 480 31.47 59.94... -
Page 28: Troubleshooting
Troubleshooting Before contacting our service department you can go through the following for possible solutions. Problem Solution TV will not turn on • Make sure the power cord is plugged in. • The batteries in the remote control may be drained; replace the batteries. - Page 29 Troubleshooting USB files are played jerkily • The speed of the USB storage device can affect the speed of data transfer to the TV, preventing image and / or sound from being smoothly displayed. The TFT LED panel uses a panel consisting of sub pixels which requires sophis- ticated technology to produce.
-
Page 30: Useful Information And Licences
Useful Information and Licences Guarantee We regret it when a HKC product doesn’t work as it should, despite our careful quality control. That is why we offer a 2-year manufacturer’s warranty after the date of purchase on all our models. - Page 31 Useful Information and Licences EC directives internet address: https://eur-lex.europa.eu/browse/summaries.html?locale=en The symbol on the product or its packaging indicates that this product must not be disposed of with your other household waste. Instead, it is your responsibility to dispose of your waste equipment by handing it over to a designated collection point for the recycling of waste electrical and electronic equipment.
- Page 32 TV in-house, so HKC has one of the only open-cell assembly lines where the LCD of the TV is made. Since 2007, HKC has an office in the Netherlands and in 2016 HKC started the assembly of TV’s in the Netherlands, where HKC tries to offer as many jobs as possible to people with a distance to the labor market in order to be socially responsible.
Need help?
Do you have a question about the 24C2NB and is the answer not in the manual?
Questions and answers