
Subscribe to Our Youtube Channel
Related Manuals for Branick 7400

Summary of Contents for Branick 7400
- Page 1 MODEL 7400 Installation, Operation STRUT SPRING & Repair Parts Information COMPRESSOR Branick Industries, Inc. • 4245 Main Avenue • P.O. Box 1937 • Fargo, North Dakota 58103 P/N: 81-0103A REV112712...
-
Page 2: Table Of Contents
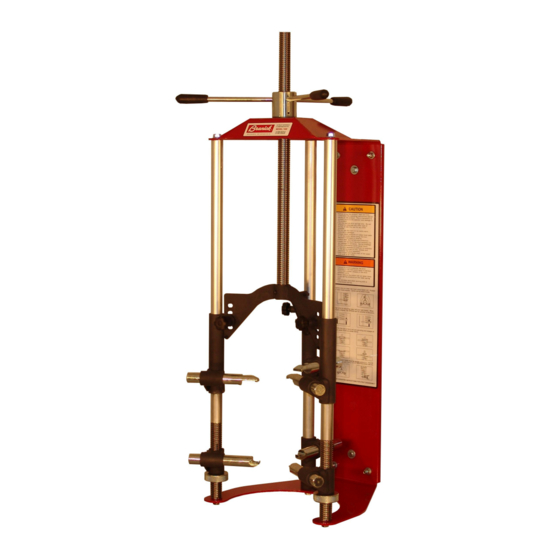
TABLE OF CONTENTS _______________________________________________________ SAFETY INSTRUCTIONS DEFINITIONS SPECIFICATIONS INSTALLATION INSTRUCTIONS OPERATING INSTRUCTIONS Positioning the Strut Assembly Disassembly Reassembly MAINTENANCE REPAIR PARTS WARRANTY SAFETY INSTRUCTIONS _____________________________________________________ • NEVER allow unauthorized personnel to operate this product. • NEVER use this product for anything other than its intended use. •... -
Page 3: Specifications
CAUTION ♦ Before using this product, read and fully understand the operating instructions and all decals on the product. This is necessary to prevent injury to the operator and damage to the product. ♦ Do not attempt to use this product for anything other than its intended purpose. -
Page 4: Operating Instructions
OPERATING INSTRUCTIONS________________________________________________ Step 1. Positioning the Strut Assembly A) Adjust lower right hook to a position just below the lower center hook. Adjust lower left hook to a position just above the lower center hook. B) Place strut assembly on the lower center hook using the lowest possible coil of the spring. C) Engage lower left and right hooks with spring. - Page 5 D) Align strut assembly by adjusting the lower left and right hooks. When properly aligned, the spring of the strut assembly will be parallel to the posts of the tool when viewed from both the front and side. Front Front CORRECT INCORRECT Side...
- Page 6 Type 3 Type 4 This type of strut has only an upper spring This is a coil over shock. Place upper hooks seat. Place upper hooks on upper spring on the highest coil of the spring. seat. F) Engage all three upper hooks as shown above for the type of strut assembly you are servicing. The three upper hooks should be equally extended and contacting the strut.
-
Page 7: Disassembly
Step 2. Disassembly CAUTION ♦ If the strut assembly is difficult to compress or the spring bows or tilts, release tension and reposition the strut assembly. ♦ Keep fingers and hands clear of the upper hook area at all times. With the strut assembly properly positioned, turn handles to compress spring until the bottom coil of spring is just free of the lower spring seat. -
Page 8: Reassembly
Install piston rod nut. NUT MUST BE FULLY ENGAGED ON PISTON ROD THREADS! Release pressure on spring. Remove the clamp. Remove strut assembly from tool. MAINTENANCE_____________________________________________________________ NOTE: To avoid personal injury or damage to the Model 7400, permit only qualified personnel to perform maintenance. See repair parts breakdown for replacement parts. -
Page 9: Repair Parts
REPAIR PARTS_____________________________________________________________... - Page 10 SCREW, 1/2-13 X 1-1/4 SERRATED FLANGE 51-0015 ACME ADJUSTMENT NUT 53-0008 SPRING CLAMP 54-0010 SPRING PIN, 3/16 X 9/16 73-1000 LOCK PIN 73-1005 THREADED HANDLE ROD 80-0222 DECAL, INSTRUCTION 80-0224 DECAL, MODLE 7400 81-0103 INSTRUCTIONS, MODEL 7400 OPERATING * Item not shown...
-
Page 11: Warranty
During the warranty period, at the discretion of Branick management, if the product is found to be defective, it will be repaired or replaced without charge. For service, contact Branick (800-437-4394) to obtain an RMA. Any product shipped to Branick must have an RMA and proof of original shipment date.
Need help?
Do you have a question about the 7400 and is the answer not in the manual?
Questions and answers