Advertisement
Quick Links
SpiderCloud Radio Node - SCRN-320 Hardware Installation Guide
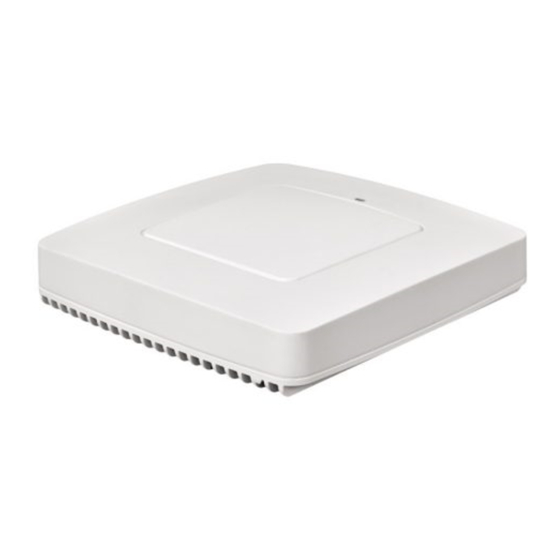
Attach the mount bracket to the radio node as shown in
Installing the Radio Node (Method 1)
Use this method with the quarter-inch bracket when routing the Ethernet cable through an opening where
the bracket will be mounted.
To route the cable directly and mount the radio node
Step 1 Cut a hole in the ceiling or wall to route the Ethernet cable through. Align the hole with the
bracket Ethernet cable entry hole.
Step 2 Route the Ethernet cable through the rectangular hole in the mounting bracket.
SpiderCloud Wireless, Inc.
16
Bracket
Keyholes
Figure 11 Radio Node Slides into Mount Bracket
Ethernet Cable
Entry Hole
Figure 12 Mount Bracket with Direct Cable Routing
Figure
11:
Proprietary and Confidential
Advertisement

Summary of Contents for SpiderCloud SCRN-320
- Page 1 SpiderCloud Radio Node - SCRN-320 Hardware Installation Guide Attach the mount bracket to the radio node as shown in Figure Bracket Keyholes Figure 11 Radio Node Slides into Mount Bracket Installing the Radio Node (Method 1) Use this method with the quarter-inch bracket when routing the Ethernet cable through an opening where the bracket will be mounted.
- Page 2 SpiderCloud Radio Node - SCRN-320 Hardware Installation Guide Step 3 With two user-provided screws, attach the mount bracket assembly to a wall or ceiling. The screw holes are sized for an M4 (#10) or larger screw. Ensure the screws have a snug fit onto the studs, sheetrock, anchor, or other material you are bolting onto and that you match the screw head with the appropriate cutout hole size on the bracket.
- Page 3 SpiderCloud Radio Node - SCRN-320 Hardware Installation Guide If needed, use a flat washer between the bracket and screw head to ensure a secure fastening. Figure 14 shows the 1.25-inch mount bracket. Figure 14 1.25-Inch Mount Bracket Step 2 Insert the RJ-45 connector through the rectangular bracket opening into the Ethernet port...
- Page 4 SpiderCloud Radio Node - SCRN-320 Hardware Installation Guide Completing the Installation Step 1 Attach a padlock or cable tie wrap into the provided slot to secure the unit to the mount bracket. Figure 16 Padlock and Lock Holes The lock in the above figure is shown schematically. The orientation is for illustration purposes (not accurate) since the bracket is typically wall or ceiling mounted.
- Page 5 4. The services node responds with a Join Response message indicating whether the radio node is allowed to join the network or not. 5. The arrival sequence begins. The services node sends the SpiderCloud software image to the radio node.
- Page 6 SpiderCloud Radio Node - SCRN-320 Hardware Installation Guide Radio Node LED Boot Sequence The radio node state machine is sequential and progresses in the following order: State 0 -> State 1 -> State 2 -> State 3 -> State 4 -> State 5 A normal boot sequence transitions through all these states sequentially and the LED state transitions accordingly.
- Page 7 Approximately 1 second on/off cycle Blue: solid Follow IMSI enabled* Powered off or LED disabled * Refer to the SpiderCloud OS (SCOS) Administrator Guide for information about the locate radio node and follow IMSI features. SpiderCloud Wireless, Inc. Proprietary and Confidential...
- Page 8 The E-RAN Deployment Planning Guide provides information about planning and dimensioning E-RAN systems. • The SpiderCloud OS (SCOS) CLI User Guide provides an introduction to the key features and functionalities of the SpiderCloud Command Line Interface (CLI). • The SCOS NB Data Model Reference Guide provides details about the objects and parameters that comprise the system configuration and operational state.
- Page 9 SpiderNet network management server and client and using it to remotely manage E-RAN deployments. • The SpiderCloud Time Zone Reference Guide provides the information required to configure the time zone for SpiderCloud services nodes. • The SpiderCloud Call Performance Event Reporting Guide provides detailed information about call performance events files including the file format, reported events, and event parameters.
Need help?
Do you have a question about the SCRN-320 and is the answer not in the manual?
Questions and answers