Advertisement
Quick Links
Advertisement

Summary of Contents for Fiplex DHS Series
- Page 1 English DHSxx – PS800 Digital Fiber DAS User & Installation Manual...
- Page 2 Document History Description Revision Date Issued Original version July 3 , 2014 General Review March 2 , 2016 General Update 7 June, 2017 UM-0909...
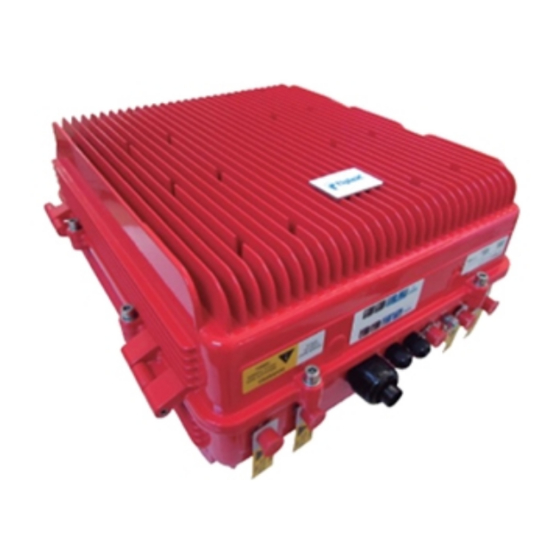
- Page 3 This manual describes installation, commissioning, operation and maintenance of the Fiplex PS800 Digital Fiber DAS, and Fiplex Control Software (FCS). The hardware included in this manual corresponds to the Digital Master Unit (DM) DHS00- M and Digital Remote Unit (DR) DHS37-R.
- Page 4 Extended Global System for Mobile communication ETACS Extended Total Access Communication System ETSI European Telecommunications Standard Institute Fiplex Control Software Global System for Mobile communication Hardware Light Emitting Diode Low Noise Amplifier, uplink and downlink Mobile Station, MS antenna = towards the mobile station...
- Page 5 Fiber DAS Master Optical Unit from FIPLEX. Any omission may result in damage and/or injuries to the System and/or the System Operators or Users. If an instruction is not clear or you consider is missing, please contact immediately to Fiplex. See www.fiplex.com for contact information.
- Page 6 CLASS 1 Fibers carry transmission power in both direction due to the use of WDM LASER Never view a laser pointer using an optical instrument, such as binocular or a PRODUCT microscope. Never handle non-dark fibers. RF Exposure. As a part of a Telecommunications System, MOU1x is not intended to radiate signals and meets EMC directives, but within the System may have cables and antennas that are potential sources of radiating.
-
Page 7: Fcc Compliance
FCC Compliance This is a 90.219 Class B device. WARNING: This is a 90.219 Class B device. This is NOT a CONSUMER device. It is designed for installation by FCC LICENSEES and QUALIFIED INSTALLERS. You MUST have an FCC LICENSE or express consent of an FCC Licensee to operate this device. You MUST register Class B signal boosters (as defined in 47 CFR 90.219) online at www.fcc.gov/signal- boosters/registration. - Page 8 The antenna/s used for this transmitter must be installed to provide a separation of at least 45 cm in DL and 45 cm in UL from all persons and must not be collocated or operating in conjunction with any other antenna or transmitter. Changes or modifications not expressly approved by the party responsible for compliance could void the user’s authority to operate the equipment.
-
Page 9: Product Description
UL noise. The Fiplex Digital Master Unit can be fed with a number of Base Stations or Off the Air. The direct connection to a base station is done though the Point Of Interconnection (POI) and depending on the configuration and amount of Base Stations it can be something simple as a directional coupler and a duplexer or something more complex that can consist on several directional couplers, splitters, duplexers. - Page 10 2.1 Digital Master Unit Ports The Digital Master Unit is equipped with internal duplexers, therefore, the enclosure has the “To Base” RF Port. UM-0909...
- Page 11 Digital Remote Unit Ports The Digital Remote Unit is equipped with internal duplexers, therefore, the enclosure has the “To Mobile” RF Port. UM-0909...
- Page 12 FO Connection 2.3.1 FO Connection in Master Unit Note: Each fiber connection is performed with simplex fiber and LC-APC connector. UM-0909...
- Page 13 2.3.2 FO Connection in Remote Unit Note: Each fiber connection is performed with simplex fiber and LC-APC connector. UM-0909...
- Page 14 2.4 Dimensions 2.4.1 Digital Master, Expansion and Remote Unit Cabinet Dimensions UM-0909...
-
Page 15: Installation
Installation Mounting the cabinet Fiplex Digital DAS is designed for outdoor usage with a weather proof outdoor NEMA4 cabinet that can be mounted without any kind of shelter from rain, snow or hail. However, to improve reliability, it is recommended to mount the Digital DAS on a site with shelter from direct exposure to sun, rain, snow and hailing. - Page 16 2. After attaching the bracket hang the cabinet as shown in Figure 3. Figure 3 UM-0909...
- Page 17 3. Secure the cabinet to the bracket as shown in Figure 4. To attach the cabinet to the bracket use the provided four M6 x 1/2” allen screws. Figure 4 UM-0909...
- Page 18 Opening and Closing the Cabinet To open the cabinet, release the 8 door screws indicated in figure 5 using the provided special allen key. A - Release cabinet cover. Figure 5 Use the special allen key N°6 UM-0909...
- Page 19 B - Open the cabinet cover. Figure 6 C – Close the cabinet cover. Figure 7 UM-0909...
- Page 20 D - Secure cabinet cover. Figure 8 UM-0909...
- Page 21 Use of Liquid Tight Conduit The unit has available a Liquid Tight Conduit Fitting connector. The unit as standard has the connector installed, so if the user requires to use this connector, if available, the NFPA cables, Ethernet, DC and AC cables can be routed through this connector. Figure 9;...
- Page 22 B – Install the sealing cup Figure 10; Replacement of Conduit connector to sealing cup Nema4X considerations This device is equipped with a Nema4X enclosure, however, to ensure the Nema rating, the user must have the following considerations: 1. Correct use of the Liquid Tight Conduit. In case this interface is not used, it should be replaced with the sealing cup.
- Page 23 4 Commissioning 4.1 Connection step by step Connect the RF ports, Power, Fibers and Ethernet Cable Glands location, for Master, Expansion and Remote units following the next steps: For Master Unit: Connect the signal coupled from the base station to the “To Base” RF port. N type female connectors are used in the unit.
- Page 24 Once the unit has been connected to the power source, it takes about 30 seconds to run a booting routine. After that time unit is ready to be connected via USB cable to the Digital Master to a computer running Fiplex Control Software (FCS) in order to be properly configured. Figure 13; USB Port location...
- Page 25 Link status Enable channel filtering if needed and setup desired channel frequencies. If Fiplex Digital Fiber DAS is used as channel selective, user has to know what frequencies are used in base station. Each channel can be enabled independently. Channels not used can be showed / hidden using the “Show channels”...
- Page 26 Set number of active channels and frequencies According to DL RF input levels, program input attenuator to avoid input overflow, and output attenuator for each remote to obtain desired output level in each remote. Set Input attenuator Set Output attenuator Reciprocally, set UL band gain adjusting output attenuator of master unit.
- Page 27 Set Output attenuator Check UL and DL gain for each remote Set up squelch settings. Controls are independent in UL (for each remote) and DL (master) bands. Typical values for UL are between -110dBm and -100dBm for squelch threshold. For DL, recommended value for squelch threshold is minimum level received in any active channel minus 10dB.
- Page 28 Filters and fine gain settings UM-0909...
- Page 29 4.3 Status Indicators There is an indicator panel located at the front panel of the repeater. This led panel works as a status monitor, in order indicate warning or alarms of repeater There are four leds, first one the power ON indication led, labelled “PWR”. A Second led, labelled “STS”...
- Page 30 Table 2 Indicator Panel LED indication description Unit is not powered or fail in power supply Normal state: Unit is powered on Normal state HW fail: digital signal processor is not detected Temperature: very high internal Unit temperature Optical fiber alarm in at least one link Normal state PA Overflow or excessive temperature alarm.
- Page 31 Part 2 SOFTWARE Introduction Fiplex Fiber DAS can be fully configured and monitored through USB connection. Digital Master unit receives through optical links monitoring and configuration data from remotes units. For this reason, whole system can be fully configured and supervised from digital master unit.
- Page 32 IP: At this page (for units with Ethernet supervision), IP addresses configuration and addresses of SNMP Managers are shown. User can set addresses of two SNMP Managers (IP where SNMP agent will send TRAP information). To modify, click over Apply Changes link after writing new values on text fields.
- Page 33 a 3V lithium battery, button type of 20mm (CR2032) with 220mA·h. This suffices for at least half year. When the repeater is powered, no current is drained from the battery. So, actual battery life will depend on repeater usage. For battery replacement, please locate battery holder between USB and Ethernet connectors on main board.
- Page 34 Digital Master frame. There are five sub-sections inside this frame: Downlink filtering: this section contains fields to modify channel frequencies, squelch options and filtering options. Parameters are described in following table: Parameter Range Description Downlink frequency channels. Frequency Frequency Downlink band resolution is 3.125KHz Channel enable...
- Page 35 This indicator shows overflow on input circuitry is Grey: normal state / Overflow occurring. This condition can be avoided Red: alarm state increasing input attenuator Input attenuator to accommodate input levels. This value must be set to avoid overflow Input Attenuator - condition.
- Page 36 Optical link status: each indicator shows optical link status between digital master and each remote unit. Clicking on “REMOTE LINK n” detailed monitoring data of each optical link can be viewed: voltage, current and temperature of each optical module, transmitted and received optical power, and alarms related to digital data recovery system.
- Page 37 Filtering option can be bypassed. If filtering is Filtering enable Enabled / disabled disabled, fine gain adjustments and squelch options are ignored Remote RF Input parameters. Next table describes information of this frame: Parameter Range Description This indicator shows input level measured in UL Broad band level band Grey: normal state /...
- Page 38 This control sets the output attenuation used to Output attenuator 0 to 40dB set DL gain together with Master Input Attenuator Temperature This indicator shows unit temperature High temperature Grey: normal state / High temperature alarm condition is indicated alarm Red: alarm state with this led.
- Page 39 Local Software. Installation and troubleshooting 7.1 Installation The following section will describe the steps to be followed in order to install and use the Fiplex Control software with your Fiplex repeater. 1. Before connect USB cable between computer and repeater, run the FiplexControlSoftware.msi File.
- Page 40 Choose the default installation path “C:\Program Files (x86)\FiplexControlSoftware”. Note that this can change according to your system configuration (32bits or 64bits), language and Windows Version. 3. The installer will start to copy the necessary files. 4. After installation has completed, a shortcut in user desktop will appear. UM-0909...
- Page 41 C:\Program Files (x86)\FiplexControlSoftware\drivers”. 6. Turn on the Repeater BE SURE THAT “TO MOBILE” AND “TO BASE” PORTS ARE PROPERLY LOADED EITHER WITH 50 OHMS DUMMY LOADS, OR RADIATING SYSTEM. 7. Execute the Fiplex Control Software. Next window will appear: UM-0909...
- Page 42 File menu: contains menus to save repeater configuration to a file and load configuration from file to repeater. NOTE: if Fiplex Repeater is not turned on, related COM port will appear as “Unknown device” 8. Click “Scan Devices” UM-0909...
- Page 43 Now, the Fiplex unit is shown in the list of available devices, and connection button is enabled. NOTE: Fiplex repeater could not appear in list, if COM port number is higher than COM16, depending on Windows version. COM port number can be forced to arbitrary number (below COM16) through Device Administrator.
- Page 44 Change COM port number 9. Click “Connect”. Fiplex Control Software window will be automatically maximized, and it will show the configuration screen described in previous sections. UM-0909...
- Page 45 Moreover, if some communication problem occurs while device is monitored, the software will go back to initial state as well. 11. Remote unit can be controlled through USB port. In this case, Fiplex Control Software will show that connected device is a remote unit.
- Page 46 UM-0909...
Need help?
Do you have a question about the DHS Series and is the answer not in the manual?
Questions and answers