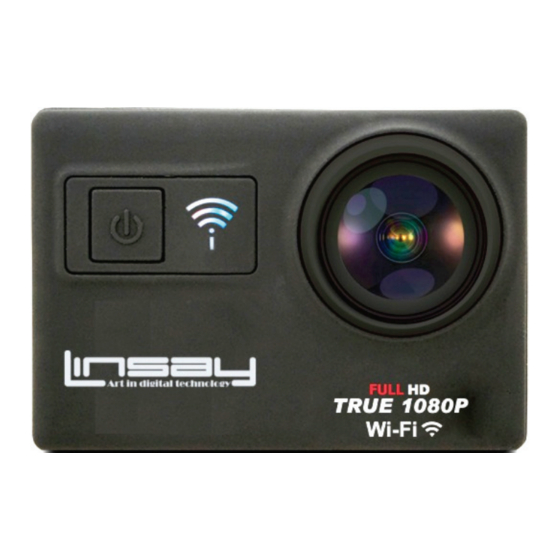
Summary of Contents for Linsay X7000A80P
- Page 1 X7000A80P ACTION CAMERA TRUE FULL 1080P USER MANUAL Models: X7000A80P www.LINSAYdigital.com LINSAY-Art in Digital Technology- Copyright. All Right Reserved 2018...
-
Page 2: Dear Customer
Dear Customer, Thank you for purchasing the newest LINSAY X7000A80P Action Camera, please read the instructions and suggestions carefully to ensure the best possible performance. FCC Class B: Note: This equipment has been tested and found to comply with the limits for a Class B digital device, pursuant to part 15 of the FCC Rules. -
Page 3: Safety Advices
SAFETY ADVICES READ CAREFULLY ALL THESE INSTRUCTIONS BEFORE USING THE DEVICE AND PRESERVE THEM FOR ANY LATER NEED. Please follow the rules depicted in this manual closely to ensure your safety. Be more wary of any edges, uneven surfaces, metal parts, accessories and its packaging so as to prevent any possible injury or damage. - Page 4 THE BASICS...
- Page 5 ACCESSORIES...
-
Page 6: Mounting Your Camera
MOUNTING YOUR CAMERA Attach your camera to helmets, gear and equipment. -
Page 7: Insert The Battery
Insert the Battery • Open the battery compartment on the bottom of the camera and slide in the battery. • Keep the plastic pull tab facing you. Insert the Micro Memory Card: • Slide the memory card into the slot on the left side of the camera body. •... -
Page 8: Video Mode
SETTINGS • Press the Power button to change modes and Press the OK Record/Shutter Release to enter the settings menu. • Use the Up/Down buttons to cycle through the setting options that appear on the screen • Press the Power/Mode button to cycle through setting options and press the OK Record/Shutter Release button to select a desired option. -
Page 9: Slow Motion
SLOW MOTION To Take a Video in Slow Motion: 1. Go to Video Settings. 2. Use the Down arrow to go to Slow Motion. Click OK. 3. Select either 1080p 60fps or 720p 120fps. Click OK 4. Go back to Video mode. Advance through settings by clicking the Power/Mode button repeatedly. -
Page 10: Delete A Video/Photo
2. Use the Up/Down arrow to cycle through the various videos or photos. 3. Press the OK Record/Shutter Release button to start a video. 4. Press the OK Record/Shutter Release button to pause a video. • To exit to the Playback menu, press the Power/Mode button DELETE A VIDEO/PHOTO To Delete a Video or Photo: 1. - Page 11 The XDV App is compatible with the following smartphones and tablets: • Apple iOS • iPhone5, 5s, 6(plus), 6s(plus)(iOS9), iPad Air and Mini (iOS9) • Android • Android 4X Quad-core devices Note: Compatibility varies by device. Content playback, sharing and access to the memory card might not be available on some devices.
-
Page 12: Safety Precautions
Time Lapse To Capture a Time Lapse Series: 1. Verify the Continuous Lapse is ON. 2. Verify the camera is in Time Lapse mode 3. Long press the Grey Video button . The camera initiates a countdown and emits a camera shutter sound each time a photo is taken Drama Shot Photo To Take a Burst Photo Series:... - Page 13 simply reset and restart the device following the instruction manual. During file transmission, please handle with care and operate in a static- free environment. Keep the device away from water and other liquids. In the event that • water or other liquids enter the device, power off the product immediately and clean the device.
- Page 14 The power adaptor is a CLASS II apparatus with double insulation, and • no external ground is provided. Safety Symbol Explanation: • • -The lightning flash with arrowhead symbol within an equilateral triangle is intended to alert the user to the presence of non-insulated “dangerous voltage”...
-
Page 15: Warranty Policy
LINSAY shall have no obligation to repair, replace or refund until the customer returns the defective product to LINSAY. Units sent to LINSAY for repair will be repair or replaced with new or like-new product (s) of the same model with the same functionality as the original unit. Original unit (s) will be returned only at LINSAY' discretion. -
Page 16: How To Obtain Warranty Service
LINSAY reserves the right to assess all warranty claims and to determine if defects or damages are covered by this limited warranty. In case of a claim that is not covered by this warranty, you will be contacted to determine whether LINSAY should repair the damage for a fee or whether the product should be returned to you as received by the service technician or service center. -
Page 17: Owner's Responsibility
This warranty gives you specific legal rights, and you may also have other rights, which vary from state to state. This is the only warranty applicable; no one is authorized to extend or modify it or to grant any other warranty on LINSAY's behalf. Owner's Responsibility To ensure warranty service, keep the dated bill or sales receipt as evidence of the purchase date and location.


Need help?
Do you have a question about the X7000A80P and is the answer not in the manual?
Questions and answers