Table of Contents
Advertisement
Quick Links
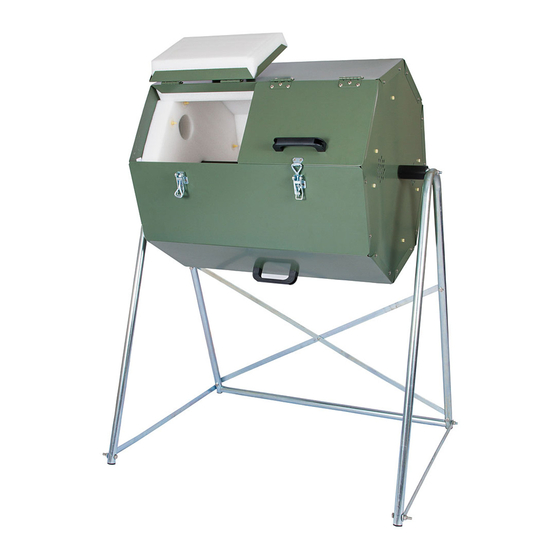
Assembly Instructions JK125
TOOLS REQUIRED: One knife to open packaging | Two ½" wrench or socket (metric 13) | One 9/16' wrench or socket
(metric 14) | One #2 Philips (+) screwdriver NOTE: All bolts are 9/16" (metric 14) and nuts are ½" (metric 13)
We highly recommend 2 people work together to assemble. Also, we suggest placing
on soft surface when laying out and assembling: ie cardboard or a blanket.
Tools needed:
2 pc adjustable wrenches
Advertisement
Table of Contents

Related Manuals for Jora Composters JK125

Summary of Contents for Jora Composters JK125
- Page 1 ASSEMBLY INSTRUCTIONS JK125 TOOLS REQUIRED: One knife to open packaging | Two ½” wrench or socket (metric 13) | One 9/16’ wrench or socket (metric 14) | One #2 Philips (+) screwdriver NOTE: All bolts are 9/16” (metric 14) and nuts are ½” (metric 13) We highly recommend 2 people work together to assemble.
- Page 2 ASSEMBLY INSTRUCTIONS JK125 For all connections hand tighten only for step 1. Place cross brace #4 on the ground Set one piece of the stand #2 V shaped on top (note: the stand has a front and back, back has 2 extra holes for...
- Page 3 ASSEMBLY INSTRUCTIONS JK125 Slide the Octagonal foam insulation piece #9 (one of two with ventilation holes) over the long and medium black tube until it reaches the metal side piece. Line up ventilation holes. Slide the square nylon piece #13 over the black tube until it rests on the medium tube #11.
- Page 4 ASSEMBLY INSTRUCTIONS JK125 It is very important to have 2 people to add the side panels to prevent the composter from spinning. Line up the octagonal panels. Place the side section with doors #20 on top with doors pointing towards the front.
- Page 5 ASSEMBLY INSTRUCTIONS JK125 Add the next panels the same way starting with #19 (with a handle) then #18 (no handle) until all are attached . Stand it up, check all screws, nuts, and bolts. When all are secure you are ready to compost.
Need help?
Do you have a question about the JK125 and is the answer not in the manual?
Questions and answers