Table of Contents
Advertisement
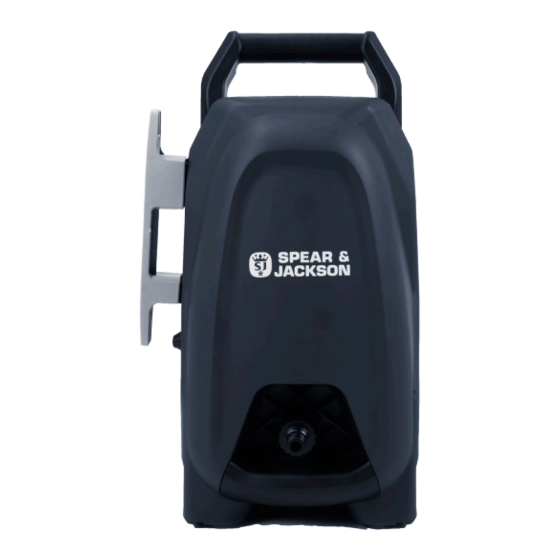
1400W
High
Pressure Washer
Q1W-SP09-1450
Important - Please read these instructions
fully before starting assembly
These instructions contain important information that will help
you get the best from your pressure washer, ensuring it is assembled
correctly and safely. If you need help or have damaged or missing parts,
call the Customer Helpline on 0345 605 2067
ORIGINAL
INSTRUCTION
MANUAL
AFTER SALES SUPPORT
0345 605 2067
Advertisement
Chapters
Table of Contents

Related Manuals for Spear & Jackson Q1W-SP09-1450


Summary of Contents for Spear & Jackson Q1W-SP09-1450
- Page 1 ORIGINAL INSTRUCTION MANUAL 1400W High Pressure Washer Q1W-SP09-1450 Important - Please read these instructions fully before starting assembly AFTER SALES SUPPORT 0345 605 2067 These instructions contain important information that will help you get the best from your pressure washer, ensuring it is assembled correctly and safely.
- Page 2 SPEAR & JACKSON SINCE 1760 For more than 250 years gardeners have enjoyed high quality performance and great results using Spear & Jackson tools. Our garden power tools combine continuous innovation and the latest in manufacturing technologies with a proud heritage. Each product is carefully designed with performance, comfort and durability firmly in mind, which has earned Spear &...
-
Page 3: Table Of Contents
CONTENTS Safety Information Description of symbols General safety Personal safety Operating safety Maintenance and storage safety Intended use Box Content / Parts Assemble Assemble gun storage Connect the hose and spray gun Fit the lance to spray gun Connect the hose and pressure washer Assemble inlet connector Connect garden hose and water supply Connect garden hose and inlet connector... -
Page 4: Safety Information
SAFETY INFORMATION Please read these instructions fully before operating or maintaining your machine DESCRIPTION OF SYMBOLS The following warning symbols appear throughout this manual and indicate the appropriate safety measures you should take when operating and maintaining the pressure washer. IMPORTANT! Appliance not suitable for Please read all of the safety and... -
Page 5: General Safety
SAFETY INFORMATION Please read these instructions fully before operating or maintaining your machine GENERAL SAFETY ■ Don’t use the appliance IMPORTANT! without reading the instruction sheet. ■ Keep this instruction ■High pressure cleaners manual in a safe shall not be used by place for future reference. - Page 6 SAFETY INFORMATION Please read these instructions fully before operating or maintaining your machine yourself or others in order to the influence of alcohol or clean clothes or footwear. drugs. ■ The appliance is not ■ Keep operating area clear designed for connecting of all persons.
-
Page 7: Operating Safety
SAFETY INFORMATION Please read these instructions fully before operating or maintaining your machine OPERATING SAFETY device that will interrupt WARNING! the supply if the leakage current to earth exceeds ■ High-pressure hose 30 mA for 30 ms or a fittings and couplings device that will prove the are important for the earth circuit. - Page 8 SAFETY INFORMATION Please read these instructions fully before operating or maintaining your machine considered to be non- when checking the potable. equipment, cleaning it or removing blockages, when ■ The PVC or undertaking maintenance polychloroprene sheathed work or changing power cord, or extension accessories, if the power cables (H05VV-F) are or extension cable is...
-
Page 9: Maintenance And Storage Safety
SAFETY INFORMATION Please read these instructions fully before operating or maintaining your machine of the mains cable. parts will invalidate your warranty. ■ Do not use the equipment ■ Do not attempt to repair when the switching action the equipment yourself. All of the On/Off switch is work not indicated in these impaired. - Page 10 SAFETY INFORMATION Please read these instructions fully before operating or maintaining your machine designed for domestic use only: ■ To clean machines, vehicles, buildings, tools, facades, terraces, garden equipment etc. using a high-pressure water jet (and detergents if required). ■ To use with accessories, replacement parts and detergents approved by...
-
Page 11: Box Content / Parts
BOX CONTENT PARTS High pressure washer Spray gun Cable storage High pressure hose Patio cleaner Detergent bottle Extend lance for patio cleaner Water inlet male connector Fix brush Nozzle pin Adjustable spray lance Instruction manual If there are any parts missing, please call the customer helpline on 0345 605 2067 AFTER SALES SUPPORT 0345 605 2067... -
Page 12: Assemble
ASSEMBLE WARNING - Pull out the power plug before carrying out any work on the equipment, and use only original parts. Before starting any cleaning task, it is important to inspect the area for objects that could create a hazard. Remove any objects from the work area that could be tripped over, such as toys or outdoor furniture. -
Page 13: Fit The Lance To Spray Gun
ASSEMBLE Fit the lance to spray gun. Insert the adjustable spray lance (6) to spray gun (7), and twist 1/4 turn to lock in position. Connect the hose and pressure washer. Attach high pressure hose (8) to the machine’s water outlet (hand tighten only). Assemble inlet connector Attach the inlet connector (10) to the machine’s water inlet. -
Page 14: Connect Garden Hose And Inlet Connector
ASSEMBLE Connect garden hose and inlet connector. Attach a hose with a quick connect coupling (not included) to the high pressure washer. OFF position. Make sure the ON/OFF switch is in the OFF position. Connect socket. Insert the mains plug into the socket. AFTER SALES SUPPORT 0345 605 2067... -
Page 15: Operate
OPERATE WARNING - Wear suitable clothing, ears and eyes protecting when working with the equipment. Ensure that the mains voltage value matches the label on the equipment. Before starting i. Check the machine for visual defects. Ii. Check that all parts of the machine have been securely fitted. iIi. -
Page 16: High Pressure Working
OPERATE RISK OF FATAL INJURY! Use special care when cleaning tyres. Vehicle tyres/ tyre valves may become damaged or burst when handled improperly. First signs of damage included discolorations on the tyre. Damaged vehicle tyres/ tyre valves pose a life-threatening risk. Keep the jet at a distance of at least 30 cm! The high-pressure jet may be dangerous when handled improperly. -
Page 17: Use The Patio Cleaner
OPERATE Use the patio cleaner Ideal for cleaning areas without the splash-back of dirt like patios, fences, garage doors, gravel and pebbled pathways. Stop the machine before changing the lance for the extension pole and patio cleaner To clean the patio make side ways movements, instead of up and down scrubbing movements. -
Page 18: Use The Detergent Bottle
OPERATE Use the detergent bottle Unscrew the bottle cap of the detergent bottle. Fill the detergent to the detergent bottle. Screw on the bottle cap tight. Fit the detergent bottle to the trigger gun. Turn on the pressure washer. Pull trigger to operate unit. -
Page 19: Maintenance
MAINTENANCE Turn off machine and connect lance. Note: The meshes filter of the machine is not intended for the filtration of large quantities of impurities. Overview of cleaning After every use wipe the machine with a slightly damp ▪ cloth. Do not clean the machine using a high-pressure water jet. -
Page 20: Storing, Transport
MAINTENANCE Storing Store the machine where it is dry and well ventilated. When placing the machine out of service for an extended period of time, remove the cleaning agent and drain all the water left in the hoses. Transport If shipping, use the original packaging wherever possible. Disposal Disposing of the machine Machines which are labelled with the this symbol... -
Page 21: Technical Data
TECHNICAL DATA Model Q1W-SP09-1450 Input voltage rating 230-240V ~, 50 Hz Input power 1400W Working pressure 7MPa Max pressure 10.5MPa Flow rate 5l/min. IP number IPX5 Max flow rate 6.7l/min Safety class class II Max. inlet pressure: 0.6MPa Inlet water temperature (max.): 40ºC(104ºF) -
Page 22: Troubleshooting
TROUBLESHOOTING Suspected malfunctions are often due to causes that the user can fix themselves. Therefore, check the product using this section. In most cases the problem can be solved quickly. WARNING - Only perform the steps described within these instructions! All further inspection, maintenance and repair work must be performed by an authorised service centre or a similarly qualified specialist if you cannot solve the problem yourself! -
Page 23: Guarantee
GUARANTEE If your device develops a fault, please don’t hesitate to contact our customer service department on 0345 605 2067, the majority of issues can be solved directly over the phone. 1. These warranty terms cover additional warranty rights and do not affect your statutory warranty rights.
Need help?
Do you have a question about the Q1W-SP09-1450 and is the answer not in the manual?
Questions and answers
component came out of my pressure washer and would like to know how to put it back in please, I have attached and image and any information about how to do it would be amazing. Thank you.
To reassemble the Spear & Jackson pressure washer Q1W-SP09-1450, follow these steps:
1. Install the inlet male connector (part 10).
2. Connect the garden hose to the inlet connector.
3. Attach the high pressure hose (part 8) to the outlet.
4. Connect the spray gun (part 7) to the high pressure hose.
5. Attach the adjustable spray lance (part 6) or other accessories like the patio cleaner (part 3) or fix brush (part 5) to the spray gun.
6. Insert the detergent bottle (part 9) if using detergent.
7. Power on the machine after connecting water and checking all parts are secure.
Let water run through the hose before turning on the power to avoid airlocks. Use the nozzle pin (part 11) if the nozzle gets blocked.
This answer is automatically generated