Advertisement
Quick Links
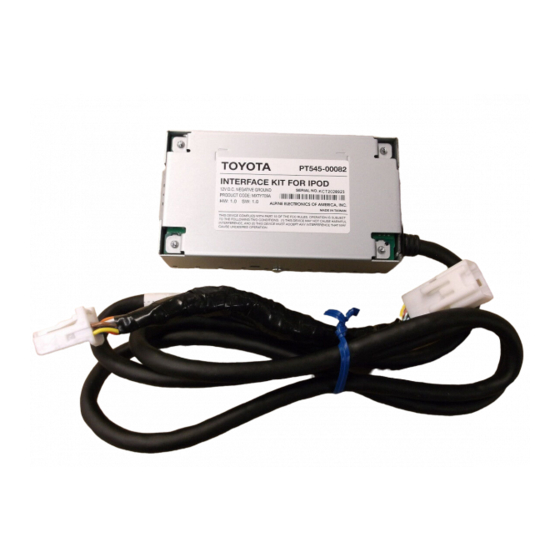
TOYOTA
Preparation
Part Number: PT545-00082
Kit Contents
Item #
Quantity Reqd.
1
1
2
1
3
1
4
1
5
1
Unit Assembly Kit Contents
Item #
Quantity Reqd.
1
1
Mounting Kit Contents
Item #
Quantity Reqd.
1
1
2
1
Hardware Bag Contents
Item #
Quantity Reqd.
1
1
2
4
3
4
4
2
Conflicts
XM or Sirius Satellite Radio
Requirement
SAT Ready Head Unit
Recommended Tools
Personal & Vehicle
Protection
Safety Goggles
Seat Covers
Special Tools
Panel Clip Remover
Sockets
Screwdriver
Torque Wrench
Hole Saw
De-burring Tool
Installation Tools
Tape Measure/Ruler
Side Cutters
Masking Tape
Special Chemicals
Cleaner
Issue: B
9/08/08
PRIUS
Description
Unit Assembly Kit
Mounting Kit
Hardware Bags Special Tools
Unit and Fit Kit List
Owner's Manual
Description
Interface Kit
Description
iPod Cable
Grommet
Description
Foam Sleeve
2x4 inch Adhesive Protective
Foam
14 inch Lock Tie
6 inch Lock Tie
Notes
10 mm, 8 mm
Phillips, #2
4.1 N•m (36 lbf in)
(Battery Cable)
1 1/8 inch (29 mm)
Notes
Metric/Standard
Notes
3M™ Prep Sol-70
Page 1 of 13 pages
2008 -
INTERFACE KIT FOR IPOD
NOTE: Part number of this accessory may not be
the same as the part number shown.
General Applicability
Note:
Recommended Sequence of Application
Item #
Accessory
1
Security System
2
RES
3
EC Rearview Mirror
4
iPod Interface
Vehicle Service Parts
Item #
Quantity Reqd.
1
2
3
Legend
STOP: Damage to the vehicle may occur. Do not
proceed until process has been complied with.
OPERATOR SAFETY: Use caution to avoid risk of
injury.
CAUTION: A process that must be carefully observed
in order to reduce the risk of damage to the
accessory/vehicle and to ensure a quality installation.
TOOLS & EQUIPMENT: Used in Figures calls out the
specific tools and equipment recommended for this
process.
REVISION MARK: This mark highlights a change in
installation with respect to previous issue.
SAFETY TORQUE: This mark indicates that torque is
related to safety.
*Mandatory
(may be required for reassembly)
Description
DIO
Advertisement

Related Manuals for Toyota PT545-00082

Summary of Contents for Toyota PT545-00082
- Page 1 TOYOTA PRIUS 2008 - INTERFACE KIT FOR IPOD Preparation Part Number: PT545-00082 Kit Contents NOTE: Part number of this accessory may not be the same as the part number shown. Item # Quantity Reqd. Description Unit Assembly Kit General Applicability...
- Page 2 Preparation Parts Description of Interface Kit Assy. Item # Parts Name Parts No. Interface Kit PT545-00082 Parts Description of Mounting Kit (PT545-00082) Item # Parts Name iPod Cable Grommet Foam Sleeve 2x4 inch Adhesive Protective Foam 14 inch Lock Tie...
-
Page 3: Vehicle Protection
Vehicle Disassembly/Reassembly (panel removal, part storage, etc.). • Electrical Component Disassembly/Reassembly (battery disconnection, connector removal, etc.). Please see your Toyota dealer for a copy of this document. 1. Vehicle Protection. (a) Open rear hatch. (b) Lift trunk shelf to access battery. - Page 4 TOYOTA PRIUS 2008 - INTERFACE KIT FOR IPOD Procedure (b) Remove the lower instrument pad. (Fig. 2-2) Screwdriver (1) Remove the two (2) screws. (2) Disconnect the hood lock control cable. (3) Detach the four (4) claws and five (5) clips.
- Page 5 TOYOTA PRIUS 2008 - INTERFACE KIT FOR IPOD Procedure (e) Remove the instrument panel cluster. (Fig. 2-5) (1) Detach the six (6) clips and remove the instrument panel cluster. Fig. 2-5 (f) Remove the multi-display assembly. (Fig. 2-6) (1) Remove the two (2) bolts.
- Page 6 TOYOTA PRIUS 2008 - INTERFACE KIT FOR IPOD Procedure (h) Remove the radio receiver with bracket. Screwdriver (Fig. 2-8) (1) Remove the four (4) screws. (2) Disconnect the connector and remove the radio receiver with bracket. Fig. 2-8 (i) Remove the glove box door stopper sub- assembly.
- Page 7 TOYOTA PRIUS 2008 - INTERFACE KIT FOR IPOD Procedure (2) Open the door until it is horizontal. (3) Pull the glove box door toward the rear of the vehicle to detach the two (2) hinges and remove the glove box door. (Fig. 2-11) Fig.
- Page 8 TOYOTA PRIUS 2008 - INTERFACE KIT FOR IPOD Procedure 4. Connect the AVC-LAN Cable to the Head Side Cutters Unit. (a) Bundle the excess AVC-LAN cable and secure with cushion tape and one (1) 14” lock tie. (Fig. 4-1) (b) Secure the AVC-LAN cable at the vehicle harness with one (1) 6"...
- Page 9 TOYOTA PRIUS 2008 - INTERFACE KIT FOR IPOD Procedure (c) If the 12 pin connector is already pre-wired to the head unit. (1) Remove the pre-wired 12 pin connector from the head unit. Vehicle’s 12 Pin Connector (2) If applicable, plug the pre-wired 12 pin...
- Page 10 TOYOTA PRIUS 2008 - INTERFACE KIT FOR IPOD Procedure 5. Route the iPod Cable. (a) Route the iPod cable from the opening for the head unit to the glove box. (Fig. 5-1) (1) Route the iPod cable under the vehicle harness.
- Page 11 TOYOTA PRIUS 2008 - INTERFACE KIT FOR IPOD Procedure 6. Route the iPod Cable Terminal. 1 1/8” Hole Saw (a) Make a round hole through which the cable can pass at the location on the glove box shown in the illustration. (Fig. 6-1) (1) Hole saw is 1 1/8”...
- Page 12 TOYOTA PRIUS 2008 - INTERFACE KIT FOR IPOD Procedure 7. Vehicle Reassembly. (a) Reinstall junction block. (b) Reinstall all trim pieces in reverse order. (1) Reconnect any disconnected connectors. (c) Verify the panels fit together properly with no uneven gaps between them.
- Page 13 TOYOTA PRIUS 2008 - INTERFACE KIT FOR IPOD Checklist - these points MUST be checked to ensure a quality installation. Check: Look For: Accessory Function Checks Interface Kit for iPod *Verify proper connection of Interface Kit for iPod. Verify the proper operation of the audio Audio Head Unit head unit.*...
Need help?
Do you have a question about the PT545-00082 and is the answer not in the manual?
Questions and answers