
Subscribe to Our Youtube Channel
Related Manuals for Linden Group L32HTC17a


Summary of Contents for Linden Group L32HTC17a
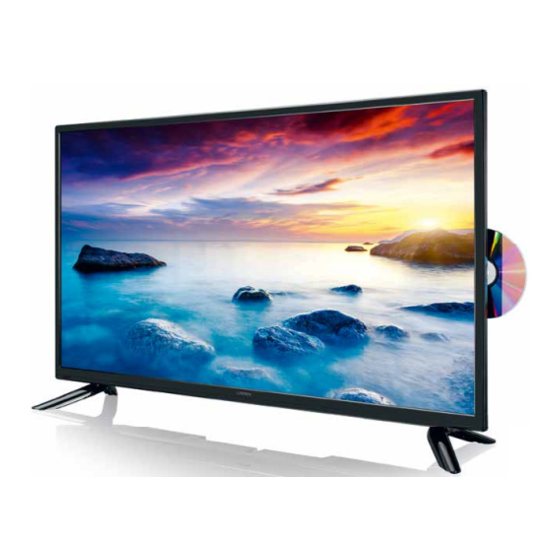
- Page 1 32” (80cm) HD LED LCD TV with Built-in DVD Player Instruction Manual L32HTC17a 24 Month Manufacturer’s Warranty...
-
Page 3: Table Of Contents
Contents Guide to the Television Front / Right Side View and Rear Controls Rear View and Sockets Remote Control Installing Batteries in the Remote Control Remote Control Operation Range Turning the TV On for the First Time − First Time Setup −... - Page 4 Setup Setting − OSD Language − Audio Languages (DTV Mode) − Subtitle (DTV Mode) − Teletext − Blue Screen − Mode Setting − Time Settings − HDMI CEC Control − PVR Settings (DTV Mode) − OAD (Over Air Download) − Restore Factory Default EPG (Electronic Programme Guide) (DTV Mode) −...
-
Page 5: Guide To The Television
Guide to the Television Front / Right Side View and Rear Controls INPUT Item Description Receives IR signals from the remote control. IR (Infrared Receiver) Do not put anything near the sensor, as its function may be affected. Illuminates blue when the TV is turned on. Illuminates red when the TV is in POWER LED standby mode. -
Page 6: Rear View And Sockets
Guide to the Television Rear View and Sockets Digital Audio HDMI1 HEADPHONE PC AUDIO Output (Coaxial) (ARC) Item Description HEADPHONE Connects to the headphones. Connects to a DVD player, Digital Set-Top-Box, or other AV devices with component Y, Pb, Pr / AUDIO (L/R) (YPbPr) video and audio output sockets. -
Page 7: Remote Control
Guide to the Television Remote Control Infrared LED Sending IR signals to TV. Do not put anything near the sensor, as its function may be affected. Switch the TV between on and standby mode. Mute and restore your TV sound. SLEEP Set the TV sleep timer: OFF / 5 / 15 / …... - Page 8 Guide to the Television Allows you to navigate the OSD menus and adjust the system settings to your preference. Confirm the selection in the OSD menus. 18. BACK Return to the previous menu in the OSD menus. 19. Exit Exit the OSD menu. DVD SETUP Display and exit the DVD setup menu.
- Page 9 Guide to the Television 30. TEXT Turn on and off the teletext function. (DTV mode) ZOOM Zoom in on the displayed frame. (DVD mode) 31. FAV Display the favourite channel list. (ATV / DTV mode) (DVD) MENU Display the DVD menu. (DVD mode) 32.
-
Page 10: Installing Batteries In The Remote Control
Guide to the Television Installing Batteries in the Remote Control Press and lift the back cover to open the battery compartment of the remote control. Insert two AAA size batteries. Make sure the (+) and ( - ) ends of the batteries match the (+) and ( - ) ends indicated in the battery compartment. -
Page 11: Turning The Tv On For The First Time
Guide to the Television Turning the TV On for the First Time • This instruction manual explains the basic instructions for operating this unit. Some DVDs are produced in a manner that allows for specific or limited operation during playback. Therefore, this unit may not respond to all operating commands. - Page 12 Guide to the Television button to select Mode Setting. Press the Press the buttons First Time Setup to select your desired mode. If select Store Mode, a pop-up menu OSD Language English Mode Setting Home Mode will be display. Press the OK button to confirm or press any button Country Australia to cancel and return to the Mode Setting menu.
-
Page 13: Selecting The Input Source
Guide to the Television Selecting the Input Source Press the INPUT button on the TV or on the remote control to INPUT SOURCE display the INPUT SOURCE list. Press the buttons to select the input source that you want: DTV / ATV / AV / YPbPr / HDMI 1 / HDMI 2 / HDMI 3 / PC / YPbPr USB / DVD. -
Page 14: Caring For The Environment
Caring for the Environment Responsible Disposal of the Packaging The packaging of your television has been selected from environmentally friendly materials and can usually be recycled. Please ensure these packing materials are disposed of correctly. Plastic wrapping can be a suffocation hazard for babies and young children, please ensure all packaging materials are out of reach and are safely disposed of. -
Page 15: Safety Information And Warnings
Safety Information and Warnings Symbols The symbols used in this manual or on the back cover of the television set means: Read this Instruction Manual before use Enclosures contain dangerous voltages Please refer to important operating and maintenance/servicing instructions that accompany the appliance Important Safety Instructions When using any electrical apparatus, always observer safety regulations and use basic safety precautions to reduce the risk of fire, electric shock, and/or personal injury including any of the following:... - Page 16 Safety Information and Warnings 20. For household use only; this television is not intended for commercial use. 21. This television is intended to be used in household and similar applications such as; - offices and other working environments; - farm houses; - by clients in hotels, motels, bed and breakfast and other residential type environments.
-
Page 17: Item In The Box
Item in the Box Remove all packaging from the TV. Retain the packaging. If you dispose of it please do so according to local regulations. The following items are included: AUDIO TV Stand (Left) x 1 Remote Control / AAA Batteries x 2 TV Stand (Right) x 1 Screw (4x20mm) x 4 Instruction Manual... -
Page 18: Basic Set Up
Basic Set Up • The LCD display is very fragile, and must be protected at all times when installing and removing the base stand. Be sure that no hard or sharp object, or anything that could scratch or damage the LCD display, comes into contact with it. -
Page 19: Mounting The Tv To A Wall
Basic Set Up Mounting the TV to a Wall • Remove the stand assembly before mounting the TV onto the wall. • It is recommended that two people take part in the installation. To remove the stand assembly, untighten the screws holding the stand assembly to the rear of the TV. Slide the stand assembly out. -
Page 20: Advanced Connection Diagrams
Advanced Connection Diagrams Making Video and Audio Connections Not all AV devices have the ability to connect to a TV, please refer to the owner’s manual of your AV device for compatibility and connection procedures. When connecting any external AV device, do not connect the mains cable to the mains socket until all other connections are complete. -
Page 21: Connecting A Computer Using A Vga Cable
Advanced Connection Diagrams Connecting a Computer Using a VGA Cable Use a VGA cable to connect the TV’s VGA input Rear Right Bottom View of TV socket to a computer’s VGA output socket. Use an Digital Audio HDMI1 HEADPHONE PC AUDIO Output (Coaxial) (ARC) audio cable to connect the TV’s PC AUDIO input... -
Page 22: Connecting An Av Device Using Composite Cable
Advanced Connection Diagrams Connecting an AV Device Using Composite Cable Use an AV cable (not included) to connect the Rear Right Side View of TV TV’s AUDIO(L/R) / VIDEO input sockets to the AV INPUT HDMI2 HDMI3 VIDEO external AV device’s composite audio / video output sockets. -
Page 23: Connecting Headphones
Advanced Connection Diagrams Connecting Headphones Connect your headphones to the TV’s HEADPHONE Rear Right Bottom View of TV socket. Digital Audio HDMI1 HEADPHONE PC AUDIO Output (Coaxial) (ARC) Before putting on the headphones, turn the volume down then put the headphones on and slowly increase the volume until you reach a comfortable listening level. -
Page 24: Advanced Features
Advanced Features Picture Setting Allows you to set your preferred picture mode. Press the MENU button to display the main menu. Press the buttons to select the PICTURE menu and then press the button or the OK button. Picture Press the buttons to select the following options, and then press Picture Mode Standard... -
Page 25: Sound Setting
Advanced Features Sound Setting Allows you to select an audio-enhancement technique. Press the MENU button to display the main menu. Press the buttons to select the SOUND menu and then press the button or the OK button. Sound Press the buttons to select the following options, and then press Sound Mode Standard... -
Page 26: Channel Setting
Advanced Features Mono sound selection If the stereo signal is weak, you can switch to mono by pressing the AUDIO button. In mono reception, the clarity of sound is improved. To switch back to stereo, press the AUDIO button again. Language selection for dual language broadcast If a programme can be received in two languages (dual language), you can switch to NICAM DUAL I, NICAM DUAL II, NICAM DUAL I+II or MONO by pressing the AUDIO button repeatedly. -
Page 27: Dtv Manual Scan (Dtv Mode)
Advanced Features button to select Start and then press the OK button or Press the button to start auto tuning. Auto Scan Country Australia Mode DTV + ATV Start Move OK: Select MENU: Return EXIT: Exit Channel tuning will commence. This operation may take up to few Auto Scan minutes. -
Page 28: Atv Manual Scan (Atv Mode)
Advanced Features button to select Digital Scan and then press the Press the buttons to selects the desired channel number. button to select Start and then press the OK button to Press the Digital Manual Scan commence the search of that channel. When the signal has been Digital Scan CH 8 tuned, the frequency and strength will be displayed on the screen. -
Page 29: Auto Channel Update (Dtv Mode)
Advanced Features button to select Start and then press the OK button to Press the commence the search of that channel. Press the MENU button to return to the previous menu, press again to return to the main menu. Press the EXIT button to exit the menu. Auto Channel Update (DTV Mode) Enable auto channel update feature in DTV channel. -
Page 30: Channel Edit (Atv Mode)
Advanced Features buttons to select Channel Edit and then press the Press the OK button or the button to enter the Channel Edit menu. Channel Auto Scan Manual Scan Auto Channel Update Channel Edit Favourite Manager Signal Information Move OK: Select MENU: Return EXIT: Exit A Channel Edit screen will be displayed. -
Page 31: Favourite Manager
Advanced Features A Channel Edit screen will be displayed. Press the buttons to select the programme you want to edit. a. Delete Channel Edit Press the RED button to delete the selected channel. S-07 S-08 b. Skip S-09 S-10 Press the GREEN button to select the channels that you want to skip when you are selecting channels. -
Page 32: Signal Information (Dtv Mode)
Advanced Features A Favourite Manager screen will be displayed. Press the Favourite Manager buttons to select the channel you want to add to the list and then Channel Name Favourite1 Favourite2 Favourite3 Favourite4 Type ABC News use the coloured button to save your favourite list. NITV Press the MENU button to return to the previous menu, press again to return to the main menu. -
Page 33: Lock Setting
Advanced Features Lock Setting To access the Lock System menu, you must enter the password. Enter the default password “0000” for first time use. To change the password, refer to “New Password” (see below). Lock System The Lock System is designed to prevent accidental re-tuning of the TV / losing of channels and to prevent children from watching unsuitable programmes. -
Page 34: Channel Locks
Advanced Features Channel Locks Block Channel is designed to prevent children from watching unsuitable programmes. The Lock System must be set to On for this function to operate. When a channel is blocked, a valid password must be entered. Press the MENU button to display the main menu. Press the buttons to select the Lock System and then press the button or the OK button. -
Page 35: Parental Rating (Dtv Mode)
Advanced Features Parental Rating (DTV Mode) This function allows you to set up blocking schemes to block specific channels and ratings. It operates according to information from the broadcasting station, therefore if the signal has incorrect information, this function will not operate. This TV is programmed to remember the last option set even if the TV is switched off. -
Page 36: Lock Keypad
Advanced Features Lock Keypad Lock Keypad is designed to prevent children from pressing the buttons on the TV. The Lock System must be set to On for this function to operate. If the Lock Keypad is set to On, all buttons on the TV will be locked. All TV operations can be controlled by the remote control only. -
Page 37: New Password
Advanced Features New Password Press the MENU button to display the main menu. Press the buttons to select the Lock System and then press the button or the OK button. Lock System Enter Password – – – – Enable Channel Block Parental Rating No Block Lock Keypad... -
Page 38: Setup Setting
Advanced Features buttons to select Clear Lock and then press the OK Press the button or the button. All settings in Lock System will reset to the factory defaults. Lock System Press the MENU button to return to the previous menu, press again Enter Password –... -
Page 39: Subtitle (Dtv Mode)
Advanced Features buttons to select Audio Language and then press Press the the OK button or the button to enter Audio Language menu. Setup OSD Language English Audio Language Subtitle Teletext Blue Screen Mode Setting Home Mode Time Settings HDMI CEC Control Move OK: Select MENU: Return EXIT: Exit... -
Page 40: Teletext
Advanced Features Press the buttons to select the following options, and then press buttons to adjust each option’s setting or OK button to select the options. Subtitle Mode Allows you to turn On / Off the subtitle. Mode Subtitle Primary Language English Subtitle Secondary Language English... -
Page 41: Blue Screen
Advanced Features Press the buttons to select the following options, and then press buttons to adjust each option’s setting or OK button to select the options. Teletext Digital Digital Teletext Language English Allows you to selects an available language as Decoding Page Language West Teletext... -
Page 42: Time Settings
Advanced Features buttons to select Mode Setting and then press the Press the buttons to select Home Mode or Store Mode. Press the MENU button to return to the previous menu, press again Setup to return to the main menu. OSD Language English Audio Language... - Page 43 Advanced Features Sleep Timer The sleep timer automatically switches the TV to standby after the preset time has elapsed. The clock will be set automatically when receiving a digital signal. Time must be set before using Sleep Timer function. Selects a period of time after which the TV automatically switches to standby mode: OFF / 5 / 15 / …...
-
Page 44: Hdmi Cec Control
Advanced Features HDMI CEC Control Allows you to command and control two or more HDMI CEC (Consumer Electronics Control) compliant devices, that are connected through HDMI, by using only one of the remote controls (e.g. controlling a TV set, set-top box and DVD player using only the remote control of the TV). - Page 45 Advanced Features HDMI CEC This will allow you to control other CEC enabled devices (connected via HDMI) using Control buttons to select HDMI CEC Control and then your TV remote control. Press the buttons to turn On. press the The ARC (Audio Return Channel) function allows you to send audio from your ARC- compliant TV to ARC-compliant audio devices (e.g.
-
Page 46: Pvr Settings (Dtv Mode)
Advanced Features PVR Settings (DTV Mode) Allows you to select your preferences in the PVR File System. Ensure the USB device is connected. Press the MENU button to display the main menu. Press the buttons to select the Setup and then press the button or the OK button. -
Page 47: Oad (Over Air Download)
Advanced Features Scheduled Sets the scheduled recording information manually. Scheduled Record Setting List Scheduled Record 6 Apr 2015 Fri. 02:33 Standby Record See page 55 for details on Timer Programming. Group Frequency Channel Date Start Time Duration Delete Press the GREEN button to delete the Function Delete One Delete All... -
Page 48: Restore Factory Default
Advanced Features Press the MENU button to return to the previous menu, press again to return to the main menu. Press the EXIT button to exit the menu. Restore Factory Default Restores all settings to the factory defaults. Press the MENU button to display the main menu. Press the buttons to select the Setup and then press the button or the OK button. -
Page 49: Epg (Electronic Programme Guide) (Dtv Mode)
Advanced Features EPG (Electronic Programme Guide) (DTV Mode) This system has an Electronic Programme Guide (EPG) to help you navigate through all the possible viewing options. The EPG supplies information such as programme listings, start and end times for all available services. In addition, detailed information about the programme is often available in the EPG (the availability and amount of programme information will vary, depending on the particular broadcaster). -
Page 50: Digital Teletext (Dtv Mode)
Advanced Features Digital Teletext (DTV Mode) Digital teletext can access special digital teletext services and specific services which broadcast digital teletext. You will need to turn off Subtitle Function before using teletext (refer to page 37 for details). Teletext within Digital Service In DTV mode press the TEXT button to display the main information page. -
Page 51: Connecting A Usb Storage Device
Advanced Features Connecting a USB Storage Device Switch off the TV before connecting any USB storage Rear Right Side View of TV device. AV INPUT HDMI2 HDMI3 VIDEO Connect your USB storage device to the USB port of your TV. Plug the connected devices into the mains socket before switching on the TV. -
Page 52: Listening To Music
Advanced Features Press the buttons to navigate in the picture folder and then press the OK button to play the slideshow. Supported file formats: JPG. Press the OK button or the i button to display the function bar. Press the OK button to play / pause the slideshow. Press the buttons to select the previous or next photo. -
Page 53: Viewing Movies
Advanced Features Viewing Movies Press the INPUT button on the TV or on the remote control then buttons to select the USB mode and then press the press the OK button. buttons to select MOVIE and then press the OK Press the button. - Page 54 Advanced Features Press the buttons to navigate in the text folder and then press the OK button to view. Press the buttons to go to previous or next page. Use 0-9 buttons to goto the specified page. Press the BLUE button to enter the Quick Menu. And then press buttons to select the functions: Repeat / Background Music / Encode Type.
-
Page 55: Time Shift Function
Advanced Features Time Shift Function This function allows you to pause live TV. The picture will pause and the programme will begin recording so you will not miss any of the programme. You need to have a USB storage device attached to the USB socket for Time Shift Recording to work. -
Page 56: Recording Dtv Programme Onto A Usb Storage Device
Advanced Features Recording DTV Programme onto a USB Storage Device Use this function to record the DTV programme you are watching on the main screen and save it for future viewing. The recording from timer programme or direct recording may have a little bit of delay when it starts to record the broadcast programme. -
Page 57: Timer Programming (Dtv Mode)
Advanced Features Timer Programming (DTV Mode) This function is used to perform scheduled recording. The recording from timer programme or direct recording may have a little bit of delay when it starts to record the broadcast programme. Please make sure the USB device is inserted. If not, a warning message will pop up. Press the GUIDE button on the remote control. - Page 58 Advanced Features buttons to select the first digit of hour. Use the 0-9 Press the Scheduled Record - Group 1 buttons and the buttons to enter the Hour and Minutes. Setting Status Setting Is Not In Use Frequency Once Hot Key Channel 4Music Move Up...
-
Page 59: Play Recorded Programme
Advanced Features Play Recorded Programme You can play a recorded programme from the File Manager or from a USB Storage Device. From File Manager Press the MENU button to display the main menu. Press the buttons to select the Setup and then press the button or the OK button. - Page 60 Advanced Features From a USB Storage Device Press the INPUT button on the TV or on the remote control and then buttons to select the USB mode and then press the OK press the button. buttons to select MOVIE and then press the OK button. Press the Press the buttons to select your storage device and then press...
-
Page 61: Dvd Operation
DVD Operation Using the Built-in DVD Player Insert a disc with the label side facing towards the rear of the TV. (CD-R, CD-RW, DVD-R, DVD-RW, CD, DVD+R, or DVD+RW) Allow 10 seconds for the player to load the disc. If you insert the disc wrongly, an error message will be displayed. -
Page 62: Basic Dvd Playback Functions
DVD Operation Basic DVD Playback Functions Playing the DVD Depending on the disc, a menu may appear on the TV screen once the disc has loaded. When playing the disc, you may use the button on the unit or the button on the remote control to toggle between Play and Pause mode. -
Page 63: Display (For Dvd / Multimedia Discs)
DVD Operation • For DIVX discs, while playing the disc, you may use the repeat playback. There are 4 repeat modes, press the REPEAT button to toggle between the different repeat modes in sequence. (REPEAT (SINGLE) / REPEAT (ONE) / REPEAT (ALL) / SHUFFLE / RANDOM / REPEAT (FOLDER)). -
Page 64: Audio (For Dvd / Cd)
DVD Operation Audio (for DVD / CD) Press the AUDIO button to toggle between different audio modes in sequence. For CD discs: Stereo / Mono Left / Mono Right / Mix-Mono. Some discs may contain multiple languages which can be selected by pressing the AUDIO button. Repeat A-B (for DVD / CD) When playing DVD, CD disc, press the A-B button to repeat certain content. -
Page 65: Using The Dvd General Setup Page
DVD Operation Using the DVD General Setup Page In the DVD mode, press the DVD SETUP button on the remote control. Press the buttons to select the General Setup Page menu, and then press the buttons to select the menu options. Press the DVD SETUP button to exit the menu. Option Description TV Display... -
Page 66: Using The Dvd Audio Setup Page
DVD Operation Using the DVD Audio Setup Page In the DVD mode, press the DVD SETUP button on the remote control. Press the buttons to select the Audio Setup Page menu, and then press the buttons to select the menu options. Press the DVD SETUP button to exit the menu. Option Description Speaker Setup... - Page 67 DVD Operation Option Description Audio Set the Audio language to your language of choice. - - Preference Page - - TV Type Audio English Subtitle Not all DVD discs support multiple audio languages. DiscMenu Parental Password Default Subtitle Select the Subtitle language. - - Preference Page - - TV Type Audio...
-
Page 68: Troubleshooting
Troubleshooting The following table contains various hints and tips to get the best performance from your TV. If you require additional assistance, please call our customer care center on 1300 530 800. The TV does not operate properly. • The TV may freeze up during use. Disconnect the mains plug from the mains The TV does not respond socket for a few minutes. - Page 69 Troubleshooting Password • Select the New Password setting in the Lock System menu, then enter the Lost password following master password “8899”. The master password clears your previous password and allows you to enter a new password. The DVD function does not work. •...
-
Page 70: Other Information
Other Information Maintenance Careful and regular cleaning can prolong the life of your TV. Be sure to press the button on the rear panel of the TV or on the remote control to turn off the TV. Disconnect the mains cable from the mains socket before any cleaning. Use a soft dry cloth to wipe away the dust from the screen and surfaces. -
Page 71: Display Modes
Other Information Display Modes The screen resolution has been optimised during production for the display modes listed below. Although this TV is compatible with a 1080i/1080p input, it is possible that the screen may not display the exact resolution this resolution and consequently the picture quality will be adjusted accordingly. YPbPr Mode Resolution Vertical Frequency (Hz) -
Page 72: Technical Specifications
Technical Specifications Model no. L32HTC17a Display screen type Direct LED Display Display size 32" Diagonal Viewing angle 178° / 178° (H / V) Aspect Ratio 16:9 Resolution 1366 (H) x 768 (V) Power supply AC 100-240V ~50/60Hz TV receiver PAL: BG, DK, I & DVB-T Frequency range Analogue: 46.25MHz ~ 814.25MHz... - Page 76 Customer care: Aus-1300 530 800 customercare@lindenproducts.com.au lindenproducts.com.au While every effort has been made in the preparation of this instruction manual, the publishers cannot be held responsible for the accuracy of the information contained herein or any consequences arising from it. (IB-L32HTC17a-170322V1)
Need help?
Do you have a question about the L32HTC17a and is the answer not in the manual?
Questions and answers