Table of Contents
Advertisement
Quick Links
Advertisement
Table of Contents

Related Manuals for LONGJOY LV-1010


Summary of Contents for LONGJOY LV-1010
- Page 1 Digital Portable Overhead Document Camera LV-1010 Instruction Manual...
-
Page 2: Table Of Contents
Content I、Product Introduction 1.1 Product appearance………………………………………………..3 1.2 Main functions and features of the product……………………….3 1.3 Production specifications………………………………………….4 II、Product installation 2.1 The structure of the Document Camera…………………………...5 2.2 The folding and unfolding of the Document Camera……………..5 2.3 The vertical height of the Document Camera……………………..6 2.4 The level angle of the Document Camera……………………..…..6 2.5 The rotation angle of the camera lens of the Document Camera….7 2.6 Hardware connection………………………………………………7... -
Page 3: I、Product Introduction
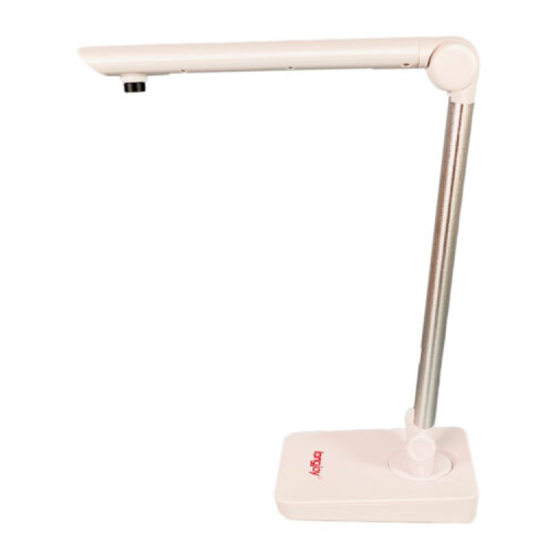
1.1 Product appearance 1.2 The main functions and features of the product LONGJOY Document Camera is a portable multifunction device. It can easily scan and save images of a paper document, color picture, and even a 3-D object. The foldable design makes the Document Camera look concise, noble, and modest. -
Page 4: Production Specifications
1.3 Product specifications Category Model LV-1010 Sensor CMOS 5M 800*600,1280*720,1600*1200, Resolution 2592*1944 Focusing Manual operation Image Aperture Automatic system White balance Automatic Shooting dimension A3、A4 Picture format PNG、JPG、BMP、TIF、PDF Text enhancement Support Image noise reduction Support Brightness control Support Saturation adjustment... -
Page 5: Product Installation
II、Product Installation 2.1 The structure of the Document Camera 1 Switch of LED 2 Camera lens 3 LED light 4 Spindle 5 Main arm 6 Power interface 7 Base 2.2 The folding and unfolding of the Document Camera Make the main arm and the shooting arm of the Document Camera spread out 90 degrees successively... -
Page 6: The Vertical Height Of The Document Camera
2.3 The vertical height of the Document Camera The height of A3 size The height of A4 size 2.4 The level angle of the Document Camera The shooting arm can be rotated horizontally for 180 degrees... -
Page 7: The Rotation Angle Of The Camera Lens Of The Document Camera
The rotation angle of the camera lens of the Document Camera The camera lens can be rotated 90 degrees at left or right Note: after rotating the Document Camera to the specified position, it can’t be overexerted, or the Document Camera might be damaged. 2.6 Hardware connection This product is connected to the computer with the universal serial bus (USB) interface and the accessories include the USB date cable. -
Page 8: Software Installation
Use the USB cable to connect the Document Camera to your computer, and it will get electricity via the USB cable from your computer. 2.7 Software installation The CD comes with the Document Camera has the software that will be needed to use the device. - Page 9 Click “Install” to confirm the installation...
- Page 10 Click “Finish” to complete the installation Note: if there are some changes on the software, it will be subject to the actual software.
-
Page 11: Function Introduction For The Software
2.8 Function introduction for the software The software of the document camera As shown in the figure, after starting the software, the central control navigation bar will appear at the lower right corner of the screen and 6 functions can be selected. Document management Document Camera Quick capture... - Page 12 The main toolbar of the software is listed above, and it mainly includes: 1. Obtain the images from the scanning source 2. Bind the images into the volume 3. Unbind the images 4. Delete the images 5. Export the files to the specified path 6.
- Page 13 Collect the pictures from the scanning source Click “Cam Scanner” icon “Cam Scanner” dialog box pops up The introduction of the main function of “Cam Scanner” Select the file saving path under “Save Path” 2. For “Secondary Camera”, the alternate video equipment can be selected. The software supports multiple connections.
- Page 14 3.Select the suitable resolution in the drop-down list of “Resolution” to adjust the pixel of the images when there is a need. 4. Select the saving format of image in the “File Format”. The document camera software supports JPG picture format compressed format and the lossless BMP picture format which are the most common formats currently.
- Page 15 8. Selecting “Gray”, “Trim” or “Straighten” in the “Auto Adjust” menu to realize the corresponding operation for the image of the video. 9. Exit from “Cam Scanner” 10. Rotate the button at any angle 11. Rotate the button in 90 degree clockwise and counterclockwise 12.
- Page 16 14. Shooting button 15.Click “ ” to set up the continuous shooting function. * One way is to click the “QuickCap”, then press any buttons on the keyboard to do the continuous shooting. * Another way is to set up the quantity of the photo at the parameter of “Amount”. Set up the interval time of shooting at the parameter of“Interval”.
- Page 17 Picture editing function: 1. Edit the picture file in the “File Library” interface Select in the “OCR Library or click the path directly to find the file that needed to be edited. * For one picture file or many pictures file, right click to operate the functions of “Bag”, “DeBag”,...
- Page 18 1. Realize the adjustment for the “Brightness”, “Contrast” and “Saturation” of the image file. 2.Realize the operation of “Trim”, “Straighten”, “CUT”,“Y axis mirror”, and “X axis mirror” for the image file 3. Realize the five effects for the image file, such as “Gray”, “Threshold”, “Invert”, “Emboss”...
- Page 19 4. Click “Undo”,“Redo”,“Confirm” or “Reset” to do reversal operation for the editing process. 5. Zoom in and zoom out the image in the range of “9%—1000%” 6. Browse the image file under the same directory backward or forward. The range of quick adjustment for the size of image is between “100%”...
- Page 20 The introduction of “OCR” function Click the “ ” icon of “ScanView” interface or right click the picture to edit and select the “OCR” function, and then “OCR Proofread” interface will be popped up: “OCR” target document will show above the interface and character interface after recognition will show as below...
- Page 21 Document Camera software Click the “Document Camera” button in the central console Click the main interface button to start the exhibition stand software, as shown in figure below. The introduction of the functions for buttons Brush tool for three colors Light stick tool...
- Page 22 Erasing tool Clear the entire screen Remove the designated effect Hand shape drag button Define the degree of thickness Define the line type Color tool Transparency tool to select the transparency of the brush Shape tool Save tool Setup Zoom in function Zoom out function 1:1 display Best display...
- Page 23 Rotate to the right Image contrast Take the photo Screen recording Add the auxiliary camera Exit Create PPT By clicking “PPT Slide” button in the central console, the new PPT can be created. Quick capture By clicking “Quick capture” button in the central console, users can drag the image in the video directly to other applications, for example, the picture contrast Contrast teaching Click “Image contrast”...
- Page 24 *Double click on blank space of the dialog box, select the path in the pop-up image, then the selecting of contrasting picture is completed. *Click the graphical button to open more image editing tools *When opening many pictures to contrast, users can use the mouse wheel to realize the scaling of the picture.
- Page 25 1. The size of the recording screen can be selected at the lower left corner, such as 1024X768, 800X600 and 640X480. The content in the red box of the screen can be recorded. 2. Adjust the window size of the video recording by dragging the red frame. By clicking the central point of the red frame, the effective area of the video can be dragged.