Table of Contents
Advertisement
Quick Links
Advertisement
Table of Contents

Related Manuals for TP-Link M7310

Summary of Contents for TP-Link M7310
- Page 1 User Guide 4G LTE Mobile Wi-Fi M7310 REV2.0.0 1910012091...
-
Page 2: Table Of Contents
Contents About This Guide ......................1 Chapter 1. Get to Know About Your Mobile Wi-Fi..... . 1 1. 1. Product Overview............3 1. - Page 3 5. 3. Lock SIM Card ............. . 31 Chapter 6.
-
Page 4: About This Guide
The Quick Installation Guide can be found in the same place you found this guide or inside the package of the Mobile Wi-Fi. Specifications can be found on the product page at http://www.tp-link.com. A Technical Support Forum is provided for you to discuss our products at http://forum.tp-link.com. -
Page 5: Chapter 1. Get To Know About Your Mobile Wi-Fi
Chapter Get to Know About Your Mobile Wi-Fi This chapter introduces what the Mobile Wi-Fi can do and its appearance. It includes the following sections: • Product Overview • Physical Description... -
Page 6: Product Overview
Artful Little Gadget and Built-in Battery for Life on the Go The TP-Link Mobile Wi-Fi features a compact, elegant design and rechargeable powerful battery very suitable for travel, business trips and outdoor activities. With added flexibility, the device can be charged via a micro USB cable connected to an adapter, laptop or portable charger for endless hours of 4G sharing. -
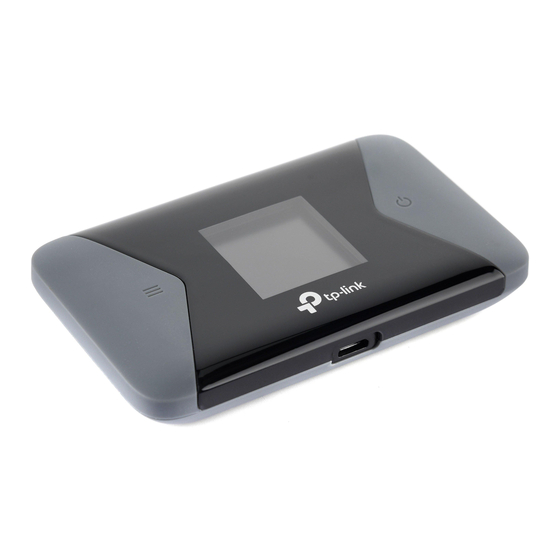
Page 7: Physical Description
Chapter 1 Get to Know About Your Mobile Wi-Fi 1. 2. Physical Description 1. 2. 1. The Exterior Carrier Name Menu Button Power Button Button Explanation Button Description • Press to enter the Menu Screen from the Home Screen. • Press to switch between icons or options. Menu Button •... - Page 8 Chapter 1 Get to Know About Your Mobile Wi-Fi Screen Display Home Screen Displayed Item Indication Indicates the signal strength of the current network. Indicates successful network connection and the current network 4G/3G/2G type: 4G, 3G or 2G. Indicates you are in roaming service. Indicates that there is un-read message(s) and the number of them.
-
Page 9: The Interior
Chapter 1 Get to Know About Your Mobile Wi-Fi 1. 2. 2. The Interior Micro SIM Card Slot Micro SD Card Slot Micro USB Input Port Reset Button Item Description Insert a SIM card into the slot. A nano SIM card must be converted using the provided SIM Card Slot SIM card tray. -
Page 10: Chapter 2. Set Up Internet Connection
Chapter Set Up Internet Connection This chapter introduces how to install the hardware and set up the internet connection of your Mobile Wi-Fi. It includes the following sections: • Install the Hardware • Connect to the Mobile Wi-Fi... -
Page 11: Install The Hardware
• A nano SIM card must be converted using the provided SIM card tray. • The SIM card is not provided by TP-Link. 3. (Optional) Slide and lift up the SD card slot cover and insert a micro SD card. -
Page 12: Power On
Chapter 2 Set Up Internet Connection 5. Replace the cover. 2. 1. 2. Power On Press and hold (power button) until the welcome screen appears. Note: To power off, press and hold (power button) until Power Off appears on the screen. -
Page 13: Connect To The Mobile Wi-Fi
Chapter 2 Set Up Internet Connection 2. 2. Connect to the Mobile Wi-Fi 1. After the Mobile Wi-Fi is powered on, you will see the following screen. 100% 0.0 K/S Carrier Name Note: If other messages appear on the screen, please refer to of FAQ. - Page 14 Chapter 2 Set Up Internet Connection 2 ) Press (power button) to enter the Device Info page. Device Info SSID: TP-Link_XXXX Password: XXXXXXXX Device Info Login Address: http://tplinkmifi.net 3 ) On your device, select the SSID and enter the Password which you find on the screen.
- Page 15 Chapter 2 Set Up Internet Connection Carrier Name 3 ) Press (menu button) and (power button) to enable the WPS function, and then the Mobile Wi-Fi starts to scan WPS-supported devices. Connecting Carrier Name 4 ) On your WPS-supported device, go to Settings, turn on Wi-Fi, and click Connect via WPS within 2 minutes.
- Page 16 Chapter 2 Set Up Internet Connection 5 ) The status of WPS will change from Connecting Succeeded indicating your WPS-supported device is connected to the Mobile Wi-Fi. Succeeded Carrier Name • Via the PIN 1 ) On your WPS-supported device, go to Settings, turn on Wi-Fi, and go to the WPS page to get the PIN.
- Page 17 Chapter 2 Set Up Internet Connection 2 ) On another device already connected to the Mobile Wi-Fi, visit http://tplinkmifi.net, and log in with the default password: admin.
- Page 18 Chapter 2 Set Up Internet Connection 3 ) Go to Device > Advanced > WPS, check the box and enter the PIN of your WPS-supported device in the field. 4 ) Click Start to start the WPS process, and the Current Status will change from Idle Succeed...
-
Page 19: Chapter 3. Login
Chapter Login This chapter introduces 3 methods to log in to the web management pages. Demonstrations in this guide use the phone web management interfaces, while some use the PC ones as those functions are only available on the PC web management page. -
Page 20: Via Phone Login Entry
Chapter 3 Login 3. 1. Via Phone Login Entry 1. On your smart phone, visit http://tplinkmifi.net, and log in with the default password: admin. 2. Create a new login password for security purposes and click Done. 3. Use the password you just created for future logins. 3. -
Page 21: Via Tpmifi App
Chapter 3 Login 1. On your computer or tablet, visit http://tplinkmifi.net, and log in with the password: admin. 2. Go to Wizard, create a new login password for security purposes and click Confirm. 3. Use the password you just created for future logins. 3. - Page 22 Chapter 3 Login 2. Connect your device to the Mobile Wi-Fi. 3. Launch the tpMiFi app, create a new password for security purposes and click 4. Use the password you just created for future logins.
-
Page 23: Chapter 4. Manage Your Data Usage
Chapter Manage Your Data Usage This chapter explains how to manage the data usage of your Mobile Wi-Fi. It includes the following sections: • Track Data Usage • Limit Data Usage • Setup Free Data Period • Enable Mobile Data •... -
Page 24: Track Data Usage
Chapter 4 Manage Your Data Usage 4. 1. Track Data Usage This feature allows you to monitor the amount of data you have used on your Mobile Wi-Fi and revise the displayed data usage as needed. 4. 1. 1. Check Data Usage on Screen You can view data usage on the screen of your Mobile Wi-Fi. -
Page 25: Check Data Usage Via Sms
Chapter 4 Manage Your Data Usage Note: 1. Actual data usage may vary from the estimated data usage displayed on the usage meter. 2. The page above displays the monthly data usage if you have enabled Monthly Data Statistics. 4. 1. 3. Check Data Usage via SMS Your mobile carrier can provide more accurate data usage information. -
Page 26: Revise Data Usage
Chapter 4 Manage Your Data Usage 4. 1. 4. Revise Data Usage If the data usage displayed is not accurate, you can modify it as needed. 1. Visit http://tplinkmifi.net, and log in with the password you set for the Mobile Wi-Fi. -
Page 27: Limit Data Usage
Chapter 4 Manage Your Data Usage 4. 2. Limit Data Usage This feature allows you to establish data limits for different data packages so that you can better control your data usage. 4. 2. 1. Limit Data Package I want to: Limit my data usage so that I will not exceed my data package (2GB). -
Page 28: Limit Monthly Data Usage
Chapter 4 Manage Your Data Usage 4. 2. 2. Limit Monthly Data Usage I want to: I want to: Limit my data usage so that I will not exceed my monthly data package (800MB). I wish to: 1. Receive an alert when the data usage reaches 720MB (90% of the allowance);... -
Page 29: Setup Free Data Period
Chapter 4 Manage Your Data Usage 7. Tap Done. Done! Now your data usage is limited according to your settings. 4. 3. Setup Free Data Period In the free data period, you will not be charged for data by the mobile carrier. If your carrier has provided this data service to you, you can specify the free data period during, so the data usage will not be counted for data alert and limitation. -
Page 30: Enable Mobile Data
Chapter 4 Manage Your Data Usage 5. Tap Done. 4. 4. Enable Mobile Data With Mobile Data (also known as cellular data) enabled, devices connected to the Mobile Wi-Fi can access the internet. This feature is enabled by default. 1. Visit http://tplinkmifi.net, and log in with the password you set for the Mobile Wi-Fi. - Page 31 Chapter 4 Manage Your Data Usage Method One: Via the screen 1. Press (menu button) and switch to the Data Roaming menu. Data Roaming Carrier Name 2. Press (power button) to enter the Data Roaming page. 3. Press to select ON. Data Roaming Carrier Name Method One: Via the screen...
-
Page 32: Chapter 5. Secure Your Network
Chapter Secure Your Network This chapter explains how to secure your network in various ways. You can change the SSID, manage the blacklist and lock your SIM card to safeguard your network. It includes the following sections: • Secure Wireless Network •... -
Page 33: Secure Wireless Network
Chapter 5 Secure Your Network 5. 1. Secure Wireless Network The SSID(wireless network name), wireless password of the Mobile Wi-Fi and security options are preset as default. The default SSID and password can be found on the screen of your Mobile Wi-Fi. You can customize the wireless settings as needed. -
Page 34: Block Unwelcome Devices
Chapter 5 Secure Your Network ¾ To hide password on screen: 1. Toggle off Display password on screen, so the wireless password will not be displayed on the screen of your Mobile Wi-Fi. 2. Tap Done. 5. 2. Block Unwelcome Devices This feature allows you to restrict unwelcome devices to accessing the wireless network of your Mobile Wi-Fi. -
Page 35: Lock Sim Card
Chapter 5 Secure Your Network 5. Tap Block. 5. 3. Lock SIM Card This feature allows you to lock your SIM card with the lock. Once the lock is enabled, every time you start your Mobile Wi-Fi with your SIM card inserted, you need to enter the PIN code to access the internet. - Page 36 Chapter 5 Secure Your Network 4. Tap Done. 5. Visit http://tplinkmifi.net and then enter the PIN code to access the internet every time you start your Mobile Wi-Fi. Note: 1. The PIN code of your SIM card is preset by your carrier and usually can be found on the package of the SIM card.
- Page 37 Chapter 5 Secure Your Network 6. Click Apply. 7. Use the new PIN code for future PIN verifications. ¾ To enable Auto-unlock PIN upon Power-on: 1. Visit http://tplinkmifi.net, and log in with the password you set for the Mobile Wi-Fi. 2.
-
Page 38: Chapter 6. Share Files On Sd Card
Chapter Share Files on SD Card This chapter describes how to share and access files on an SD card via Wi-Fi and via a USB cable. It contains the following sections: • Access via Wi-Fi Mode • Access via USB Mode... -
Page 39: Access Via Wi-Fi Mode
Chapter 6 Share Files on SD Card 6. 1. Access via Wi-Fi Mode You can share files on an SD card via Wi-Fi mode so clients connected to the Mobile Wi-Fi can access the SD card. 1. Visit http://tplinkmifi.net, and log in with the password you set for the Mobile Wi-Fi. - Page 40 Chapter 6 Share Files on SD Card Note: If you have selected Signed, please specify Username and Password for access (admin by default). 3. Tap Done. 4. Search tpMiFi at the App Store Store or Google Play Store or simply scan the QR code to download it.
- Page 41 Chapter 6 Share Files on SD Card ¾ To access the SD card via a PC: 1. Select By Wi-Fi for Access Mode.
- Page 42 Chapter 6 Share Files on SD Card 2. Select Signed Anonymous for Login Permission.
- Page 43 Chapter 6 Share Files on SD Card Note: If you have selected Signed, please specify Username and Password for access (admin by default). 3. Tap Done. 4. Connect your computer to the Mobile Wi-Fi. 5. Open and input “\\192.168.0.1“ (by default) or ftp://192.168.0.1. Then click to continue.
-
Page 44: Access Via Usb Mode
Chapter 6 Share Files on SD Card 6. For anonymous access, you can now access the SD card. For signed access, enter the login username and password in the authentication window and click OK. Then you can access the SD card. 6. - Page 45 Chapter 6 Share Files on SD Card 2. Tap Done. 3. Connect your computer to the Mobile Wi-Fi via a USB cable and access the SD card directly.
-
Page 46: Chapter 7. Customize Your Network
Chapter Customize Your Network This chapter guides you on how to configure network settings of your Mobile Wi-Fi. It contains the following sections: • Specify Network Mode • Specify Network Band • Set Network Expansion • Configure Dial-up • Configure DHCP Server... -
Page 47: Specify Network Mode
Chapter 7 Customize Your Network 7. 1. Specify Network Mode This Mobile Wi-Fi supports three modes of network connection: 4G Preferred, 4G Only and 3G Only. If your SIM card supports WCDMA, select 3G Only; if your SIM card supports FDD-LTE or TDD-LTE, select 4G Preferred or 4G Only as needed. -
Page 48: Specify Network Band
Chapter 7 Customize Your Network 4. Tap Done. 7. 2. Specify Network Band This Mobile Wi-Fi supports 2.4GHz and 5GHz wireless bands. In general, the 5GHz band performs better, but covers a smaller area . Note: If you have specified 5GHz for Wireless Band, devices that only support 2.4GHz cannot connect to the Mobile Wi-Fi. - Page 49 Chapter 7 Customize Your Network Wi-Fi Band Carrier Name 2. Press (power button) to enter the Wi-Fi Band page. 3. Press to specify 2.4GHz 5GHz as needed Wi-Fi Band 2.4GHz 5GHz Method Two: Via the webpage 1. Visit http://tplinkmifi.net, and log in with the password you set for the Mobile Wi-Fi.
-
Page 50: Set Network Expansion
Chapter 7 Customize Your Network 4. Tap Done. 7. 3. Set Network Expansion This Mobile Wi-Fi can work as a range extender, connecting to a wireless network and expanding its Wi-Fi coverage. 1. Visit http://tplinkmifi.net, and log in with the password you set for the Mobile Wi-Fi. - Page 51 Chapter 7 Customize Your Network 5. Enter the password if required and tap Connect. Then tap Continue in the pop-up. Note: Enabling network expansion may cause an IP conflict. Please use http://tplinkmifi.net to log in to the web management page of the Mobile Wi-Fi. 6.
-
Page 52: Configure Dial-Up
Chapter 7 Customize Your Network 7. 4. Configure Dial-up 7. 4. 1. Configure Dial-up Settings If you are in a location beyond your mobile carrier’s service area, you may need to configure the dial-up settings to access the internet provided by a local mobile carrier. -
Page 53: Configure Network Search
Chapter 7 Customize Your Network 3. You can click View Profile details to check the current profile. If any parameter is wrong, you can click Create to build a new one. 7. 4. 2. Configure Network Search The Mobile Wi-Fi provides two types of network connection: Auto and Manual. •... - Page 54 Chapter 7 Customize Your Network 2. If you have changed the IP address of your Mobile Wi-Fi, you should use the new IP address or http://tplinkmifi.net to log into the web management page. 4. Enter the lease time in the Lease Time field.
-
Page 55: Chapter 8. Manage Your Mobile Wi-Fi
Chapter Manage Your Mobile Wi-Fi This chapter presents how to manage and maintain your Mobile Wi-Fi. It includes the following sections: • Save the Mobile Wi-Fi’s Power • Change Login Password • Set Up System Time • Restore Configuration Settings •... -
Page 56: Save The Mobile Wi-Fi's Power
Chapter 8 Manage Your Mobile Wi-Fi 8. 1. Save the Mobile Wi-Fi’s Power The Power Saving feature allows you to slow down the power consumption of your Mobile Wi-Fi, by adjusting the Wi-Fi range or enabling the Wi-Fi Auto- disable Time feature. Method One: Via the screen By enabling Power Saving on the screen, the Wi-Fi range will be medium and Wi- Fi Auto-disable time will be 10 minutes. - Page 57 Chapter 8 Manage Your Mobile Wi-Fi Note: The shorter the Wi-Fi Range is, the less power your Mobile Wi-Fi uses. 3. Tap Done. 4. Tap Restart Wi-Fi on the pop-up to make the configurations take effect, and then reconnect to the Wi-Fi after it restarts. ¾...
-
Page 58: Change Login Password
Chapter 8 Manage Your Mobile Wi-Fi 8. 2. Change Login Password This feature allows you to change your login password of the web management page. 1. Visit http://tplinkmifi.net, and log in with the password you set for the Mobile Wi-Fi. 2. -
Page 59: Restore Configuration Settings
Chapter 8 Manage Your Mobile Wi-Fi 4. Tap Done. 8. 4. Restore Configuration Settings The Factory Defaults feature allows you to restore your Mobile Wi-Fi to its factory defaults. After you restore your Mobile Wi-Fi, all previous settings will be cleared and you have to reconfigure them. -
Page 60: Update The Firmware
8. 5. Update the Firmware TP-Link is committed to improving product features, giving you a better network experience. We will inform you through the screen and web management page if there’s any newly released update firmware. Also, you can download it from the Support page of our website www.tp-link.com. -
Page 61: Update Isp Parameters
Update ISP Parameters You can update the ISP information. 1. Download the latest ISP update file from the Support page at www.tp-link.com. 2. On your computer or tablet, visit http://tplinkmifi.net, and log in with the password you set for the Mobile Wi-Fi. -
Page 62: System Log
Chapter 8 Manage Your Mobile Wi-Fi 4. Click Browse to locate the downloaded file. 5. Click Update. 8. 7. System Log When the Mobile Wi-Fi does not work normally, you can save the system log and send it to our technical support for troubleshooting. 1. - Page 63 Chapter 8 Manage Your Mobile Wi-Fi ¾ To debug logs: The Debug Log feature can save logs for specific troubleshooting. This function should be enabled under the requirement of our technical support. 1. Insert an SD card of at least 100MB storage in your Mobile Wi-Fi. 2.
-
Page 64: Faq
Q1. What should I do if I cannot log into the web management page? • Verify that your device is connected to the Mobile Wi-Fi’s SSID. • Verify that you have entered http://tplinkmifi.net http://192.168.0.1 correctly. • Verify that your device is set to obtain an IP address automatically. Q2. - Page 65 • Log in to the web management page, and go to Dial-up to enable Data Roaming. Q3. What should I do if my internet speed is slow? Log in to the web management page and try the methods below: • If you are experiencing intermittent slow Internet connection, go to Wi-Fi Band to switch between 2.4GHz and 5GHz for better connectivity.
- Page 66 Specifications are subject to change without notice. is a registered trademark of TP-Link Technologies Co., Ltd. Other brands and product names are trademarks or registered trademarks of their respective holders. No part of the specifications may be reproduced in any form or by any means or used to make any derivative such as translation, transformation, or adaptation without permission from TP-Link Technologies Co., Ltd.
- Page 67 CE Mark Warning This is a class B product. In a domestic environment, this product may cause radio interference, in which case the user may be required to take adequate measures. RF Exposure Information This device meets the EU requirements (1999/5/EC Article 3.1a) on the limitation of exposure of the general public to electromagnetic fields by way of health protection.
- Page 68 Explanations of the symbols on the product label Symbol Explanation DC voltage RECYCLING This product bears the selective sorting symbol for Waste electrical and electronic equipment (WEEE). This means that this product must be handled pursuant to European directive 2012/19/EU in order to be recycled or dismantled to minimize its impact on the environment.
Need help?
Do you have a question about the M7310 and is the answer not in the manual?
Questions and answers