Advertisement
Technical Specifications
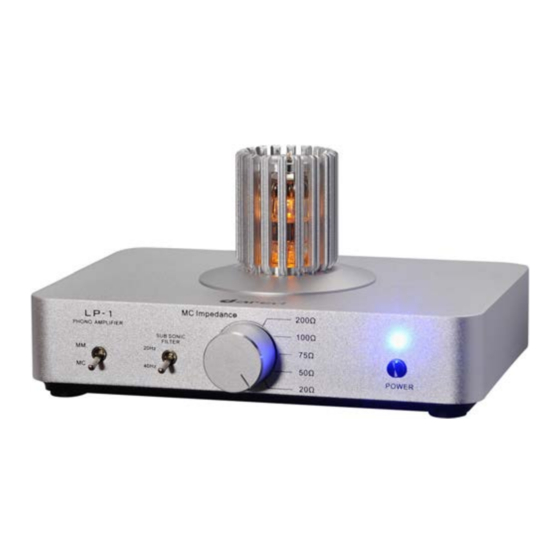
LP-1 MM/MC Phono Preamplifier
Max. Output Voltage: 5V
Distortion: 0.01%
S/N Ratio: 90dB (MM), 70dB (MC)
Input Impedance (MM): 47kohms
Input Impedance (MC): 20ohms, 50ohms, 75ohms,
100ohms, 200ohms
MM Amplification Gain: 35dB
MC Amplification Gain: 62dB
Output Impedance: 2kohms
Subsonic Filter: 20Hz or 40Hz
Input Supply Voltage: AC100-120 / AC220-240
Max. Power Consumption: 20W
Tubes Required: 6N3 (5670)
Dimensions: 189x150x100mm (WxDxH)
7.44''x5.91x3.94''
Weight: 2kg / 4.41lbs
Thank-you for selecting DARED as your choice
for your audio entertainment system and
listening pleasure.
Experience The Art of Tube
Tube
The Purity of Sound
LP-1 User Manual
MM/MC Phono Preamplifier
Advertisement
Table of Contents

Summary of Contents for Dared LP-1
- Page 1 Max. Power Consumption: 20W Tubes Required: 6N3 (5670) Dimensions: 189x150x100mm (WxDxH) 7.44''x5.91x3.94'' Weight: 2kg / 4.41lbs Thank-you for selecting DARED as your choice for your audio entertainment system and listening pleasure. Experience The Art of Tube MM/MC Phono Preamplifier Tube...
- Page 2 At this time also please locate the Product Registration Card and write down the serial number of your new LP-1 in the space provided on the card as well as below for future reference. Serial No.: ________________ Date of Purchase:__________________...
- Page 3 10. Only use attachments and accessories specified by DARED or your on, tube does not light Authorized DARED Dealer. 11. Use a surge protector on the main AC-Line to this component as well as all C.
- Page 4 FAMILIARIZING YOURSELF WITH YOUR LP-1 Connetion Diagram Front Panel 1. Power On/Off Button 2. MC impedance selector 3. Subsonic filter selector 4. MM or MC channel input Rear Panel 1. External Power Input Connections 2. RCA Output 3. MM Input (a) Before making connections, ensure that the power switch is 4.
Need help?
Do you have a question about the LP-1 and is the answer not in the manual?
Questions and answers