Table of Contents
Advertisement
Quick Links
Save Time! Watch Install Videos for Tips, Shortcuts, and Updates at
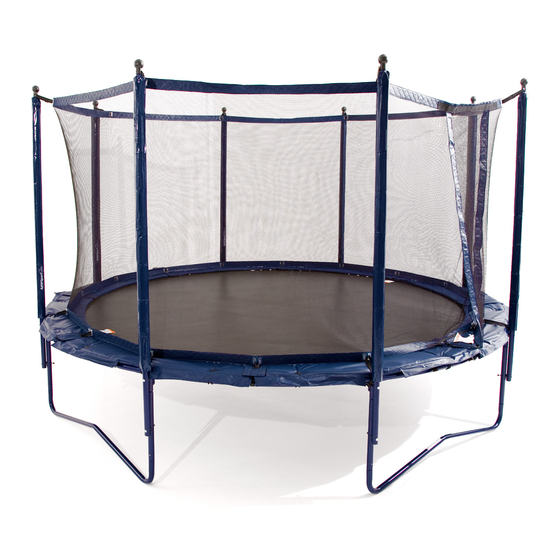
14ft JumpSport Elite Trampoline System
Assembly, Installation, Care, Maintenance, and Use Instructions
Read these materials prior to assembling and using this
DO
somersaults.
head or neck can cause serious
injury, paralysis or death, even
when landing in the middle of the
bed.
DO NOT attempt to jump over
the enclosure system.
Retain address information for future use.
JumpSport, Inc.
1680 Dell Ave
Campbell, CA 95008 USA
Instruction Manual P/N: INS-P-11600-03D
JumpSport Elite 14ft Trampoline System P/N: UNE-U-11597-03
www.JumpSport.com/Installation-Videos
User's Manual
WARNING
trampoline and Trampoline Enclosure
NOT
attempt
or
allow
Landing
on
Use trampoline only with mature, knowledgeable supervision.
the
The maximum user weight is 240 pounds. This
trampoline is not recommended for use by children
1
DO NOT allow more than one
person on the trampoline. DO
NOT allow more than one
person inside the trampoline
enclosure. Use by more than
one person at the same time
is not recommended.
DO NOT intentionally rebound
off the enclosure system.
Patent info at: Patents.JumpSport.com
www.jumpsport.com
408-213-2551
Advertisement
Table of Contents

Summary of Contents for JumpSport Elite 14ft Trampoline System
- Page 1 The maximum user weight is 240 pounds. This trampoline is not recommended for use by children JumpSport, Inc. 1680 Dell Ave Campbell, CA 95008 USA Patent info at: Patents.JumpSport.com 408-213-2551 Instruction Manual P/N: INS-P-11600-03D www.jumpsport.com JumpSport Elite 14ft Trampoline System P/N: UNE-U-11597-03...
- Page 2 Additional Patents Pending. Patent info at: Patents.JumpSport.com How to Contact Customer Support Should you require customer service or technical support for your JumpSport Elite 14ft Trampoline System, please contact Jump- Sport’s Customer Service department at: 408-213-2551 6:00am—5:00pm Monday through Friday, Pacific Time...
-
Page 3: Table Of Contents
Contents Chapter 1 Introduction JumpSport ProFlex Basketball Set Game and Party Pak Chapter 2 Assembly and Installation Instructions Preparation Trampoline Placement Tools (Trampoline) Parts List (Trampoline) Tools (Safety Enclosure) Parts List (Safety Enclosure) Assembly Final Steps Disassembly Chapter 3 Care and Maintenance Instructions Inspection (Trampoline &... -
Page 4: Assembly And Installation Instructions
Assembly and Installation Preparation Before you begin assembling your JumpSport Elite 14ft Trampoline System, make sure your trampoline is in a proper location. Trampoline Placement CAUTION: When deciding on where to place your trampoline, consider the following: WARNING Overhead Clearance Adequate overhead clearance is essential. - Page 5 Trampoline Placement Windy Conditions It is possible for the trampoline to be blown about by a high wind. If you anticipate high winds, the frame should be secured to the ground with the use of a JumpSport Trampoline Anchor Kit. If you anticipate severe winds, the trampoline should be moved to a sheltered location or completely disassembled.
-
Page 6: Tools (Trampoline)
Assembly and Installation Instructions Parts List (Trampoline) Your 14ft Elite Trampoline System is shipped with the parts shown below. The trampoline parts ship in 2 separate box- es which may arrive on different days. If any parts are missing, immediately call JumpSport Customer Service at 408-213 -2551. -
Page 7: Assembly
Assembly and Installation Instructions Assembly Note: We recommend at least 2 people participate in assembling the trampoline. Use page 6 to help with part names and numbers. Rail with 2 Rail with no leg sockets leg sockets CAUTION Ref. #3 Ref. - Page 8 Assembly and Installation Instructions IMPORTANT: As you connect leg assemblies to rails, pay careful attention to snap buttons in horizontal legs. All snap buttons are designed to point toward center of trampoline when properly installed. Indented holes in vertical legs need to be facing away from trampoline, and aligned with holes in leg sockets of trampoline.
- Page 9 Assembly and Installation Instructions Rail with 2 leg sockets Ref. #3 Rail with no leg sockets Ref. #4 Connect another leg assembly to same rail with 2 sockets. Connect rail with no sockets, then rail with 2 sockets. Completed frame. Connect next leg assembly to rail with 2 sockets.
- Page 10 Assembly and Installation Instructions Warning label on Ref. #5 mat facing up Spring Ref. #6 Warning label on mat facing up (Top view) TIP: For easy spring installation, connect spring to V-ring of mat Connect jumping mat to trampoline frame using 4 springs. and pull toward you, to connect to frame.
- Page 11 Assembly and Installation Instructions Person 2 (Top view) Person 1 Now connect a spring to every middle V-ring and spring notch, working clockwise around the trampoline. Have someone work across from you, also going clockwise. Note: It is important to have someone working across from you. Otherwise the springs could over-extend and become difficult to connect, or possibly even damaged.
- Page 12 Assembly and Installation Instructions End of pad sections Frame pad section Ref. #7a Vertical legs Ref. #2 WARNING: Trampoline use is not recommended without the frame pad in- stalled (see Picture on page 20). The frame pad is designed to reduce the possi- bility of injury by protecting the user from coming into contact with the frame and springs of the trampoline.
- Page 13 Assembly and Installation Instructions Button bungee t-anchor on bottom of frame pad Button bungee on top of frame pad Between the poles on the top of the frame pad, you will find a button bungee. Lift the pad at one of these button bungee locations.
- Page 14 Assembly and Installation Instructions Steel Upper pole ( Steel Lower pole ( Ref. #11 Ref. #10 Top of upper pole Top of lower pole (narrower end with snap button) Short foam tubing ( Long foam tubing ( Ref. #14 Ref. #13) Plastic Pole Cap (Ref.
- Page 15 Assembly and Installation Instructions Red markers adjacent to door (Top of net) Doorway (overlapping panels) (View from outside of net) Bottom corner of outside section of net (Bottom of net) Bottom corner of inside section of net, secured to outside edge. Familiarize yourself with the net.
- Page 16 Assembly and Installation Instructions On top of the net, find a red marker adjacent to the entryway. Install a short strap through the net at the top of the enclosure pole at this location . Feed the free end through buckle so you have a generous loop, repeat, installing short straps at the remaining 7 red marks.
- Page 17 Assembly and Installation Instructions WARNING: If the buckle is upside-down and the strap is routed through it, the strap will not hold. Attempt to pull the strap out of the buckle to be sure the straps are secure. If the strap pulls free, flip the buckle over and reinstall the strap. On the bottom of the net, place a long strap with buckle through the pad’s grommet holes closest to Pole 2.
- Page 18 Assembly and Installation Instructions Wrap the end of the strap with a buckle over the top of the trampoline rail and secure it loosely through the buckle underneath the rail. The frame pad may need to be lifted up for this step. >>...
- Page 19 Assembly and Installation Instructions Completed Pull the bottom corner of the net towards pole 2. Life the pad and secure the pre-installed button bungee T-Anchor found on the bottom corner of the net. Secure the bungee around the frame between poles 1 and 2. The bungee secures around the frame the exact same way as the T-anchors show on page 13.
-
Page 20: Final Steps
Assembly and Installation Instructions Final Steps Assembly is now complete! Make sure all parts are securely assembled. Before using your 14ft Elite Trampoline System, familiarize yourself and all users with the Care and Maintenance Instructions, Warning Information, and Use Instructions included in this manual. - Page 21 Care and Maintenance Your JumpSport Trampoline is made using quality materials and is finely-crafted to provide you and your family with many years of enjoyment and exercise. Proper maintenance and care will help to prolong the life of the trampoline and reduce the possibility of injury.
-
Page 22: Disassembly
Care and Maintenance Instructions Trampoline Mat Periodically inspect the trampoline for worn out or rotten stitching around the trampoline mat (bed). Stitching may fail due to excessive use or exposure to extreme weather. In most cases, evidence of deterioration will make itself known in the form of: ... -
Page 23: Care And Maintenance Instructions
Care and Maintenance Instructions (Trampoline) Care and Maintenance Safety Checklist (Trampoline) Note: Inspect the trampoline before each use and replace any worn, defective, or missing parts. Frame Pad Our frame pad reduces the risk of accidental injury due to falling onto the frame railing and gives minimal resistance to striking or falling on and through the springs. - Page 24 Care and Maintenance Instructions (Trampoline) Frame The life of your JumpSport trampoline frame should last for many years, depending upon the weather in the area where you live. Safety Check Check for... Necessary Action Safe Unsafe Rust Clean and paint _______ _______ Structural failure...
-
Page 25: Care And Maintenance Safety Checklist (Safety Enclosure)
Care and Maintenance Instructions (Safety Enclosure) Care and Maintenance Safety Checklist (Safety Enclosure) Note: Inspect the trampoline enclosure before each use and replace any worn, defective, or missing parts. Pole Foam The pole foam and vinyl pole sleeve life expectancy is two to five years. To increase the life of your pole foam and sleeves, do not allow people to grab them in order to pull themselves onto the trampoline. -
Page 26: Warning Information
Warning Information WARNING DO NOT allow more than one DO NOT attempt or allow person on the trampoline. DO somersaults. Landing NOT allow more than one the head or neck can cause person inside the trampoline serious injury, paralysis or enclosure. -
Page 27: Landing On Springs Or Frame
Warning Information Landing on Springs or Frame The risk of falling on the springs or frame, landing between the springs, or hitting the frame can be reduced by: Proper mounting and dismounting of the trampoline Jumping at the center of the mat without traveling toward the side ... -
Page 28: Use Instructions
Use Instructions Safety Rules (Trampoline) It is the responsibility of the owner to become familiar with the safety rules and to convey these rules to all users. WARNING DO NOT attempt or allow somersaults. Landing on the head or neck can cause serious injury, paralysis, or death, even when landing in the middle of the bed. -
Page 29: Safety Rules (Safety Enclosure)
Use Instructions (Safety Enclosure) Safety Rules (Safety Enclosure) It is the responsibility of the owner to become familiar with the safety rules and to convey these rules to all users. WARNING DO NOT attempt or allow somersaults on the trampoline. Landing on the head or neck can cause serious injury, paralysis, or death, even when landing in the middle of the bed. -
Page 30: Basic Skills
Use Instructions Basic Skills Basic trampoline skills include: Bouncing Stop Bounce Arm Action Bounce Variations Bouncing The most important basic skill in jumping on a trampoline, is controlling the height and landing of your bounce. The goal is to land in the center of the mat, or as close to the center of the mat as possible. -
Page 31: Bounce Variations
Use Instructions Bounce Variations Figure 3 shows three variations you can perform in the air. These should be performed at the top of your bounce before returning to the normal landing position on your feet. Figure 3 Bounce Variations Pike Straddle Tuck Practice these simple variations and concentrate on perfect form. -
Page 32: Hands And Knees Drop
Use Instructions Hands and Knees Drop To do a Hands and Knees Drop properly, there should be just as much weight on the hands as on the knees. The back should be about parallel to the mat. The knees and hands should land simultaneously, with the middle of the body landing in the center of the trampoline. -
Page 33: Series Of Drops
Use Instructions Front Drop Note: Your body must contact the trampoline mat all at once. If you land on your chest and arms first, they will rebound before the knees hit, which will result in a straining action on the back. If this type of landing is made with a traveling, diving approach, there is a good chance that the elbows may become skinned. - Page 34 Use Instructions Turntable Figure 8 Turntable A Turntable is a combination move consisting of a Front Drop, a Half Twist, then another Front Drop. First become familiar with the first part of a Turntable. a. Begin in a hands and knees position, with hands forming a triangle, like a Front Drop.
- Page 35 This warranty covers any defects in materials or workmanship on all of the components What is covered by this warranty? of the JumpSport Elite 14ft Elite Trampoline System, and is extended exclusively to the original retail purchaser. How long does this coverage last?
Need help?
Do you have a question about the 14ft Trampoline System and is the answer not in the manual?
Questions and answers