
Subscribe to Our Youtube Channel
Related Manuals for Bowflex BXE226

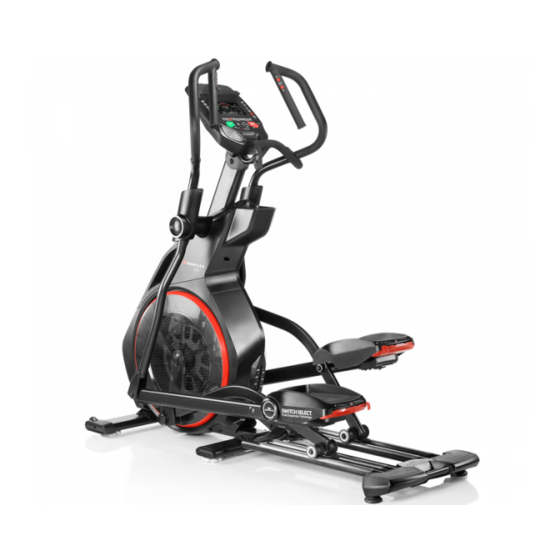
Summary of Contents for Bowflex BXE226
- Page 1 BXE226 A SSE MB LY / O W NE R’ S M AN UAL This product is compliant with the applicable CE requirements.
-
Page 2: Table Of Contents
Nautilus, Inc. | ® indicates trademarks registered in the United States. These marks may be registered in other nations or otherwise protected by common law. Bowflex, the B logo, Bowflex Connect, Bowflex Trainer, Switch Select, Nautilus, Schwinn, and Universal are trademarks owned by or licensed to Nautilus, Inc. -
Page 3: Important Safety Instructions
Important Safety Instructions When using an electrical appliance, basic precautions should always be followed, including the following: This icon means a potentially hazardous situation which, if not avoided, could result in death or serious injury. Obey the following warnings: Read and understand all Warnings on this machine. Carefully read and understand the Assembly/Owner’s Manual. - Page 4 Before using this equipment, obey the following warnings: Read and understand the complete Manual. Keep the Manual for future reference. Read and understand all Warnings on this machine. If at any time the Warning stickers become loose, unreadable or dislodged, contact your local distributor for replacement stickers.
-
Page 5: Safety Warning Labels And Serial Number
Safety Warning Labels and Serial Number WARNING! • 21.78mm Keep hands and feet away. Serial Number Product Specification • 54.8mm Assembly / Owner’s Manual... -
Page 6: Grounding Instructions
Earthing Instructions This product must be electrically earthed. If a malfunction occurs, correct earthing decreases the risk of electric shock. The power cord is equipped with an equipment-earthing conductor, and must be connected to an outlet that is properly installed and earthed. The electrical wiring must comply with all applicable local and provincial standards and requirements. -
Page 7: Specifications / Before Assembly
Machine Mat The Bowflex™ Machine Mat is an optional accessory that helps keep your workout area clear and adds a layer of protection to your floor. The rubber machine mat provides a non-slip, rubber surface which limits static discharge and reduces the possibility of display errors. If possible, put your Bowflex™... -
Page 8: Parts
Parts A right (“ R ”) and left (“ L ”) decal has been applied to some parts to assist with assembly. Item Description Item Description Console Assembly Frame Assembly Upper Handlebar, Right Document Kit Pivot Cover, Right Exterior Power Cord Pivot Cover, Right Interior Pivot Cover, Left Exterior Lower Handlebar, Right... -
Page 9: Hardware / Tools
Hardware / Tools Hardware Item Description Item Description Button Head Screw, M8x1.25x16 Pan Phillips Screw M3.9x16 Lock Washer, M8 Flat Washer, M8x24 Large Flat Washer, M8x18 Wave Washer, M8 Lock Nut, M8 Curved Washer, M8 Button Head Screw, M8x1.25x25 Socket Head Cap Screw, M8x16 Pan Phillips Screw M3.9x38 Pivot Pin Note: Select pieces of Hardware have been provided as spares on the Hardware Card. -
Page 10: Assembly
Assembly Some components of the machine can be heavy or awkward. Use a second person when doing the assembly steps involving these parts. Do not do steps that involve heavy lifting or awkward movements on your own. 1. Safely Remove the Stabilizing Block(*) and Attach the Front Stabilizer to Frame Assembly In order to avoid possible serious injury, when placing the Frame Assembly onto the Front Stabilizer be careful to avoid fingers or hands being caught or pinched. - Page 11 2. Attach Rail Assembly to Frame Assembly In order to avoid possible serious injury, when attaching the Rail Assembly to the Frame Assembly be careful to avoid fingers or hands being caught or pinched. Do not place fingers or hands below any pivoting parts of the Rail Assembly. Note: Do not fully tighten until all hardware has been installed.
- Page 12 3. Connect Cables and Attach Console Mast to Frame Assembly Note: Do not crimp the Lower I/O Cable. Be sure to FULLY tighten hardware with hex wrench when all hardware has been finger tightened. Assembly / Owner’s Manual...
- Page 13 4. Route Handlebar Cables through Upper Shrouds and Attach the Upper Shrouds and Tray Note: Do not crimp the Cables. This step may require two people. Do not fully tighten until all hardware has been installed. To assist, the short screws go into the metal Frame and the longer screws go through to the other Upper Shroud Assembly / Owner’s Manual...
- Page 14 5. Attach Legs and then the Caps to Frame Assembly Assembly / Owner’s Manual...
- Page 15 6. Attach the Lower and Upper Handlebar Arms In order to avoid possible serious injury, when inserting the tube ends onto the Lower Handlebar Arms be careful to avoid fingers or hands being caught or pinched. Note: Do not crimp the Cables. A right (“ R ”) and left (“ L ”) decal has been applied to some parts to assist with assembly. “...
- Page 16 7. Insert Pivot Rod, Attach Interior Pivot Covers and Handlebar Arms, and Connect Cables Be aware that the Handlebars are top heavy, and will want to pivot when attached onto the Pivot Rod. Be sure to stay out of the path of the Handlebars and to gently allow it to pivot to a rest.
- Page 17 8. Attach Pedals to Frame Assembly In order to avoid possible serious injury, when inserting the end of the Pedal into the Lower Handlebar Arm be careful to avoid fingers or hands being caught or pinched. Be sure to stay out of the path of the Handlebars. Note: Be sure the key on the Pivot Pin is fully set into the notch on the Lower Handlebar Arm.
- Page 18 9. Snap the Exterior Pivot Covers to Frame Assembly Assembly / Owner’s Manual...
- Page 19 10. Place the Console Mast Collar, and Remove the Hardware from the Console Note: Do not crimp the Cables. Assembly / Owner’s Manual...
- Page 20 11. Route Cables through Static Handlebar and Attach to Console Note: Do not crimp the Cables. Connect the Heart Rate Cables from the Console and the Static Handlebar. Assembly / Owner’s Manual...
- Page 21 12. Connect the Cables and Attach the Console Mast Collar and Console / Static Handlebar Assembly Assembly / Owner’s Manual...
- Page 22 13. Set the Console Angle and Attach the Console Shroud to Frame Assembly Assembly / Owner’s Manual...
- Page 23 14. Connect Power Cord to Frame Assembly Connect this machine to a properly earthed outlet only (see Earthing Instructions). Make sure that the product is connected to an outlet having the same configuration as the plug. Use the appropriate adapter supplied with this product.
-
Page 24: Moving Your Machine
Adjustments Moving Your Machine The fitness machine weighs approximately 119 kg (263 lbs) when fully assembled and requires caution when being moved. Use the Transport Handle found under the rear of the machine to move it. To get access to the Transport Handle, turn the Levelers until you have sufficient clearance between the machine and floor. -
Page 25: Features
Features Console Resistance Remote Controls Incline Remote Controls Upper Handlebar MP3 Input/ Charger Contact Heart Rate Sensors Port Media Cable Speaker Media Static Handlebar Tray Fully Shrouded Heart Rate Strap Flywheel; Power Switch / Inlet Incline Arm Front Stabilizer Switch Se- lect™... - Page 26 Console Bluetooth App Connected ® display Quick Incline buttons Quick Resistance buttons Heart 8 Min. 16 Min. Calorie Calorie Manual Strength Custom Rate Interval Interval Burn Burn Goal Program buttons PAUSE START STOP User Enter Active User display Audio button and setting lights Bluetooth App Connected display...
- Page 27 Enter button Confirms information or a selection. Left () / Right () buttons Push to shift the currently active segment. A button will light up to indicate it is an available option. Quick Resistance buttons Quickly shifts the resistance level for the machine to the desired setting. Program buttons Push to select one of the workout Programs.
- Page 28 Burn Rate display Heart Rate Current Fitness Zone Score Workout Segment Display Heart Rate display The Heart Rate display shows your heart beats per minute. The heart icon will flash when acquiring the rate. With a stable reading, the icon will be shown as solid.
-
Page 29: Connectivity With The Fitness App
1. Select the Options tab in the upper left corner of the Software App, and click on “Settings”. 2. Select the “Bowflex Connect” option. Sign in to your account or create a new account. To create a new account, click on the “Create New Ac- count”... - Page 30 USB Charging If a USB Device is attached to the USB Port, the Port will attempt to charge the Device. The power supplied from the USB Port may not be enough to operate the Device and charge it at the same time. Remote Heart Rate Monitor Monitoring your Heart Rate is one of the best procedures to control the intensity of your exercise.
- Page 31 Contact Heart Rate Sensors Contact Heart Rate (CHR) sensors send your heart rate signals to the Console. The CHR sensors are the stainless steel parts of the Handlebars. To use, put your hands comfortably around the sensors. Be sure that your hands touch both the top and the bottom of the sensors. Hold firm, but not too tight or loose.
- Page 32 FAT-BURNING TARGET HEART RATE Fat-Burning Target Heart Rate 20-24 25-29 30-34 35-39 40-44 45-49 50-54 55-59 60-64 65-69 Maximum Heart Rate Target Heart Rate Zone (keep within this range for optimum fat-burning) The graph is a brief guideline, describing the generally suggested target heart rates based on age. As noted above, your optimal target rate may be higher or lower.
-
Page 33: Fitness Basics
Fitness Basics Frequency To maintain good health, lose weight and improve your cardiovascular endurance, try and use the Bowflex fitness machine a minimum of 3 times ® per week, 30 minutes each day. If you are new to exercise (or returning to a regular exercise program), and you are unable to comfortably complete 30 minutes of continuous exer- cise at one time, just do 5 –... - Page 34 Dynamic Knee Hug Stand with the feet together. Bring one knee forward and up toward the chest. Place the hands around the shin and pull the knee into the chest. Release the stretch by putting the foot on the floor. Each repetition of the sequence should take 1 to 3 seconds.
- Page 35 Contact your doctor before you use the machine again. Use the values calculated or measured by the machine’s computer for reference purposes only. Steady State and Interval Training are 2 types of workouts you can do on your Bowflex fitness machine: ®...
- Page 36 Workout Schedule Here is a beginner, intermediate and advanced sample workout schedule. Use the workout schedule that reflects your current fitness level. With each of these sample workout schedules, do not move on to the next week until the current week feels easier and comfortable. Beginner Week 1 Week 2...
- Page 37 Workout Log Use this log to track your workouts and progress. Tracking your workouts helps you stay motivated and achieve your goals. Date Program Time Distance Speed Calories Heart Rate Incline Resistance (Average) (Average) (Average) (Average) Assembly / Owner’s Manual...
- Page 38 Cool-Down * When you are done using your Bowflex fitness machine, consider doing these relaxing stretches, which will help your body recover from the work- ® out and make you more flexible: Lying Leg Raise Lie on the floor face up with the legs slightly bent. Lift one leg up toward the ceiling, keeping the knee straight.
- Page 39 Dynamic Heel Drop Place the ball of one foot on the edge of a step or staircase. Place the other foot slightly in front. Lower the heel of the back foot as far as comfortably possible, keeping the knee straight. Release the stretch by lifting the heel as high as comfortably possible.
-
Page 40: Operations
Operations What to Wear Wear rubber-soled athletic shoes. You will need the appropriate clothes for exercise that allow you to move freely. How Often Should You Exercise Consult a physician before you start an exercise program. Stop exercising if you feel pain or tightness in your chest, become short of breath, or feel faint. -
Page 41: Power Up / Idle Mode
To dismount the fitness machine: 1. Move the Pedal you want to dismount from to the highest position, and bring the machine to a complete stop. This machine is not equipped with a free-wheel. Pedal speed should be reduced in a controlled manner. 2. -
Page 42: Workout Programs
Select a User Profile Every workout is saved to the User Profile and can be reviewed with the online health tracker at www.bowflexconnect.com. Be sure to select the proper User Profile before starting a workout. The last User that completed a workout will be the default User. User Profiles are assigned the default values until they are customized by editing. - Page 43 Calorie Burn (30 minutes, 1 minute each column) Calorie Goal (300 calories, 1 minute each column) Before a workout, push the Increase () or Decrease () buttons to adjust the Goal by 50 calorie increments. Note: 50 calories is the minimum, 9950 calories is the maximum. Target Heart Rate (HR) (30 minutes plus the initial time to raise heart rate into the Endurance heart rate zone) Interval Workout Programs...
- Page 44 Custom (Open-ended workout, 1 minute each column or saved workout) The Custom workout program allows a user to “design as you go”, adjusting the currently active incline segment of each column. When the workout ends, the workout will be as- signed to the Custom program.
-
Page 45: Pausing Or Stopping
Changing Resistance Levels Push the Resistance Level Increase() or Decrease() buttons to change the resistance level at any time in a workout program. To rapidly change the resistance level, push the desired Resistance Level Quick Button. The Console will adjust to the selected resistance level of the quick button. Pausing or Stopping a Workout 1. -
Page 46: Fitness Score Display
Target Heart Rate (HR) Program The Target Heart Rate Program adjusts the incline to get and keep the User in the Endurance heart rate zone. When the heart rate reaches the zone, the 30 minute workout begins. Note: The console must be able to read the heart rate information from the Heart Rate Monitor for the program to work correctly. Push the Target HR button. -
Page 47: Celebrations
User Fitness Level Based on Fitness Score excellent good high average average low average poor excellent good high average average low average poor 18-25 26-35 36-45 46-55 56-65 Celebrations When a Celebration is earned the Console will make an audible sound, display the name of the achievement, and animate the lights in a certain sequence. -
Page 48: Machine Settings Mode
Machine Settings Mode The Machine Settings Mode lets you view the total run hours for the machine and the current versions of the main systems. Hold down the PAUSE/STOP button and Down button together for 3 seconds while in the Power-Up Mode to access the Machine Settings Mode. -
Page 49: Maintenance
Maintenance Read all maintenance instructions fully before you start any repair work. In some conditions, an assistant is required to do the necessary tasks. Equipment must be regularly examined for damage and repairs. The owner is responsible to make sure that regular maintenance is done. -
Page 50: Maintenance Parts
Maintenance Parts Console Upper Handlebar, Right Inner Handlebar Shroud, Console Shroud Right Static Handlebars Outer Handlebar Shroud, Console Mast Collar Upper Handlebar, Left Tray Right Pivot Rod Lower Handlebar, Right Upper Crank Cover Upper Shroud, Shroud, Left Console Mast Cap, Large Right Shroud, Incline Cap, Small... -
Page 51: Troubleshooting
Troubleshooting Condition/Problem Things to Check Solution No display/partial display/unit Check electrical (wall) outlet Make sure unit is plugged into a functioning wall outlet. will not turn on Check connection at front of unit Connection should be secure and undamaged. Replace adapter or connec- tion at unit if either are damaged. - Page 52 Condition/Problem Things to Check Solution Resistance does not change Check Console Check for visual sign that Console is damaged. Replace Console if damaged. (machine turns on and oper- ates) Check data cable integrity All wires in cable should be intact. If any are visibly crimped or cut, replace cable.
- Page 53 Bowflex Connect™ website. Review account and password for the Bowflex Connect™ website. Contact your local distributor for further assistance. Workout results not posting Sync accounts From the Menu icon on the Bowflex Connect™ website, select the Sync to from Bowflex Connect™ to MyFitnessPal ® MyFitnessPal account ®...
-
Page 54: Body Weight Loss Guide
By focusing on the main three elements of the Bowflex™ Body Weight Loss Guide- quality, balance, and consistency- you’ll be able to reach and maintain your weight loss and fitness goals for the next six weeks and beyond. - Page 55 – You can swap out any type of protein, vegetables or smart carbs for the suggested meal options. For example: • Turkey for tuna • Any fish or seafood for chicken • Cooked vegetables instead of salad • Eat your calories –...
- Page 56 Here’s an overview of what an ideal day looks like: (See Portion Size Guide for proper serving sizes) Breakfast Snack #1 smart rich fruit protein carb carbs smart protein carb veggies protein/fat Lunch Snack #2 healthy smart protein carb smart protein carb veggies...
- Page 57 Breakfast Options Fruit Smart Carb Protein/Fat Fruit and Nut Oatmeal Cook Berries or banana Plain oats Nuts and milk plain oats in water. Top with fruit, (Regular or quick-cook) nuts, milk, cinnamon, and honey. Egg Muffin Cook egg/s. Toast Tomato English muffin or sandwich thin Egg, ham, and cheese bread and top with 1 slice of...
- Page 58 1 string cheese Energy or protein bar with <200 calories* *See www.Bowflex.com/Resources for brand recommendations Optional Treats You have the choice of replacing Snack #2 with a 100-150 calorie treat. You can have an optional treat every day but for optimal health it is recom- mended to limit small splurges to 3-4 times per week.
- Page 59 Portion Size Guide Each of the items listed are for one serving MALE FEMALE PROTEIN 1 cup = baseball 2 eggs 1 egg 5oz chicken, fish, lean meat, or tofu 3oz chicken, fish, or lean meat 2/3 cup beans or lentils* 1/2 cup beans or lentils* 1 cup greek yogurt* 1/2 cup greek yogurt*...
- Page 60 Grocery List BREAD & GRAINS 100% whole wheat bread Tips: Look for 100% whole wheat as the first ingredient. Look for 4g of Sprouted grain breads fiber per slice or 5g per 2 slices of light or diet bread. Aim for bread with Light or whole wheat english muffins less than 100 calories per slice.
- Page 61 • 7 Day Meal Planning Form • Additional Dinner Options • Pre and Post Workout Fueling Guide Questions & Support • Ask questions, post suggestions, and connect with our online Bowflex™ Dietitian on the Bowflex Facebook page Recipes • www.wholeliving.com • www.eatingwell.com •...
- Page 62 Assembly / Owner’s Manual...
- Page 63 Assembly / Owner’s Manual...
- Page 64 8015020.041517.A...
Need help?
Do you have a question about the BXE226 and is the answer not in the manual?
Questions and answers