Table of Contents
Advertisement
Quick Links
Advertisement
Table of Contents
Troubleshooting

Summary of Contents for epiphan AV.io SDI
- Page 1 User Guide Epiphan AV.io SDI™ Septem ber 26, 2016 Release 3.1.0 UG109-04...
- Page 2 This document, the Epiphan web site, and the information contained therein, including but not limited to the text, videos and images as well as Epiphan System Inc.’s trademarks, trade names and logos are the property of Epiphan Systems Inc. and its affiliates and licensors, and are protected from unauthorized copying and dissemination by Canadian copyright law, United States copyright law, trademark law, international conventions and other intellectual property laws.
-
Page 3: Thank You For Choosing Epiphan Video
Epiphan Video website to get the most recent product specifications and additional information about AV.io SDI. Warranty All Epiphan Video products are provided with a 100% return to depot warranty for one year from the date of purchase. Technical support Epiphan’s products are backed by our professional support team. -
Page 4: Firmware 3.1.0 Release Notes
Overview AV.io SDI is the easiest SDI capture card you’ll ever use. It doesn’t need any special drivers installed on your computer – plug it in to your USB port and start using it right away. It’s as simple as using a webcam! Windows, Mac and Linux operating systems automatically detect AV.io SDI, ensuring compatibility with your... -
Page 5: About Av.io Sdi
About AV.io SDI To use AV.io SDI, there's no software to install; simply connect the cables and go. It works on Windows, Mac and Linux and integrates seamlessly with your favorite third-party applications such as Skype, Adobe FMLE, Wirecast, VLC media player and Quicktime. -
Page 6: Registering Your Av.io Sdi
Registering your AV.io SDI Why should I register m y AV.io SDI? It will allow you to activate your product warranty, give you notifications of firmware and software updates and get you our free personalized customer support. How to register 1. -
Page 7: Table Of Contents
Top cap view: Bottom cap view: Indicator LED details Capture How AV.io SDI works Set up your AV.io SDI for capture Resolutions, capture rates and aspect ratios Automatic image scaling & audio resampling Third-party applications Configuration options Input signal resolution (disabled by default) - Page 8 Install the AV.io Config tool Windows Linux Configure settings using AV.io Config tool Identifying the input resolution on your AV.io SDI Update firmware using the AV.io Config tool Advanced settings for VGA capture Lim itations and known issues Affecting all operating systems...
-
Page 9: Quickstart
An SDI cable (included with purchase)to connect your video source to your AV.io SDI Once you have these things ready to go, you can now begin the simple process of hooking up your AV.io SDI so you can start capturing! To connect your AV.io SDI for capture:... -
Page 10: Getting Started
Welcome and thank you for buying Epiphan Video’s AV.io SDI! This guide contains all the information necessary to successfully use AV.io SDI to quickly and easily capture live video content without any configuration – simply connect the cables and you’re ready to go! This guide starts off by jumping right into it by showing you how to start capturing video, then we’ll take you... - Page 11 AV.io SDI User Guide What's in the box? The USB 3.0 cable connects your USB 3.0 cable (1 m / 3 AV.io SDI video grabber with your computer’s USB 3.0 or 2.0 port.
-
Page 12: System Requirements
AV.io SDI User Guide System requirements System requirem ents System requirements are the barebones technical essentials your computer needs to work with AV.io SDI. System requirements to use AV.io SDI include: Video source A 3G-SDI, HD-SDI or SD-SDI video source. - Page 13 AV.io SDI User Guide Technical specifications LED indicates the status of AV.io SDI OS support Windows 7, Windows 8.1, Windows 10 (32-bit and 64- Mac OSX 10.10 and up bit ) Linux distribution with kernel 3.5.0 or higher USB support USB 3.0 and 2.0...
-
Page 14: Hardware
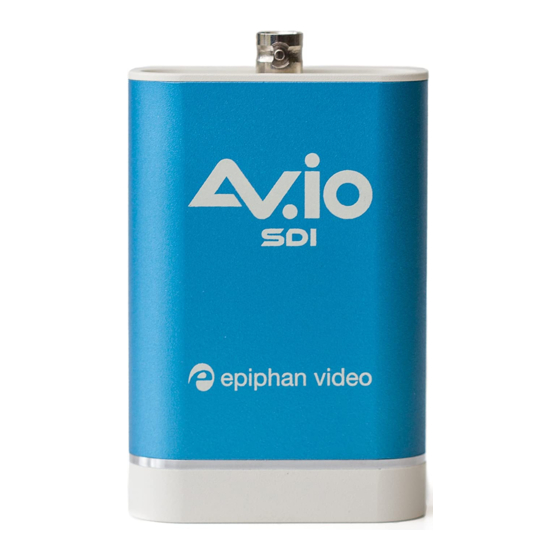
Your AV.io SDI device includes an input, an output and an indicator light. Input/output ports and indicator lights are identified and explained in the top and bottom cap view AV.io SDI images below. Indicator light details are explained in the proceeding section. -
Page 15: Indicator Led Details
From the operating system's UVC drivers, the application will receive the AV.io SDI supported color space, resolution and frame rates. If you’re not sure if your controller is USB 3.0 or USB 2.0, plug AV.io SDI into the capture computer and look at the indicator LED. After initial boot up (red LED), blue is used for USB 3.0 and green is used for USB 2.0:... -
Page 16: Capture
An SDI cable (included with purchase)to connect your video source to your AV.io SDI Once you have these things ready to go, you can now begin the simple process of hooking up your AV.io SDI so you can start capturing! -
Page 17: How Av.io Sdi Works
AV.io SDI. The application communicates with AV.io SDI and negotiates a frame rat e (frequency at which frames in a video sequence are displayed) and frame resolut ion (size of a single video frame in pixels). Higher frame rate means smoother video capture while resolution determines the aspect ratio of the video output as well as its resolution and degree of definition. -
Page 18: Set Up Your Av.io Sdi For Capture
Set up your AV.io SDI for capture Set up your AV.io SDI for capture Connecting your AV.io SDI to your capture computer is simple and is accomplished in three easy steps. To connect your AV.io SDI for capture: 1. Connect your AV.io SDI device to your video source 2. -
Page 19: Resolutions, Capture Rates And Aspect Ratios
Standard TV (NTSC/PAL) display and non-widescreen computer displays, SD-SDI resolution 16:9 Widescreen (HD) TV displays (1080p, 1080i, 720p etc) AV.io SDI generates a list of the following possible resolutions for your capture application to select for output display: 640×360 960×540 1920×1080... -
Page 20: Automatic Image Scaling & Audio Resampling
Autom atic im age scaling & audio resam pling If your source content is larger or smaller than the frame size chosen by the application, AV.io SDI automatically scales your source to match the desired frame size! No user configuration required! AV.io SDI also automatically performs audio resampling, meaning that no matter the bit depth or frequency... -
Page 21: Configuration Options
Configuration options Configuration options Your AV.io SDI device is ready to use right out of the box; however, there is support for additional configuration should you need it. AV.io SDI allows you to make adjustments to a captured VGA source and save the new capture settings to your AV.io SDI for future use. -
Page 22: Preserve Aspect Ratio (Enabled By Default)
Audio selector for m ultichannel inputs (disabled by default) Your AV.io SDI can capture one of the (up to) 8 audio channel pairs provided over SDI. Use this option to allow your third party application to choose which audio pair to capture. By default, this is disabled and the first... -
Page 23: User Modes
2. Connect your AV.io SDI device to your computer, laptop or notebook. 3. Open the AV.io Config tool. 4. Select your AV.io SDI device from the list under the Devices heading. If your video grabber is not displayed, press the Refresh icon to refresh the list of connected... - Page 24 AV.io SDI User Guide User modes 5. Click the User modes tab; the User modes page appears. 6. To create a custom resolution, click the check box for one of the user modes. The grayed-out area becomes open for changes.
- Page 25 EDID file of the connected display device. In the scenario where a resolution that is not included in the AV.io SDI standard resolution is requested, the Graphics adapter and driver will apply the resolution requested and then upscale it to AV.io SDI’s default resolution.
-
Page 26: Install The Av.io Config Tool
Install the AV.io Config tool Install the AV.io Config tool Epiphan’s AV.io Config tool is used for loading firmware updates on your AV.io SDI and for advanced settings changes. You may install AV.io Config on the same computer(s) where you use AV.io SDI, or only on one computer for configuration. -
Page 27: Mac
AV.io SDI User Guide 1. Download the AV.io Config package under the M ac OS X heading on the AV.io SDI Downloads page on Epiphan’s web site. 2. Double-click the downloaded file to open the disk image package. 3. If desired, drag the AVioConfig application to your desktop or another location where you will find it for future use. -
Page 28: Linux
6. AV.io Config starts! If you video grabber is connected to the computer by USB, it is detected. Linux 1. Download the AV.io Config package under the Linux heading on the AV.io SDI Downloads page on Epiphan’s web site. 2. Untar and unzip the contents of the .tar.bz2 file (tar -xjvf can be used to untar and unzip in one command). - Page 29 AV.io SDI User Guide Linux...
-
Page 30: Configure Settings Using Av.io Config Tool
Configure settings using AV.io Config tool Configure settings using AV.io Config tool Epiphan’s AV.io Config tool gives advanced users the ability to change several settings to their video capture experience. The settings that can be changed include: Re-numerate input signal resolution, aspect ratio preservation, audio pair selection and performance mode. - Page 31 AV.io SDI User Guide Configure settings using AV.io Config tool 5. Click the Set t ings tab; the settings page appears. 6. Enable or disable the individual settings by clicking each checkbox according to your needs. See Configuration options for a description of each setting.
-
Page 32: Identifying The Input Resolution On Your Av.io Sdi
AV.io SDI User Guide Identifying the input resolution on your AV.io SDI Identifying the input resolution on your AV.io SDI The AV.io Config tool can help you figure out exactly what information your video source is sending. Plug in the source and select your device. The UI detects information about the source and presents it at the bottom of the window. -
Page 33: Update Firmware Using The Av.io Config Tool
AV.io SDI update available for download. When new firmware is available, you can load this firmware onto your AV.io SDI using the AV.io Config tool and the steps below. - Page 34 If your AV.io SDI device is not displayed, press the Refresh icon to refresh the list of connected devices. 6. Using the diagram below, check the current firmware version of your AV.io SDI. If it is the same version as the new firmware you downloaded, there is no need to do the firmware update.
- Page 35 AV.io SDI User Guide Update firmware using the AV.io Config tool Do not disconnect your AV.io SDI at any point during the update process! Doing so may cause irrevocable errors and/or permanently damage the device. 9. When the update is finished the progress bar turns green and displays “Update Completed” (Note the firmware update will not be automatically reflected in the Devices list unless the Refresh icon is clicked).
-
Page 36: Advanced Settings For Vga Capture
AV.io SDI User Guide Advanced settings for VGA capture Advanced settings for VGA capture AV.io HD allows you to precisely adjust the bright ness/ cont rast and pan/ t ilt (horizontal and vertical sync) capture settings when capturing from a VGA source. - Page 37 To adjust your AV.io SDI VGA capture settings on your Windows or Mac computer (using Adobe FMLE): 1. Connect your AV.io SDI to both your source and capture computer and open Adobe FMLE. 2. In the default view under the Encoding Opt ions tab, select AV.io SDI from the Device dropdown menu.
- Page 38 AV.io SDI User Guide Advanced settings for VGA capture 5. Click the Camera Cont rol tab and set the Pan and Tilt values. Pan affects horizontal sync and can resolve issues where the image is too far to the left or right of the screen.
- Page 39 AV.io SDI User Guide Advanced settings for VGA capture To restore the default AV.io HD VGA capture settings on your Windows or Mac computer (using Adobe FMLE): 1. Connect your AV.io HD to both your source and capture computer and open Adobe FMLE.
- Page 40 This example shows how to use v4l2ucp to make these changes. You do no need to use v4l2ucp for the rest of your capture session, the changes are saved to the AV.io SDI device. To adjust your AV.io HD VGA capture settings on your Linux computer (using v4l2ucp):...
- Page 41 AV.io SDI User Guide Advanced settings for VGA capture 2. Adjust the Brightness, Contrast, Pan and/or Tilt slider values as required. Pan affects horizontal sync and can resolve issues where the image is too far to the left or right of the screen.
- Page 42 AV.io SDI User Guide Advanced settings for VGA capture 3. Press Updat e for each setting changed; the respective setting adjustments are saved.
-
Page 43: Lim Itations And Known Issues
AV.io SDI User Guide Limitations and known issues Lim itations and known issues This section includes known issues or limitations that affect functionality or usability and ways that you can work around these limitations. Affecting all operating system s UVC-314: With the exception of the first capture after system reboot, the very first captured frame is always green. -
Page 44: Troubleshooting
AV.io SDI User Guide Troubleshooting Troubleshooting Use the follow table for help if you are experiencing problems or unexpected behavior from your AV.io SDI. Affecting all operating system s Sympt om(s) Act ion(s) t o resolve Advanced settings for VGA capture... -
Page 45: Affecting Mac
Act ion(s) t o resolve If capturing on Ubunt u 14.04 LTSwith your AV.io SDI connected to an Et ron EJ 168A USB 3.0 cont roller, switch to a different USB port or Video cannot be resumed if stopped during a Skype simply avoid stopping the Skype call. - Page 46 AV.io SDI User Guide Affecting Chromebook and WebRTC on Google Chrome OS v43.0.2357.125 (64 bit ), use a different Chromebook app to capture both video and audio, such as Screencastify or MediaCore Capture.
-
Page 47: Software And Docum Entation License
"Software" means the Licensor binary and/or bytecode software and/or firmware programs that are (i) specified in Your Order or that are included with or in the Epiphan Hardware Products specified in Your Order, (ii) are made available to You for download after acceptance of this Agreement, (iii) are packaged with this... - Page 48 "Your Order" means (i) the web forms provided by Epiphan or its applicable reseller or distributor for ordering Epiphan Hardware Products and related Software licenses, or (ii) written documents executed by Epiphan, or one of its resellers or distributors, and You in respect to Your purchases of Epiphan Hardware Products and/or related Software licenses.
- Page 49 2. Your right to use the Software is conditioned upon Your timely payment of the full amount of fees due for: (i) the Epiphan Hardware Product(s) on which You want to use the Software; (ii) all support agreements You have entered into with Licensor or any of its distributors and/or resellers;...
- Page 50 REPRESENTATIONS OR PROVIDE ANY CONDITIONS AND/OR WARRANTIES WHATSOEVER ABOUT ANY INFORMATION AND/OR DATA THAT MAY BE PROCESSED BY OR MADE AVAILABLE USING ANY EPIPHAN HARDWARE PRODUCT AND/OR SOFTWARE OR ABOUT ANY THIRD-PARTY SERVICE THAT MAY BE ACCESSIBLE USING ANY EPIPHAN HARDWARE PRODUCT AND/OR SOFTWARE.
- Page 51 Indemnified Parties as a result of (i) Your use of the Epiphan Hardware Products, Software and/or Documentation, (ii) any use of the Epiphan Hardware Products, Software and/or Documentation on Your behalf, (iii) the use of the Epiphan Hardware...
- Page 52 Indemnified Parties as a result of (i) Your use of the Epiphan Hardware Products, Software and/or Documentation, (ii) any use of the Epiphan Hardware Products, Software and/or Documentation on Your behalf, (iii) the use of the Epiphan Hardware...
- Page 53 Epiphan Hardware Products, Software and Documentation were developed exclusively at private expense, and are trade secrets of Epiphan Systems Inc. for the purpose of any Freedom of Information legislation or any other disclosure statute, regulation or provision.
- Page 54 14. Intellectual Property: Epiphan, Epiphan Systems and Epiphan Video are tradenames, trademarks or registered trademarks of Epiphan Systems Inc. in certain countries. All Licensor product names and logos are trademarks or registered trademarks of Epiphan Systems Inc. in certain countries. All other company and product names and logos are trademarks or registered trademarks of their respective owners in certain countries.
- Page 55 Environm ent al Inform at ion The equipment that you bought has required the extraction and use of natural resources for its production. It may contain hazardous substances that could impact health and the environment. In order to avoid the dissemination of those substances in our environment and to diminish the pressure on the natural resources, we encourage you to use the appropriate take-back systems.
- Page 56 This document may contain links to non-Epiphan web sites. These links are provided to you as a convenience, and Epiphan is not responsible for the content of any linked web site. Any outside web site accessed from the Epiphan web site is independent from Epiphan, and Epiphan has no control over the content of that web site. In addition, a link to any non-Epiphan web site does not imply that Epiphan endorses or accepts any responsibility for the content or use of such a web site.
- Page 57 If any part of these terms is unlawful, void, or unenforceable, that part will be deemed severable and will not affect the validity and enforceability of the remaining provisions. Epiphan may, at its sole discretion and without notice, revise these terms at any time by updating this posting.
Need help?
Do you have a question about the AV.io SDI and is the answer not in the manual?
Questions and answers