
Related Manuals for Excalibur Water Systems EWS SUS24BF


Summary of Contents for Excalibur Water Systems EWS SUS24BF
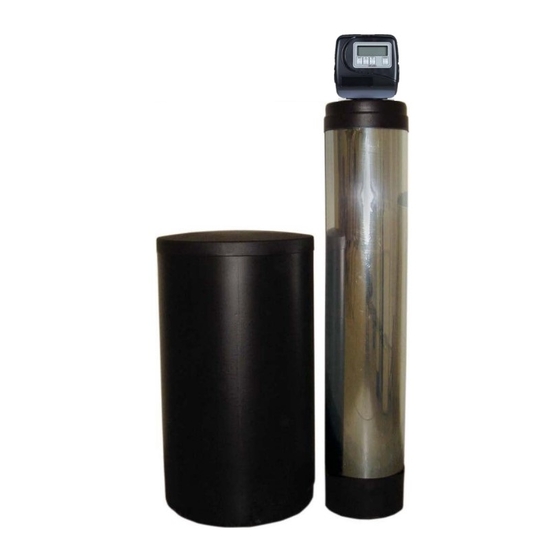
- Page 1 ULTIMATE SERIES WATER SOFTENER INSTALLATION AND USER GUIDE BARRIE • ONTARIO • CANADA 705.733.8900 WWW.EXCALIBURWATER.COM...
-
Page 2: Table Of Contents
SOFTENER INSTALLATION AND USER GUIDE TABLE OF CONTENTS Installation ............................2 1.1) Pre-installation instructions ......................2 1.2) General Installation and Service Warnings ................... 2 1.3) Site Requirements ......................... 2 1.4) Installation Drawing ........................3 1.5) System Drawing ..........................4 1.6) Plumbing Instructions ........................ -
Page 3: Installation
SOFTENER INSTALLATION AND USER GUIDE 1) INSTALLATION 1.1) Pre-installation instructions The cycle times, sequence of cycles, salt dose refill time and exchange capacity are preset to by Excalibur. The dealer must guide the installer to change the values according to the hardness, day override and time of regeneration. -
Page 4: Installation Drawing
SOFTENER INSTALLATION AND USER GUIDE 1.4) Installation Drawing BARRIE • ONTARIO • CANADA 705.733.8900 WWW.EXCALIBURWATER.COM... -
Page 5: System Drawing
SOFTENER INSTALLATION AND USER GUIDE 1.5) System Drawing 1.6) Plumbing Instructions Outside Minimum 10ft Cold Cold Minimum 10ft Outside Water Water heater Pressure heater Water Tank Brine Brine Meter Tank Tank Well Water Installation Municipal Installation 1) The softener must be located at the closest possible location to drain. 2) The water heater’s inlet must be at least 10ft away from softener. -
Page 6: Brine Line Connection
SOFTENER INSTALLATION AND USER GUIDE 1.7) Brine Line Connection Install 3/8” O.D. Polyethylene tube according to specification sheet from the brine tank to the control valve. Tank Brine Line Connection Brine Line Drain Line 1.8) Overflow Line Connection Only used where brine tank overflow water spillage can damage flooring or structure. •... -
Page 7: Drain Line
SOFTENER INSTALLATION AND USER GUIDE 1.9) Drain Line • The ½” tubing must be used for drain line. Leave minimum of 6” gap between flow control fitting and solder joints. The gap less than this • can damage the flow control. •... -
Page 8: Bypass Valve
SOFTENER INSTALLATION AND USER GUIDE 1.10) Bypass Valve NORMAL OPERATION The inlet and outlet handles of bypass valve should be pointing the direction of flow indicated by the engraved arrows on the control valve. Water flows through the control valve in normal operation as a water softener. BYPASS OPERATION The inlet and outlet handles point to the center of the bypass valve. - Page 9 SOFTENER INSTALLATION AND USER GUIDE DIAGNOSTIC MODE The inlet handle points in the direction of flow and the outlet handle points to the center of bypass valve, system water pressure is allowed to the control valve and the plumbing system while not allowing water to exit from the control valve to the plumbing.
-
Page 10: Start Up Instructions
SOFTENER INSTALLATION AND USER GUIDE 1.11) Start Up Instructions • Keep the bypass valve in bypass operation by moving both handles pointing towards the center of bypass valve. Now the untreated water is being supplied to house. Open the faucet downstream of the softener until water comes clear out of it. -
Page 11: Control Valve Programming
SOFTENER INSTALLATION AND USER GUIDE 2) CONTROL VALVE PROGRAMMING 2.1) Regeneration Screens Regen Screen • Displays the time remaining in the current cycle. Displays the cycle name and sequence number. • • Pressing REGEN advances to the next cycle. Regeneration occurs automatically if volume capacity drops below the reserve capacity automatically predicted by Control Valve or the has control valve reached 14 number of days since last regeneration. -
Page 12: User Displays
SOFTENER INSTALLATION AND USER GUIDE 2.4) User Displays When the system is operating, one of five displays may be shown. Pressing NEXT will alternate between the displays shown below. User 1: - Shows volume remaining to next regeneration. User 2: - Displays the number of days to next regeneration as per time clock. -
Page 13: Installer Display Settings
SOFTENER INSTALLATION AND USER GUIDE 2.5) Installer Display Settings Step 1I - To enter Installer Display press NEXT and ▲ simultaneously for about 5 seconds and release. Step 2I – Hardness: Set the amount (gpg) of hardness using ▲ or ▼. Press NEXT to go to step 3I. -
Page 14: Configuration Settings
SOFTENER INSTALLATION AND USER GUIDE 2.6) Configuration Settings Step 1CS: - Press NEXT and ▼ simultaneously for 5 seconds and release. Again press NEXT and ▼ simultaneously for 5 seconds. Step 2CS: - Use to select “1.0” for 1in valve. Note: - Do not select “1.0t”... -
Page 15: Softener System Setup
SOFTENER INSTALLATION AND USER GUIDE 2.7) Softener System Setup Step 1S: - Press NEXT and ▼ simultaneously for 5 seconds and release. ▲ ▼. Step 2S: - Choose “SOFTENING” using Press NEXT to go to step 3S. Step 3S: - Choose “dn” for downflow brining direction. Press NEXT to go to step 4S or press REGEN to go back to previous step. - Page 16 SOFTENER INSTALLATION AND USER GUIDE Step 8S: - Select “4 min” for the rinse cycle. Press NEXT to proceed to step 9S or press REGEN to return to previous step. Step 9S: - Select the salt dosage as per the performance data given. Step 10S: - Set System Grains Capacity.
-
Page 17: Model Specifications And Components
Mineral Tank Injector Drain Flow Control Model Number (Inch) Dia X Height (Inch) Color Order # Flow GPM Order # EWS SUS24BF 9x48 CLK V30101D CLK V3162013 18x33 (Dia x EWS SUS34BF 10x54 White CLK V30101E CLK V3162017 Height) EWS SUS54BF... -
Page 18: Control Valve Cycles
SOFTENER INSTALLATION AND USER GUIDE 4) CONTROL VALVE CYCLES In Service Cycle water flows through the upper basket and flows down to the bottom distributor. In this operation hardness of water is removed by resin. In Backwash Cycle water flows in upflow direction, the water enters the tank from bottom distributor and collected by upper basket. - Page 19 SOFTENER INSTALLATION AND USER GUIDE In Brine Cycle water flows in downflow direction which siphon the brine solution from brine tank and slow rinse water goes to the drain. In Rinse Cycle water flows rapidly in downflow direction through the resin to the drain. This cycle washes the excess sodium from the resin particles.
-
Page 20: Components Of Control Valve
SOFTENER INSTALLATION AND USER GUIDE 5) COMPONENTS OF CONTROL VALVE 5.1) Front Cover and PC Board Drawing No. Order No. Description Quantity CLK V3175EE01 WS1EE FRONT COVER ASSEMBLY CLK V310701 WS1 MOTOR CLK V310601 WS1 DRIVE BRACKET & SPRING CLIP CLK V3408EE04BOARD WS1THRU/2 EE PCB 5 DIGIT REPL CLK V3110... -
Page 21: Drive Assembly, Piston And Spacer Stack
SOFTENER INSTALLATION AND USER GUIDE 5.2) Drive assembly, Piston and Spacer stack Drawing No. Order No. Description Quantity CLK V3005 WS1 Spacer Stack Assembly CLK V3004 Drive Cap ASY CLK V3178 WS1 Drive Back Plate CLK V3011 WS1 Piston Downflow ASY CLK V3174 WS1 Regenerant Piston CLK V3135... -
Page 22: Injector Assembly
SOFTENER INSTALLATION AND USER GUIDE 5.3) Injector Assembly Drawing No. Order No. Description Quantity CLK V3176 INJECTOR CAP CLK V3152 O-RING 135 CLK V317701 INJECTOR SCREEN CAGE CLK V30101Z WS1 INJECTOR ASY Z PLUG CLK V30101D WS1 INJECTOR ASY D RED For 9”... -
Page 23: Brine Tank Line Flow Control
SOFTENER INSTALLATION AND USER GUIDE 5.4) Brine Tank Line Flow Control Drawing No. Order No. Description Quantity CLK V414401 Elbow 3/8 Liquifit Asy w/RFC CLK H4615 Elbow Locking Clip CLK H4628 Elbow 3/8” Liquifit CLK V3163 0-ring 019 CLK V316501 WS1 RFC Retainer Asy (0.5 gpm) CLK V3182 WS1 RFC Not Shown... -
Page 24: Drain Line Flow Control Assembly
SOFTENER INSTALLATION AND USER GUIDE 5.5) Drain Line Flow Control Assembly Drain Line ¾” Drawing No. Order No. Description Quantity CLK H4615 Elbow Locking Clip CLK PKP100TS8BULK Polytube insert 5/8 Option CLK V3192 WS1 Nut ¾ Drain Elbow Option CLK V315801 WS1 Drain Elbow ¾... -
Page 25: Outlet Meter Assembly
SOFTENER INSTALLATION AND USER GUIDE 5.6) Outlet Meter Assembly Drawing No. Order No. Description Quantity CLK V3151 WS1 Nut 1” QC CLK V3003* WS1 Meter ASY CLK V311801 WS1 Turbine ASY CLK V3105 O-ring 215 * CLK V3003 includes CLK V311801 and CLK V3105 NOTE: - THIS WATER METER SHOULD NOT BE USED AS THE PRIMARY MONITORING DEVICE FOR CRITICAL OR HEALTH EFFECT APPLICATIONS. -
Page 26: Bypass Valve Components
SOFTENER INSTALLATION AND USER GUIDE 5.7) Bypass Valve Components CLK V3006 WS1 Bypass Valve Assembly Drawing No. Order No. Description Quantity CLK V3151 WS1 Nut 1” Quick Connect CLK V3150 WS1 Split Ring CLK V3105 O-Ring 215 CLK V3145 WS1 Bypass 1” Rotor CLK V3146 WS1 Bypass Cap CLK V3147 WS1 Bypass Handle CLK V3148 WS1 Bypass Rotor Seal... -
Page 27: Installation Fitting Assemblies
SOFTENER INSTALLATION AND USER GUIDE 5.8) Installation Fitting Assemblies CLK V3007 WS1 Fitting 1” PVC Male NPT Elbow Assembly Drawing No. Order No. Description Quantity CLK V3151 WS1 NUT 1” QUICK CONNECT CLK V3150 WS1 SPLIT RING CLK V3105 O-RING 215 CLK V3149 WS1 FITTING 1 PVC MALE NPT CLK V300701 WS1 Fitting ¾”... - Page 28 SOFTENER INSTALLATION AND USER GUIDE CLK V300705 WS1 Fitting 1-1/4” Plastic Male NPT Assembly Drawing No. Order No. Description Quantity CLK V3151 WS1 NUT 1” QUICK CONNECT CLK V3150 WS1 SPLIT RING CLK V3105 O-RING 215 CLK V3317 WS1 FITTING 1-¼" PLASTIC MALE NPT CLK V300709LF WS1 Fitting 1-1/4”...
-
Page 29: Brine Tank Assembly
SOFTENER INSTALLATION AND USER GUIDE 6) BRINE TANK ASSEMBLY SAFETY FLOAT BRINE ELBOW Item No. Part No. Description Qty. CLK H4628 Quick Connect Elbow CLK CV3163 O-Ring 019 CLK CH4615 Elbow locking clip BRINE TANK ASSEMBLY Item No. Part No. Description Size Qty. -
Page 30: Troubleshooting
SOFTENER INSTALLATION AND USER GUIDE 7) TROUBLESHOOTING 7.1) Possible Error Codes Possible Errors Code Description Control unable to sense motor movement Err-1001 Err-101 Err-1002 Control Valve motor ran too short Err-102 Control Valve motor ran too long and unable to find next cycle Err-1003 Err-103 Err-1004... -
Page 31: Troubleshooting Procedures
SOFTENER INSTALLATION AND USER GUIDE 7.2) Troubleshooting Procedures Problem Possible Cause Solution a. No power at electric outlet a. Repair outlet or use working outlet b. Control valve Power Adapter b. Plug Power Adapter into outlet or connect power cord end to not plugged into outlet or power PC Board connection cord end not connected to PC... - Page 32 SOFTENER INSTALLATION AND USER GUIDE Problem Possible Cause Solution a. Bypass valve is open or faulty a. Fully close bypass valve or replace b. Media is exhausted due to high b. Check program settings or diagnostics for abnormal water water usage usage c.
- Page 33 SOFTENER INSTALLATION AND USER GUIDE Problem Possible Cause Solution a. Disconnect power, make sure motor is fully engaged, check for broken wires, make sure two pin connector on a. Motor not inserted full to motor is connected to the two pin connection on the PC engage pinion, motor wires Board labeled MOTOR.
-
Page 34: Quick Reference Guide
SOFTENER INSTALLATION AND USER GUIDE 8) QUICK REFERENCE GUIDE Manual Regeneration Immediate Regeneration: - Press and hold “REGEN” button for more than 3 seconds. Press “REGEN” button to advance the unit to next cycle in regeneration. Delayed Regeneration: - Press and release “REGEN” button once the “REGEN TODAY”... - Page 35 SOFTENER INSTALLATION AND USER GUIDE Installer Settings Step # Value Description Hardness Water hardness grains per gallon Maximum number of day between regenerations Minimum water usage hour of the day :00 (Default) Regeneration starting minute of the hour (Default) Softener System Setup Step # Value Description...
-
Page 36: Warranty
Warranty ~ Coverage Outlined Excalibur Water Systems guarantees, to the original owner, a period of 12 or 20 years, the CONTROL BODY to be free of defects in materials and workmanship and to perform its proper functions. To the original owner, a period of 12 or lifetime 20 years, the ELECTRONIC CONTROL VALVE as well as all parts to be free of defects in materials and workmanship and to perform their normal functions.
Need help?
Do you have a question about the EWS SUS24BF and is the answer not in the manual?
Questions and answers