
Related Manuals for Makita XDT15


Summary of Contents for Makita XDT15
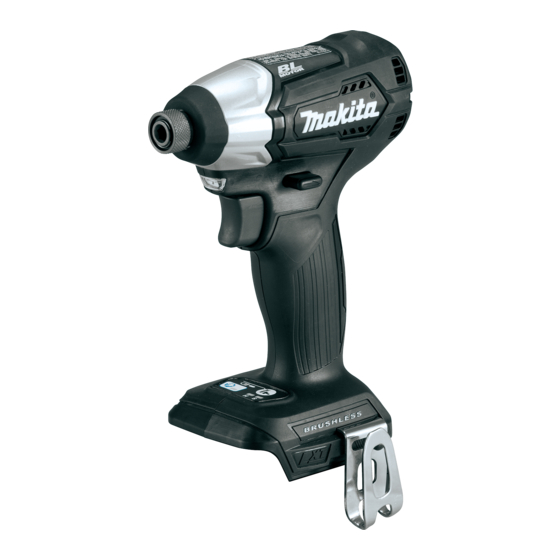
- Page 1 INSTRUCTION MANUAL MANUAL DE INSTRUCCIONES Cordless Impact Driver Atornillador de Impacto Inalámbrico XDT15 IMPORTANT: Read Before Using. IMPORTANTE: Lea antes de usar.
-
Page 2: Specifications
ENGLISH (Original instructions) SPECIFICATIONS Model: XDT15 Fastening capacities Machine screw 4 mm - 8 mm (5/32" - 5/16") Standard bolt 5 mm - 14 mm (3/16" - 9/16") High tensile bolt 5 mm - 12 mm (3/16" - 1/2") No load speed (RPM) - Page 3 Do not overreach. Keep proper footing and Service balance at all times. This enables better control Have your power tool serviced by a qualified of the power tool in unexpected situations. repair person using only identical replacement Dress properly. Do not wear loose clothing or parts.
-
Page 4: Functional Description
If you can see the red indicator on the causing fires, personal injury and damage. It will upper side of the button, it is not locked completely. also void the Makita warranty for the Makita tool and charger. CAUTION: Always install the battery cartridge fully until the red indicator cannot be seen. -
Page 5: Overheat Protection
Makita service to become overloaded. Then turn the tool on to restart. - Page 6 Lighting up the front lamp Reversing switch action CAUTION: Do not look in the light or see the source of light directly. ► 1. Reversing switch lever CAUTION: Always check the direction of ► 1. Lamp rotation before operation. CAUTION: Use the reversing switch only after the tool comes to a complete stop.
- Page 7 Changing the impact force You can change the impact force in three steps: hard, soft, and A mode. This allows a tightening suitable to the work. Every time the button is pressed, the number of blows changes in three steps. “A mode (assist mode)”...
-
Page 8: Installing Hook
Installing or removing driver bit/ Installing hook socket bit Optional accessory 12 mm 9 mm (15/32”) (3/8”) ► 1. Groove 2. Hook 3. Screw The hook is convenient for temporarily hanging the tool. Use only the driver bit/socket bit shown in the figure. Do This can be installed on either side of the tool. -
Page 9: Maintenance
To maintain product SAFETY and RELIABILITY, repairs, any other maintenance or adjustment should 1. Fastening time (second) 2. Fastening torque be performed by Makita Authorized or Factory Service 3. Proper fastening torque corresponding to each bolt Centers, always using Makita replacement parts. -
Page 10: Optional Accessories
COMPLETE tool, freight prepaid, to one of Makita’s Factory or Authorized Service Centers. If inspection shows the trouble is caused by defective workmanship or material, Makita will repair (or at our option, replace) without charge. This Warranty does not apply where: •... -
Page 11: Especificaciones
ESPAÑOL (Instrucciones originales) ESPECIFICACIONES Modelo: XDT15 Capacidades de apriete Tornillo de máquina 4 mm - 8 mm (5/32" - 5/16") Tornillo estándar 5 mm - 14 mm (3/16" - 9/16") Tornillo de alta resistencia 5 mm - 12 mm (3/16" - 1/2") - Page 12 Si no es posible evitar usar una herramienta Guarde la herramienta eléctrica que no use eléctrica en condiciones húmedas, utilice un fuera del alcance de los niños y no permita alimentador protegido con interruptor de cir- que las personas que no están familiarizadas cuito de falla a tierra (ICFT).
- Page 13 Makita, o de baterías alteradas, puede ocasionar que las baterías exploten causando un incendio, lesiones personales y daños. Asimismo, esto invalidará la garan- Instrucciones importantes de tía de Makita para la herramienta y el cargador Makita. seguridad para el cartucho de Consejos para alargar al máximo batería la vida útil de la batería...
-
Page 14: Descripción Del Funcionamiento
Indicación de la capacidad restante DESCRIPCIÓN DEL de la batería FUNCIONAMIENTO Sólo para cartuchos de batería con una “B” al final del número de modelo PRECAUCIÓN: Asegúrese siempre de que la herramienta esté apagada y el cartucho de batería haya sido extraído antes de realizar cualquier ajuste o comprobación en la herramienta. -
Page 15: Protección Contra Sobrecarga
Cuando la herramienta/batería se sobrecaliente, la soltar el gatillo interruptor, lleve la herramienta a mante- herramienta se detendrá automáticamente. En este nimiento a un centro de servicio Makita. caso, permita que la herramienta/batería se enfríe antes de volver a encender la herramienta. - Page 16 NOTA: Para confirmar el estado de la lámpara, jale el gatillo. PRECAUCIÓN: Confirme siempre la direc- Cuando la lámpara se enciende al jalar el gatillo interruptor, el ción de rotación antes de la operación. estado de la lámpara está activado. Cuando la lámpara no se PRECAUCIÓN: Utilice el conmutador de enciende, el estado de la lámpara está...
- Page 17 Grado de la fuerza de impacto Golpes máximos Propósito Ejemplo de aplicación mostrado en el panel Duro 3 900 ipm Apriete cuando se requiere Apriete de tornillos para fuerza y velocidad. madera, apriete de pernos. Suave 1 600 ipm Apriete con menos fuerza para Apriete de tornillos de banda, evitar que se rompa la rosca apriete de tornillos pequeños...
-
Page 18: Operación
Perno estándar Instalación del gancho N•m (ft•lbs) 120 N•m (87 ft•lbs) 100 N•m 14 mm(9/16") (72 ft•lbs) 12 mm(1/2") 80 N•m (58 ft•lbs) 14 mm(9/16") 60 N•m (43 ft•lbs) 10 mm(3/8") 12 mm(1/2") 40 N•m (29 ft•lbs) ► 1. Ranura 2. Gancho 3. Tornillo 8 mm(5/16") 10 mm(3/8") 20 N•m... -
Page 19: Mantenimiento
Makita. Si la inspección muestra que el problema en la posición a apretar afectará a la torsión. ha sido a causa de un defecto de mano de obra o material, Makita La operación de la herramienta a baja velocidad hará... - Page 20 Para reducir la exposición a estos productos químicos: trabaje en un área bien ventilada y póngase el equipo de seguridad indicado, tal como las máscaras contra polvo que están especialmente diseñadas para filtrar partículas microscópicas. Makita Corporation 3-11-8, Sumiyoshi-cho, Anjo, Aichi 446-8502 Japan 885520-940...
Need help?
Do you have a question about the XDT15 and is the answer not in the manual?
Questions and answers
Can you use the XDT15 as a drill
The Makita XDT15 is an impact driver, not a drill. It is designed for driving screws and fasteners rather than drilling holes. While it may accept certain drill bit attachments, it lacks the steady rotational torque needed for effective drilling, especially in materials like wood. The user experiencing issues with drilling suggests that the tool is not suitable for this purpose.
This answer is automatically generated