Advertisement
Quick Links
Advertisement

Subscribe to Our Youtube Channel
Related Manuals for Elo Touch Solutions 1517L

Summary of Contents for Elo Touch Solutions 1517L
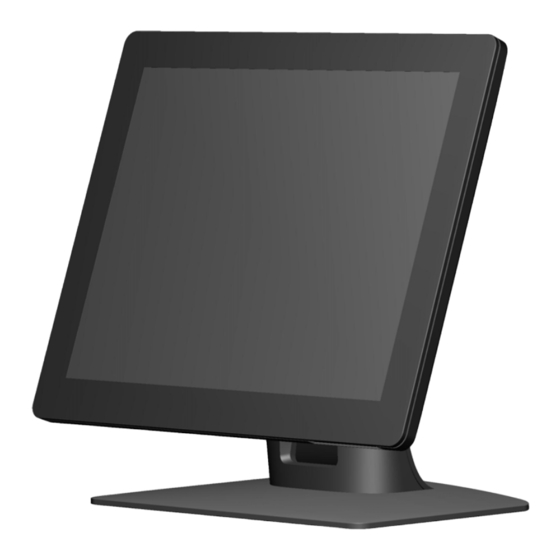
- Page 1 USER MANUAL Elo Touch Solutions 1517L and 1717L Touchmonitors SW601708 Rev E...
- Page 2 Elo Touch Solutions, Inc. Disclaimer The information in this document is subject to change without notice. Elo Touch Solutions, Inc. and its Affiliates (collectively "Elo") makes no representations or warranties with respect to the contents herein, and specifically disclaims any implied warranties of merchantability or fitness for a particular purpose.
-
Page 3: Table Of Contents
Chapter 3: Mounting ................. 7 Chapter 4: Operation ................12 Chapter 5: Technical Support ..............16 Chapter 6: Safety & Maintenance ............18 Chapter 7: Regulatory Information ............20 User Manual: 1517L, 1717L SW601708 Rev E, Page 3 of 25... -
Page 4: Chapter 1: Introduction
Chapter 1: Introduction Product Description Your new touchmonitor combines the reliable performance of Elo Touch Solutions touch products with the latest developments in touch technology and display design. This combination of features creates a natural flow of information between the user and the touchmonitor. -
Page 5: Chapter 2: Installation
• User Manuals CD • Japanese language regulatory information pamphlet • Quick Install Guide • VGA cable • USB cable • North American power cable • European power cable User Manual: 1517L, 1717L SW601708 Rev E, Page 5 of 25... - Page 6 Connect the power adapter’s DC output connector to the monitor’s DC input power jack. 5. The touchmonitor ships in an OFF state. Press the power button to turn it on. User Manual: 1517L, 1717L SW601708 Rev E, Page 6 of 25...
- Page 7 6. Enter you email address, Click on “Next Step”. Your driver download will start automatically. 7. If you are a new user, fill in the required information and Click on “Register”. Your driver download will start automatically. User Manual: 1517L, 1717L SW601708 Rev E, Page 7 of 25...
-
Page 8: Chapter 3: Mounting
The VESA FDMI-compliant counting is coded: VESA MIS-B, 75, C. An optional filler plate is available for purchase separately to use with the VESA mount: E000404 (Black) E000420 (White) User Manual: 1517L, 1717L SW601708 Rev E, Page 8 of 25... - Page 9 The VESA FDMI-compliant counting is coded: VESA MIS-B, 75, C. An optional filler plate is available for purchase separately to use with the VESA mount: E000405 (Black) E000421 (White) User Manual: 1517L, 1717L SW601708 Rev E, Page 9 of 25...
- Page 10 An additional two-hole pattern is available under small caps on the top of the base. See page 15 for instructions on how to access holes. User Manual: 1517L, 1717L SW601708 Rev E, Page 10 of 25...
- Page 11 M4 flathead screws. To utilize these mounting holes, unsnap the access covers from the outside, install the screws into the holes and then snap the cover back into place. User Manual: 1517L, 1717L SW601708 Rev E, Page 11 of 25...
-
Page 12: Chapter 4: Operation
Your touchmonitor is factory-calibrated and should not need manual calibration (unless the input video is not fully scaled to the native resolution, or the touch experience needs to be calibrated to a specific user). User Manual: 1517L, 1717L SW601708 Rev E, Page 12 of 25... - Page 13 Increase value of selected parameter / Display OSD Contrast submenu select next menu item Select parameter for adjustment / Select Auto Adjust select submenu to enter User Manual: 1517L, 1717L SW601708 Rev E, Page 13 of 25...
- Page 14 Temperature individual R, G, and B gains on a scale from 0 to 100. Default: User Defined with R, G, and B all set to 100 User Manual: 1517L, 1717L SW601708 Rev E, Page 14 of 25...
- Page 15 Press and hold the “Menu” and “Up” buttons for two seconds to enable/disable the Power Locking feature. When the Power Locking is enabled, pressing the power switch will have no effect on the system. User Manual: 1517L, 1717L SW601708 Rev E, Page 15 of 25...
-
Page 16: Chapter 5: Technical Support
Chapter 5: Technical Support If you are experiencing trouble with your touchmonitor, refer to the following suggestions. If the problem persists, please contact your local dealer or contact Elo Touch Solutions Customer Service. Solutions to Common Problems Problem Suggested Troubleshooting... -
Page 17: Chapter 6: Safety & Maintenance
• To clean the touchscreen, use window or glass cleaner applied to a clean cloth or sponge. Never apply the cleaner directly to the touchscreen. Do not use alcohol (methyl, ethyl or isopropyl), thinner, benzene, or other abrasive cleaners. User Manual: 1517L, 1717L SW601708 Rev E, Page 18 of 25... - Page 18 Ensure that product is disposed at the end of its useful life according to local laws and regulation. Elo has put in place recycling arrangements in certain parts of the world. User Manual: 1517L, 1717L SW601708 Rev E, Page 19 of 25...
-
Page 19: Chapter 7: Regulatory Information
This Information Technology Equipment (ITE) is required to have a CE Mark on the Manufacturer’s label which means that the equipment has been tested to the following Directives and Standards: This equipment has been tested to the requirements for the CE Mark User Manual: 1517L, 1717L SW601708 Rev E, Page 20 of 25... - Page 20 (Removing or cutting the line cord ground may in crease RF emission levels and may also present a lethal shock hazard to the user.) If you need additional help, consult your dealer, manufacturer, or an experienced radio or television technician. User Manual: 1517L, 1717L SW601708 Rev E, Page 21 of 25...
- Page 21 10 years. The product will not leak or mutate under normal operating conditions listed below, so that the use of this electronic information product will not result in any severe environmental pollution, any bodily injury, or damage to any assets. User Manual: 1517L, 1717L SW601708 Rev E, Page 22 of 25...
- Page 22 Input: 100-240VAC, 50/60Hz Output: 12VDC, minimum 4.16A, LPS VI. Monitor Specifications Electrical Ratings: Input 1517L: 100-240VAC, 50/60Hz, 0.3A or 12VDC, 2.5A Input 1717L: 100-240VAC, 50/60Hz, 0.5A or 12VDC, 2.5A Operating Conditions: Temperature: 0°C - 40°C Humidity: 20% to 80% (non-condensing)
Need help?
Do you have a question about the 1517L and is the answer not in the manual?
Questions and answers